Gravel Pimp: Port Alberni to Cumberland Loop Part 2…

13 05 2013
Middle of nowhere...

Middle of nowhere…

Day 3 – Wrong Turn

I made a serious mistake on the last day. I didn’t question the Google Maps bike route enough. I was so close to PA I could taste the ice cream and I wasn’t thinking straight. I ended up paying the price.

How bad was it?

  • 2500′ and 3.5hrs of pushing my bike up Mount Horne
  • 30 degree C heat
  • limited water
  • not realizing it was a dead end until right at the top where I was expecting an awesome downhill run to PA
  • road down other side didn’t exist 😦
  • 30mins of controlled falling down the mountain on my bike the same way I pushed up

I was totally crushed when I figured out the mistake in my route. I sat down and would have cried if I didn’t feel the need to conserve water! In my defence when I looked at the Google Maps satellite images it put a white line and road name for the imaginary roads. The white line looked just like a break in the trees which is what a logging road looks like. The only way you can tell the real roads from the fake roads is to zoom in uber close at which point the fake roads disappear and are replaced by trees. The real roads of course stay on the screen no matter how much you zoom in. Lesson learned.

The only upside was the cell tower at the top of the mountain meant I had 4bars on my phone so I could download satellite images and scope out a new route – very carefully!

After figuring out where to go next I had to head down the way I came. It was so steep I could barely ride safely and had to stop a few times to let my brakes cool.

Steep road...

Steep road…

and up...

and up…

thank God some water...

thank God some water…

my Sopranos look...

my Sopranos look…

Forgetting the climb for a second...

Forgetting the climb for a second…

at least the views are sweet...

at least the views are sweet…

and up we go...

and up we go…

My only reward...

My only reward an awesome cell signal… 😉

Back where I started...

Back where I started…

Day 3 – Heading to PA Finally!

4hrs of hard work and I was back where I started from. Bummer. 😦

The safest option would have been to head back to the highway and ride to PA on pavement. Did I take it?

Hell no! 😉

I decided to stay dirty and recon a route around the bottom of Horne Lake on logging roads. This had some risks and since it was now the afternoon one more setback would mean another night of camping as I could run out of daylight. After tasting a bit of main road touring I felt the opportunity to ride alone on logging roads was the better way to spend my time.

Although I felt some trepidation passing another “Keep Out!” gate the road past the gate was pretty nice. Enough shade to help beat the heat and after hours of pushing uphill it was nice just to be riding my bike again. The road deteriorated rapidly and I feared it might dead end, but it kept going and I was rewarded with a connection to a well maintained logging road at the south end of Horne Lake.

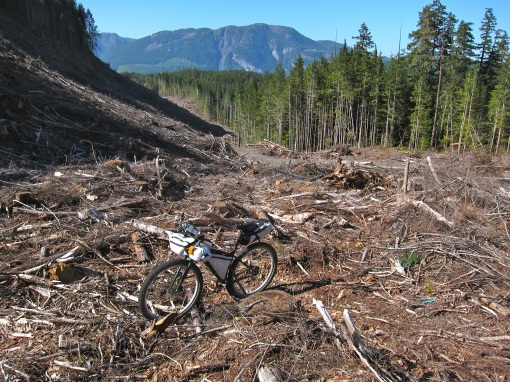
I got a little cocky at this point and spotted a shortcut on the map if I was willing to hike-a-bike across a clear cut. It would save me a long logging road detour. So I went for it. As I rode up to the clearcut I realized it was really rough and uphill the whole way. Yikes! I just kept going. Looking back at the effort required to manhandle the Krampus up the clearcut I’m not sure it was easier than riding the long way around, but it was a unique challenge. After many hours of touring on this trip doing something new was refreshing even though it was really hard.

At the far end of the clearcut I thought all my challenges were over, but Google Maps screwed me one more time with a fake road. I thought I had a straight shot to PA. But when I showed up at the intersection it didn’t exist. A zoom way in on the satellite image revealed it was another faker. **sigh**

This time however there was a reasonable alternate route I could take so instead of an 8km ride to PA. I had to ride 14-16kms. Not the end of the world. I had been through enough that even though I was pretty burnt out I knew I would get to PA that night before sunset and be drinking a cold beer.

So I cranked down the last part of the logging road I was on and hit the Alberni Highway. I enjoyed a really long downhill that brought me to the PA city limits with barely any pedalling. I stopped for a sub, bag of chips and a cold Sprite. I was thrilled to be almost done the ride. Not knowing PA very well I didn’t realize I had some super steep hills to climb back to my friends’ house, but nothing could stop me now!

I rolled into their place at 8pm. I guess I didn’t make it for lunch! A shower, 3 beers and a hottub later I felt like a champion. 😉

Another gate...

Another gate…

Looking good...

Looking good…

What happened to the last guy that tried this route... ;)

What happened to the last guy that tried this route… 😉

Getting rustic...

Getting rustic…

and rough...

and rough…

and I'm golden...

and I’m golden…

Stunning views...

Stunning views…

more gates to ignore...

more gates to ignore…

One last challenge...

One last challenge…

A harsh push through an uphill clear cut...

A harsh push through an uphill clear cut…

IMG_5752

Halfway up…

Last section of gravel...

Last section of gravel…

The Alberni Highway...

The Alberni Highway…

Viktory!

Viktory!

The Mighty Krampus!

All Hail The Mighty Krampus!

The loop map - click for more details...

The loop map – click for more details…

Wrap Up

All in all it was a great trip despite the heat and the navigation challenges. I learned a lot about this part of Vancouver Island and about route planning with the tools at my disposal. The Krampus with Porcelain Rocket bags is a capable bikepacking rig.

I cleaned up the GPS tracks on Ride With GPS to remove any detours, backtracks or wrong turns so the routes are more useful to people that download them. Riding 200kms in 3 days doesn’t seem like much, but it was quite hard for me with a lot of pushing.

The great news is I know have ~400kms of dirt touring route mapped out from Cumberland to Victoria BC and I’ve covered a bit less than half of Vancouver Island so there is lots more to come! 🙂

Ride GPS data...

Ride GPS data…


Gravel Pimp: Port Alberni to Cumberland Loop Part 1…

13 05 2013
Bridge on the Log Train Trail...

Bridge on the Log Train Trail…

With a dirt bikepacking route sorted out from Lake Cowichan to Victoria I was eager to push northwards. I know the logging roads from Lake Cowichan to Port Alberni as I have driven them on my kiteboarding adventures. So I skipped that section and looked at how to ride from PA to Cumberland on dirt.

Route map - click for more detail...

Route map – click for more detail…

I have friends in Port Alberni so I decided to drive 2hrs north to their place and start the ride from there. I figured I’d just do it as an out and back or come up with some loop options once I had a feel for the terrain.

You can have a look a the trip photos here. I should warn you as a solo trip there are lots of scenery shots and not much in the way of biking action – sorry!

Me and the Krampus at the start...

Me and the Krampus at the start…

Day 1 – Port Alberni – end of the Log Train Trail

I got to PA around 1pm on the first day of the trip. Talking about my route with my friend Rob he suggested I should ride the Log Train Trail out of PA rather than the route I had planned. It sounded like a nice ride, but I would have to abandon my well researched GPS route and navigate on the fly. It sounded like a good idea given that I had some spare time in my schedule in case things took longer than expected. Before I could even leave Rob’s place my front tires went flat while we were chatting. Turns out a pinch flat I patched on the last Krampus tour had failed. Possibly as a result of running normal 29er tubes in the big 3″ Knard tire. I ripped off the old patch and applied a new one. which held the rest of the trip.

Rob took the photo of me and my bike at the start of the Log Train Trail above. The LTT was a fun dirt rail bed ride with quite a few rough spots and twists/turns. I got lost several times and spent a lot of energy backtracking and asking locals for directions. I had to ford a fast flowing creek where the trail had washed out and rode the Krampus through a mud puddle that ended up being deeper than the hubs/BB. 😦 I guess it’s time for an oil change in the Alfine 11!

The shoes and socks I was wearing were not designed to dry fast so I had wet feet all day which did not make me happy! I need to figure out some quick dry bikepacking footwear or carry a second set of lightweight footwear [ie. Vibram FIve Fingers for camp use and river crossings]. Since the day was extremely hot ~30 deg C at least getting wet was pleasant for its cooling effect. The LTT also had a lot of tree cover and I appreciated the shade very much.

I spent a lot of time covering the LTT. Much more than if I would have followed my planned route, but the riding was amazing and I was happy to have heard about the LTT from Rob. A quiet rough dirt track with a modest grade and some shade is bikepacking paradise!

Log Train Trail Map - click for larger...

Log Train Trail Map – click for larger…

flat Knard!

flat Knard!

Lovely countryside...

Lovely countryside…

Nice shade...

Nice shade…

Good landmark for navigation...

Good landmark for navigation…

Time for wet feet...

Time for wet feet…

Where did the trail go?

Where did the trail go?

Quiet riding...

Quiet riding…

Day 1 – From LTT to Camp near Pear Lake

Leaving the LTT behind I hit logging roads heading north towards Comox Lake. This was part of my planned GPS route so navigation was easy and the riding was fun despite the heat and general uphill trend to the terrain. I stopped at every creek to throw water over my head and refill my bottles as needed. The logging roads did not provide any shade due to the lack of big trees in most places. That meant a lot of baking for me. Although my late start also meant that by the time I hit this section it was the late afternoon and the temperature was heading slowly in the cooler direction.

I’m not a fast rider and I stop frequently to take photos, eat and generally check stuff out. That works well in the heat because I am not pushing myself too hard and I can sustain a constant moderate exertion all day.

As I was riding along I spotted a tiny clearing next to a beautiful little lake. I rode in to investigate and found a lovely campsite with a stool made from a chunk of log and some firewood ready to light next to a fire ring. I had another 90mins of daylight and wanted to push on, but I also wasn’t confident I’d find an equally nice campsite further on and I was tempted by the almost ready to go fire so I could dry my wet shoes/socks. OTOH – if I kept going I’d be a lot closer to breakfast in Cumberland the following day!

After 15mins of deliberating I sat down and lit a fire. An hour later I had dry feet, dry socks and dry shoes! Yeah! 🙂 I had sandwiches and perishable snacks with me so rather than let them go bad I just ate everything I had that wouldn’t last in the heat. That let me skip my usual dehydrated camp meal. The campsite was really peaceful and I enjoyed a good long chill out session by the fire until it got dark.

Last tour I camped up high with my lightweight summer sleeping bag and suffered a lot. This trip I brought the same bag, but temperatures were high and my camp was much lower. What I didn’t realize was that there were about 1000 frogs in the lake I was camped next to and it was date night!!!!! I’ve never heard frogs that loud before – amazing. Happily I am a solid sleeper so I only woke up a few times, but every time I did it was a shock to hear them. Funny thing was when I woke up the last time and the sun was coming up the lake was silent again and I never did see a single frog!

I should mention the bear situation since Vancouver Island is home to a healthy population of black bears. I ran into a couple bears that were on the road during the first day of riding. I don’t carry any bear spray or bear bangers on the island. Black bears aren’t aggressive and they are well fed here. So I just holler at them with a Mr. T impression such as “I pity the fool bear that tries to mess with the Mighty Krampus!” It works every time and the bear scampers away into the woods never to be seen again. I keep my food away from my tent at night, but close enough I can hear an animal trying to steal it so I can get up and shoo them away. I’m actually more concerned with rodents as they’ll quietly chew through any bag to get at a snack and they are harder to notice than a 250lbs bear!

We also have cougars on the island. I don’t carry any anti-cougar safety gear either. A cougar you see isn’t interested in you and will run away every time. The first indication that a cougar wants to eat you is when its jaws are closing around your neck. You aren’t going to get bear spray out and do anything useful in that case. Since a cougar attack is rarer than a lightning strike I don’t worry about it.

Logging road...

Logging road…

Positive message...

Positive message…

Cool water!

Cool water!

Dusty and no shade...

Dusty and no shade…

Cell service 50kms from nearest people...

Cell service 50kms from the nearest town…

Nice campsite...

Nice campsite…

Dry feet... :)

Dry feet… 🙂

Chilling...

Chilling…

Home sweet home...

Home sweet home…

Breakfast...

Breakfast…

Day 2 – Camp to Cumberland

The next morning was nice and cool so I wanted to make tracks for Cumberland before it got too hot. The road went downhill a long way to the lake which actually got too chilly so I stopped to drink some hot green tea I made at breakfast and was carrying in my framebag. That really hit the spot and I was soon greeted with lots of climbing as the road around the lake was very lumpy!

I should have looked at the elevation profile more carefully, but I was expecting a leisurely cruise around the lake to Cumberland. Instead I got lots of steep ups and downs. The kind you couldn’t use your momentum from the previous downhill to get up. So there was lots of sweating and some pushing involved. Since my pace was slow it got plenty hot well before I reached Cumberland. There wasn’t much I could do other than to keep going and think about the cold drinks I could buy when I reached town.

On the plus side the scenery was really nice and I had the road to myself like I usually do when riding BC logging roads.

I did finally reach Cumberland and without thinking I pulled into the first gas station for an ice cold Sprite and a bag of salty chips! I sat outside and devoured them as fast as I could before heading into the center of town.
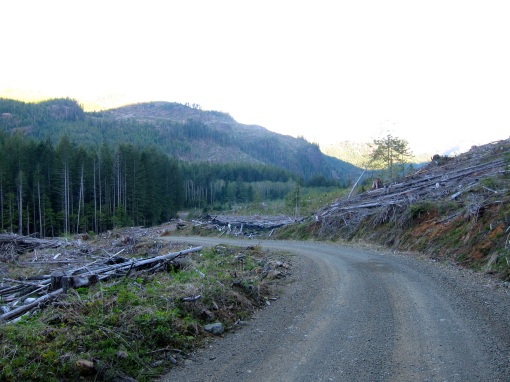
Early morning downhill...

Early morning downhill…

Comox Lake...

Comox Lake…

A message...

A message…

Getting warm...

Getting warm…

Nearly done!

Nearly done!

Mar's on Main = breakfast! :)

Mar’s on Main = breakfast! 🙂

Day 2 – Cumberland

Getting to Cumberland was great not just for the food and beverages, but it meant I now had ~400kms of dirt bikepacking route mapped out all the way down to Victoria. Almost half the island. Nice! 🙂

First thing I did was find the LBS which is Dodge City Cycles. I knew it was my kind of shop when I saw a Krampus in the window and a well used Moonlander leaning against the counter. Not to mention loads of sweet mountain bikes. Dan and Chris were very kind to me letting me leave my bike in the shop while I walked down to Mar’s on Main for a delicious breakfast.

After eating I bought a trail map from DCC and they let me drop my camping gear in a corner of the shop so I could do some unencumbered mountain biking. Thanks guys! I spent a couple hours exploring the trails closest to town and barely even scratched the surface of the riding potential in Cumberland. Their trail network blows my mind and they keep building more and more each week.

Eventually the heat and the knowledge I had more miles to cover today convinced me to head back to the shop. I chatted with the DCC guys a bunch and then I went over to the Waiverly Pub for some cold beer and shade while I figured out the route back to PA.

I could have gone back the way I had come, but I was really burnt out from the heat and the idea of repeating the hilly, hot and dusty road along Comox Lake did not appeal to me. Looking at Google Maps I decided heading to the coast for a spin down the old island highway made sense. It was flat-ish and would be 10 degrees cooler by the water. I waited until late afternoon to let the temperature subside a bit before heading out. In the meantime I caught up on stuff via my smartphone and watched some hockey recaps on TV.

Dodge City Cycles...

Dodge City Cycles…

My Krampus taking a break at DCC...

My Krampus taking a break at DCC…

Cumberland tech...

Cumberland tech…

A fresh Krampus at DCC...

A fresh Krampus at DCC…

Fat skinny...

Fat skinny…

Cumberland Trail Map...

Cumberland Trail Map…

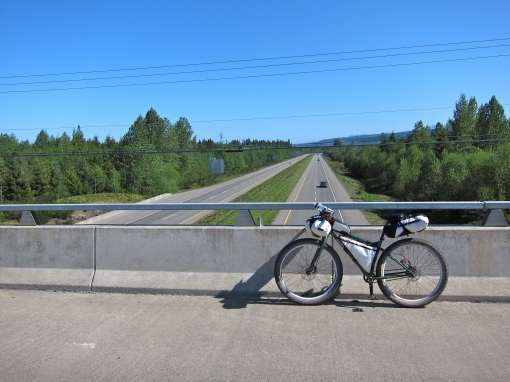
Heading out of town over the new highway...

Heading out of town over the new highway…

Day 2 – Cumberland to Roswell Creek Provincial Park

Riding to the coast I passed over the new Island Highway which is a 4 lane highspeed beast that sees most of the traffic up and down the island. That leaves the old 2 lane Island Highway on the coast much quiter for a bike tourist to enjoy! As expected the coast was much cooler than inland plus the fact it was late afternoon meant long shadows to ride in away from the burning sun. I was happy! 🙂

This section of the ride reminded me of my road touring days – for the good and the bad. The riding was easy with the Knards rolling well on pavement and there were lots of services along the way to fill any desire for food or drink. With people around to interact with the ride was a lot more social. OTOH – even this relatively quiet road had 1000 times more traffic than the deserted logging roads I used to get to Cumberland. The shoulder was wide enough that my safety wasn’t in question – just the difference between peaceful solitude and the hustle/bustle of civilization.

Given how sun blasted I felt I was happy to trade some remoteness for cool air, shade and the odd Sprite! 😉

I turned off the road near Roswell Creek Provincial Park [which doesn’t allow camping] and found a secluded campsite nearby on some undeveloped land. It was a long hard hot day on the bike and I had eaten a sub an hour back. So I just set up camp. Drank a lot of water to fight off dehydration and went right to bed. There was no frog symphony that night to keep me up!

The old Island Higway...

The old Island Higway…

Enjoying a rest stop break...

Enjoying a rest stop…

Seals...

Seals…

Shellfish shells...

Shellfish shells…

Time to camp...

Time to camp…

Day 3 – Camp to Wrong Turn

Waking up in camp near civilization didn’t make me hungry for instant oatmeal so I packed up super fast and hit the road. I almost rode past the last cafe I would see all day, but something told me I better stop so I circled back and went to town on a delicious brealkfast. Little did I know this meal would be all that kept me sane during mistakes that would occur later in the day.

After eating I rolled inland and got back on gravel roads. I made it to Spider Lake no problem and figured I was a short 28kms from PA. I’d be there for lunch baby!

No I wouldn’t! 😦

Then I hit a bunch of private roads around Horne Lake that were on my route. I just kept going and ignored the keep out signs. When I asked Google Maps for a good bike route to PA it suggested I ride over a 3000′ mountain on a gravel road. I thought it was a bold choice, but the route was short and seemed worth the climbing. I started to worry when I saw how rough and how steep the “road” was. I could barely get traction to push my bike uphill.

I should have known something was wrong…

To be continued!

Sandbar Cafe...

Sandbar Cafe…

Breakfast...

Breakfast…

Coastal beauty...

Coastal beauty…

Heading inland...

Heading inland…

Fight the giant robot for my bike!.. ;)

Fighting a giant robot for my bike!.. 😉

Spider Lake...

Spider Lake…

Private - keep out! - not...

Private – keep out! – not…

Really keep out!

Really keep out!


Surly Krampus Complete Problems?

11 05 2013
Photo: Gear Junkie.com

Photo: Gear Junkie.com

If you have bought or are going to buy a Surly Krampus complete bike in the next while you should read this blog post over at the Surly website regarding some minor issues that have cropped up. Nothing life and death, but worth being aware of.


Krampi have landed!

7 05 2013
Surly Krampus complete...

Surly Krampus complete…

I just noticed that The Fairfield Bicycle Shop has 3 Surly Krampus complete bikes in stock [small, medium & large] if you are Knard curious and on the island. The complete bikes seem very nice. If I was doing it over I’d be tempted to buy a complete rather than build a bike up from a frame to take advantage of the OEM cost parts.

I got my Krampus frame/fork and tires from Fairfield. They got my order sorted out quickly and the price was competitive with the US mail-order options.

The Krampus is proving to be a very fun bike to ride and Surly has managed to tweak the front end geometry so those big tires don’t suck the life out of the steering. In fact you very quickly forget you are riding an unusual MTB and just enjoy the great traction and comfy ride.

These bad boys are worth a test ride if you are in the market for a rigid 29er. 🙂


The Girlz ride Terra Nova Trail…

15 04 2013
Dead fall...

Dead fall…

Last time I went riding with Sharon and her friend J [fall 2012] we left with J having two broken hands and Sharon could barely walk. That was an easy paced chill ride… 😉

One of many water crossings...

One of many water crossings…

So when we all went riding again last week our mission was clear – everybody comes home in one piece!

I picked a trail that is as close to XC as I have near at hand to our home in coastal BC. Sadly that doesn’t mean buff endless singletrack. But it does mean you can ride your bike a bunch of the time without facing a techy obstacle at every turn and when you do face an obstacle you mostly have to get off your bike and walk. Walking may not be as fun a riding, but it’s safer…;)

Here is a solo ride report from the same trail last August when it was much much drier.

Sometimes you gotta push in the bush...

Sometimes you gotta push in the bush…

Our typical MTBing trails are what the kids call “all mountain”, which translates to steep and techy. I’d call it “Costal BC all mountain” which in my mind denotes a higher than normal density of the tech and often slippery conditions”. So although this isn’t a Colorado Buff trail this is a chill safe-ish MTB option around here.

Sharon riding her Pugsley...

Sharon riding her Pugsley…

I suggested that Sharon ride her Pugsley instead of her 6″ travel FS bike. Partially because this trail didn’t really need tons of travel and partially because I want her to get comfy doing easy MTBing trails on the Pugs to facilitate future bikepacking adventures.

J still smiling...

J still smiling…

Although Sharon has turned into a decent shredder she’s only been riding MTBs for 3yrs. Has really only ridden 1 MTB [Santa Cruz Nomad] and 95% of her MTBing has been in 1 bike park. So her skill set is good, but not broad.

She also has a lot of Baja sand riding experience, but that’s a pretty niche skill set not much use most other places.

Team effort...

Team effort…

For the first hour I got flack about suggesting the Pugs because she got pounded on a rigid bike trying to ride it like a long travel FS bike. Her FS bike has a dropper post so I setup her saddle at 70% normal height which she thought was too low when it was chill and too high on the few steep sections.

So she walked her bike a bunch when she could have ridden and complained a lot. I just told her that the bike she had at the moment was the Pugs and to get on with riding it…lol…tough love!

The mighty Krampus...

The mighty Krampus…

It would have helped morale if I was riding my Pugs as well, but it was at the LBS getting my Rolling Darryl rims built into wheels. I was riding my Krampus which was rigid and semi-fat so I didn’t feel guilty for flying along on a cloud of high-tech suspension!

Gloomy forest singletrack...

Gloomy forest singletrack…

The good news is that after an hour the complaints went away and Sharon started shredding the rocky climbs and other challenging sections. Then she even commented how easy it was to climb the Pugs on rough or slippery terrain and how it rolled over river rocks like they weren’t there.

Mission accomplished! 🙂

Splish Splash!

Splish Splash!

I’m not one of these guys that thinks fat bikes are the best MTBs for just about every kind of riding. I like my other MTBs plenty and for a lot of the riding I do they are miles better than my fatty…BUT…for ‘xploring poorly maintained trails in wet conditions big fat rubber is pretty sweet and the Pugs has a great geometry for this kind of riding.

I’m glad Sharon came to that conclusion on her own. Especially riding an unloaded bike on a short trail ride. This will make the leap to carrying some camping gear and having to mountain bike a lot easier.

J charging the creek...

J charging the creek…

I’m happy to report J made it back to the car un-broken and smiling. 😎

Racing the setting sun back to the car...

Racing the setting sun back to the car…

Of course Sharon did have some criticisms of the BB7s for MTBing compared to her Nomad’s hydros as well as a few other upgrades. I pointed out that the Pugs was a bike worthy of upgrading and when she wanted to spend some $$ we could tackle anything she liked…:D;):thumbsup:


Blessed Silence!

5 04 2013
What noise?

What noise?

As I was pounding along last weekend I suddenly realized something was missing from my usual ride experience – noise! My MTB has a Hope hub that sounds like angry bees making love when I coast. It used to make a lot of noise from chainslap as well, but I cured that with a clutch derailleur – although I still get various shifting noises when changing up gears on the Nomad.

My 29er bikepacking bike has an Alfine 11 IGH in it and horizontal dropouts. That means the chain is tight all the time and can’t really move around or make any noise. The A11 coasts and pedals silently. Even the shifts are accompanied by only a very soft click.

I’m so used to my bikes making a lot of noise that it’s a bit of a surprise to experience the peacefulness of a silent drivetrain.

That silence leaves more room for me to hear what’s going on around me and let’s me get lost deeper in my own thoughts.

There are times when making noise to give bears notice I’m coming through is a smart move. However, I’d rather attach a $4 bear bell to my bike when needed. It makes noise anytime I am moving – rather than just when I am coasting and I can take it off when I don’t want to make a racket.

There are loads of good reasons to use an IGH and specifically an Alfine 11, but at the moment silence is what I am appreciating the most.


Gravel Pimp – Got her done!

2 04 2013
Getting up while the moon was still bright in the sky...

Getting up while the moon was still bright in the sky…

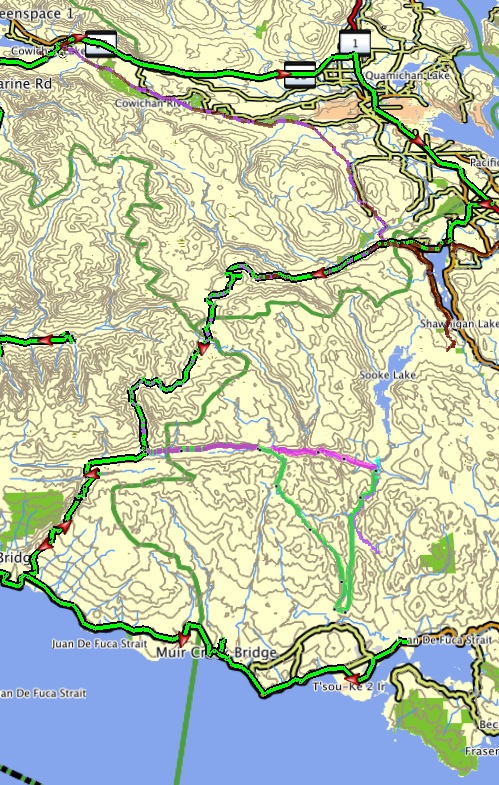
I spent a lot of time last year doing recon on a dirt route from Lake Cowichan to Victoria. With the Galloping Goose MUP mostly dirt from Sooke Potholes Park to Victoria it seemed straightforward to just find a route from Lake Cowichan to the potholes. As it turned out that wasn’t so easy after all.

First try...

First try along the cyan line above…

At first it looked simple to run down the Trans Canada Trail [TCT] and along the east side of Sooke Lake down to Leehtown and then hop on the Goose MUP to Sooke Potholes Park and onwards to Victoria. The trouble was Victoria takes its water-supply very very seriously and has blocked off any access through the area we wanted to ride with gates, fences and guards. Click on the map above to read what happened.

E&N Railway route...

E&N Railway route…

We tried riding the E&N Railway corridor from Shawnigan Lake To Victoria which is quite a bit to the east of our previous route. It worked, but riding on the tracks was pretty brutal so I couldn’t really recommend it as a bikepacking route. Not to mention it was almost too easy with no real grades and such a straight shot to Victoria. The Gov’t keeps threatening to reactivate the rail service along this line, but so far it hasn’t happened. It you don’t mind getting bounced around a lot and want to check it out it’s a viable option.

What roads?

What roads?

Not to be deterred we returned to Sooke Lake area and tried to go to the west of the Sooke Lake drainage. Both my print maps and electronic maps showed logging roads leaving the Leechtown area and heading west then north to join up with roads around the Koosilah Provincial Park. Sadly these roads were fictional. They exist only as a cartographer’s dream! 😦

Another dead end...

Another dead end…

About this time I realized that riding a bicycle out to Leechtown and back for every route recon was taking up too much time and frankly riding the Goose MUP so many times was getting boring. So I broke out the KLR dualsport motorcycle. I plotted another route uphill out of Leechtown that looked promising on the map [pink line above], but I only got as far as the burgundy line on the lower right before I hit a water-supply gate and the rest of the mapped roads stopped existing.

More moto recon...

More moto recon…

Next time out I burned a whole day on the motorcycle going in and out of various logging roads as I kept running into more locked gates or dead ends. I managed a loop from Victoria out to Port Renfrew then up to Lake Cowichan before heading back home. The good news is it was a fun day on the moto and I learned a lot about the local logging road network. The bad news is I still didn’t have a route that went all the way through, but I had narrowed down the options enough I thought it was time to take another chance with the bicycle.

Getting down to the last few options...

Getting down to the last few options…

With a lot of recon done I figured one of the two connectors shown above in pink and green would work. Obviously I’d rather ride the shorter pink route. Especially because the green route features a ton of altitude loss as you head south and a bunch of fresh climbing as you head back north on top of triple the mileage. Locked logging gates stop me on my motorcycle so it was time to start pedalling again to finish the route off.

Finally it got done...

Finally it got done…click image for GPS info…

This past weekend I headed out from Lake Cowichan and rode my bicycle down the TCT to the Kinesol Trestle and past the Koosilah Provincial Park. I headed up into the mountains on the Kapur Main logging Rd and connected with the West Jordan Main logging road. That took me to the [supposed] junction of the Butler Main logging road and the Leech Main logging road, but once again the Leech Main [the pink short cut in the map 2 above] doesn’t actually exist on the ground. So I rode south on Butler Main dropping altitude fast and connected with Graveyard Main to head north again to Leechtown. I knew I would make it at this point, but the landscape had changed at Leechtown since my last visit with logging equipment gone, vegetation grown and creeks running hard with snowmelt. I had to poke around a bit until I found the bushwhack across the Sooke River to the Goose MUP. Once I rolled up to the familiar red shelter I’ve slept in a bunch of times I was really happy to finally put that mission down as a success in the books.

Sooke River...

Sooke River…

The GPS says it’s 175kms from Lake Cowichan to Victoria along my route. Those numbers don’t sound impressive, but when I look back at all the time I spent pouring over maps, riding my motorcycle and pedalling my bike it was quite a job to figure this route out. I had decent maps and a bunch of dirt roads available for me to use. I didn’t have to do one lick of trail building or mapping to find this route. So I am even more impressed with all the trails I’ve ridden in the past and the effort the folks have put into finding them or building them. Thanks!

Phase 2...

Phase 2…

Now that Phase 1 of the Vancouver Island Bikepacking Route is done I’ve got plans for Phase 2. The next part of the adventure is to map a route from Cumberland/Comox down to Lake Cowichan. The green segment on the map above goes from Port Alberni to Lake Cowichan and I’ve been down all those roads in my truck so I know they are a sure thing. The cyan segment at the top of the map goes from Cumberland to Port Alberni. It looks pretty straightforward, but I’ve said that before! I’ll do an initial run with my motorcycle this spring to confirm the route from Cumberland to PA works and is a decent one to ride. Then I’ll come back with my bicycle to enjoy it by pedal power. 😉

My goal for 2013 is to get that far.

Phase 3...

Phase 3…

You can see from the map above that Phases 1 & 2 get me a little better than halfway up Vancouver Island. I’d like to go all the way to the top on dirt, but my knowledge of the north island is limited and it will take 3-4hrs just to get to the bottom of that area on my motorcycle so there will be some serious time involved in that part of the recon. I’d like to get at least one moto recon session in the books for 2013 so I have a lay of the land in my head to help me situated data I glean from maps.

Keep on rolling...

Keep on rolling…

I’ll get a trip report for the latest ride posted later this week or next – here are the photos for now. I’m excited for another great year on the bike with lots of new roads and trails explored.

Keep those wheels rolling Gravel Pimps of the world! 😉


Pugsley 29er Wheels…

8 03 2013

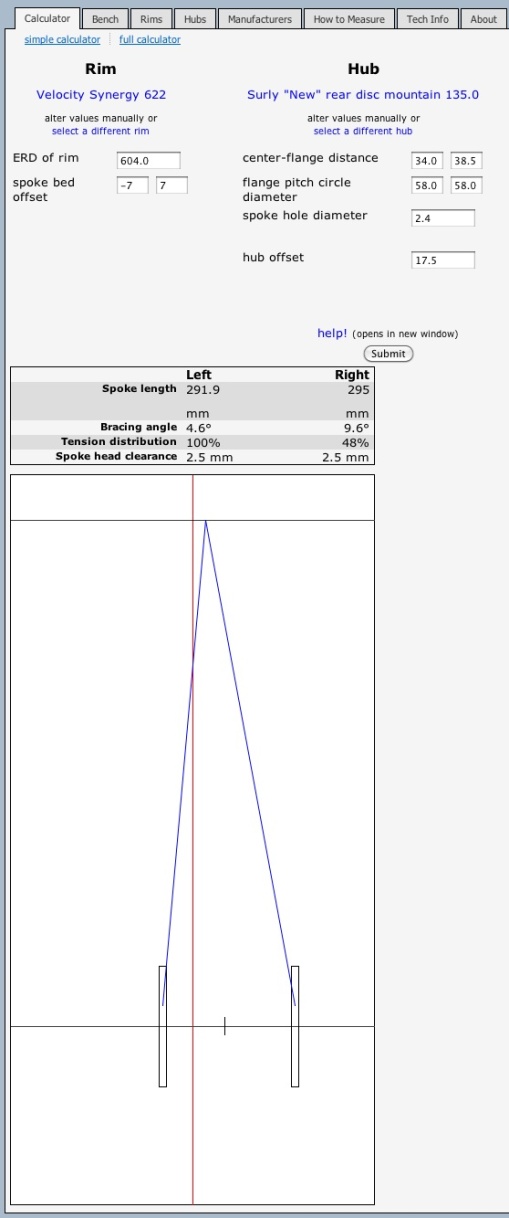
I love my Surly Pugsley and I have considered building up a 29er set of wheels for it a few times over the years. The Pugsley has a 17.5mm offset of the rear wheel to the right so the chain clears the big fat tire. That works great with the wider fat rims out there as they have enough real estate to offset the hole over to the right so that the end result is a strong wheel with reasonably even spoke tension on both sides. My Large Marge rims [shown below] have the spokes offset ~13mm to the right for example.

Note offset spokes...

Note offset spokes…

With narrower 29er rims you can’t move the spoke holes over as much so there are some compromises to be made that are worth looking at.

What’s normal?

Standard rear MTB wheel...

Standard rear MTB wheel…

I like strong wheels with even spoke tension, but most mountain bikes roll along just fine on rear wheels that are tensioned at 100%/60%. So that’s worth keeping in mind.

Offset Fork + Zero Offset Rims

Zero offset rim in the rear of the Pug...

Zero offset rim in the rear of the Pug…

If you build a Pugsley a set of 29er wheels using standard zero offset MTB rims [spoke holes centred in the rim] you get the spoke tension shown in the images above and below.

The rear wheel uses a SRAM X9 hub and the spoke tension is 100%/45%.

The front wheel uses a Surly 135mm SS hub in the Pugs offset fork and the tension is 100%/30%

Neither of these options looks that great, but I know folks that have built up 29er wheels for Pugsleys using zero offset rims and they can work if the rider isn’t super heavy and/or the use is gentle [ie. road commuting vs. loaded dirt touring].

Surly SS hub in Pugs offset fork...

Surly SS hub in Pugs offset fork…

Offset Fork – 4mm Offset Rims

Velocity Synergy OC 4mm offset rims with SRAM X9 rear hub...

Velocity Synergy OC 4mm offset rims with SRAM X9 rear hub…

Nick over at the Gypsy By Trade Blog posted about building a Pugsley 29er wheelset using 4mm offset Velocity Synergy OC rims. As far as I know these offer the most offset in a “standard” 29er rim.

The rear builds up with a tension of 100%/62% – so that’s essentially the same as our “normal” MTB rear wheel at the top of the post. Although this wheel has slacker spokes on the driveside vs. the “normal” MTB wheel which has the slacker spokes on the disc brake side. I’m not sure if that matters a lot – anyone have a comment on that?

The front builds up with a tension of 100%/40%. A normal MTB front wheel is around 100%/70%. But the front wheel sees less abuse so perhaps this is just fine as long as you aren’t on the really heavy/rough end of the use spectrum. I’m keen to follow Nick’s blog and see what happens.

Surly SS hub in offset fork with 4mm offset rim...

Surly SS hub in offset fork with 4mm offset rim…

Offset Fork – 7mm Offset Rim

7mm offset rim in rear of Pugs on SRAM X9 hub...

7mm offset rim in rear of Pugs on SRAM X9 hub…

Surly has released a 50mm wide Rabbit Hole rim that takes 29er tires as well as their new Knard 29 x 3.0″ uber wide rubber. It has a 7mm offset and fits into a Pugsley frame/fork no problems. I wish Surly has pushed those spoke holes out another couple mms to get better tension with the Pugsely offset frame/fork. It looks like there is enough real estate on the rim to do that.

The rear builds up with 100%/78% spoke tension which is nice.

The front builds up with 100%/48% spoke tension which is better than the 4mm offset rims, but still quite a bit short of the 100%/70% tension of a standard MTB front wheel.

So you are getting a more balanced build with these wide rims, but they are heavier [~200g/rim compared to the Synergy OC rims]. OTOH – they are wider so if you want to run wide 29er rubber including 3.0″ wide Knards the weight penalty may be worth it on that count.

Surly SS hub in Pugs offset fork with 7mm offset rims....

Surly SS hub in Pugs offset fork with 7mm offset rims….

Zero Offset Moonlander Fork – Zero Offset Rims

Moonlander symmetrical fork with zero offset rim...

Moonlander symmetrical fork with zero offset rim…

If you have a Necromancer Pugsley you have a symmetrical Moonlander fork that takes a 135mm front hub. I don’t have the specs on Surly’s 135mm front disc hub so I used the same Surly rear hub as the other examples. It gives you a pretty good idea where things are headed although the spoke tension with the front 135mm hub may be a bit worse since the right flange doesn’t have to make room for a cog.

For a zero offset rim I got 100%/89% spoke tension which is great. You could use 4mm or 7mm offset rim to get an even stronger wheel.

Pugsley 100m Symmetrical Fork – Zero Offset Rim

100mm front hub in Surly Pugsley 100mm symmetrical fork...

100mm front hub in Surly Pugsley 100mm symmetrical fork…

Surly sells a 100mm symmetrical fork for the Pugsley at a cost of ~$99. That would allow you to use an existing standard 29er MTB wheel which you may own or can buy pre-built for a lot less than a custom wheel build. You can also swap this wheel into another MTB you own. The spoke tension is 100%/70% – which what most MTB front wheels would be.

Note this would be the same result as using a 29er suspension fork with your Pugsley.

IGH + Pugsley Offset – Zero Offset Rim

Alfine 8 in Pugsley offset frame with zero offset rim...

Alfine 8 in Pugsley offset frame with zero offset rim…

If you are like me and want to use an IGH with your Pugs you find out that it’s a challenge with 29er wheels. As you can see from the example above of an Alfine 8 in the rear of a Pugs with zero offset rims the spoke tension balance is poor at 100%/30%. It’s essentially the same as the tension achieved with the Surly SS hub in all the examples above so your best case using a 7mm offset Rabbit Hole rim is ~100%/50% tension balance.

Some Other Ideas

Here are some additional things to consider:

  • a wider flange to flange spacing will make for a stronger more stable wheel all other things being equal
  • it may be possible to drill new spoke holes on Surly Rabbit Hole rims further to the right than the stock ones
  • you can use two rear cassette hubs in your Pugs to avoid the funky spoke tension you get with a SS/FG hub up front

So what should you do?

The very first thing I would do if you are going down this road is to evaluate how tough you are on wheels. That will let you know how important getting strong wheels should be to you.

  • how much to do you weigh?
  • how much gear do you carry?
  • how rough is the terrain you ride?
  • are you a finesse rider or a smasher?
  • how much do you ride?
  • how well do normal MTB wheels last under you?
  • how much attention do you want to spend on your wheels?

Next up you need to consider some of the other factors like:

  • how frequently do you plan on swapping wheels?
  • how far from help do you ride?
  • do you have an existing 29er front wheel you could use?
  • do you want to ride narrow 29er rubber? [less than 2.4″]
  • do you want to ride uber wide 3.0″ 29er rubber?
  • do you want to use a suspension fork?
  • what is your budget?

There is no set answer.

  • The more abuse you will dish out the stronger your wheels need to be.
  • If you want to swap wheels once a season a fork swap is no big deal.
  • If you want to swap wheels twice a week swapping forks will get old fast.
  • If you own an existing 29er front wheel you like getting a $99 Pugsley 100mm symmetrical fork is a great idea.
  • If you ride far into the backcountry you won’t want to take a lot of risk.
  • If you are never more than a few miles from the car you can afford to have a wheel failure.

Don’t use a Pugsley

If you haven’t got a fatbike and using a 2nd set of 29er wheels is important to you than you may well be better off buying one of the symmetrical rear end fatbikes being sold. Without the offset rear end you can build up some 29er wheels without much trouble although you will need the correct size hubs for your frame so an off the shelf 29er wheel set won’t work.

What would I do?

Well I’ve talked myself out of a 29er wheelset for my Pugs. Using an IGH doesn’t get me a good wheel build even with a Rabbit Hole rim. I don’t feel like swapping wheels and the fork every time I want to run 29er wheels either. So that sort of leaves a whole bunch of not so great options on the table.

I think the better plan for me is to have a dedicated 29er MTB and leave the Pugsley on fatbike rubber. I have a garage and I have the existing 29er parts to outfit a frame at a cost that wouldn’t be much more than a custom set of wheels.

Having said that if I was a one bike guy and owning/storing a second bike was out of the question I’d switch my Pugsley over to a 1 x 9 derailleur drivetrain and use a Moonlander fork upfront. I’d run Rabbit Hole rims because I’ll either run a 2.4″ or 3.0″ tire. I like wide rubber.

Comparison to my existing Pugsley wheels…

Alfine in Pugs with Large Marge rim...

Alfine in Pugs with Large Marge rim…

Since we are going to town on wheel calcs the images above and below show my current Pugsley wheels. The rear Alfine has a spoke tension of 100%/92% with a Large Marge rim that has 13mm offset [same offset as Rolling Darryl rim]. The front Surly FG hub in my Pug’s offset fork has a spoke tension of 100%/69%. Both ends are pretty strong in theory and that’s backed up by a lot of abuse with zero issues.

It’s nice to be able to ride your bike as hard as you can without having to give a second thought to your wheels.

Surly SS rear hub in Pugsley offset fork with Large Marge rims...

Surly SS rear hub in Pugsley offset fork with Large Marge rims…


Chromag Collectors…

7 03 2013


New Canfield Brothers Nimble 9…

1 03 2013
New and improved...

New and improved…

I test rode Grant’s N9 in 2011 and liked it a lot. In retrospect the geo was probably better suited to my riding needs [HA of 68/69 depending on fork] than the Scandal I bought [HA ~71]. One issue I had was the heel to chainstay clearance for my big feet and it looks like they have fixed that.

Here is the Canfield spew:

The Canfield Brothers 29er revolution continues with the ALL NEW Nimble 9. From the start of the redesign of the current Nimble 9, we wanted to give the bike a distinctive look different from what is currently available in chromo hardtails. We wanted to incorporate a hydro formed toptube and a 44mm head tube. New innovations include a removable front derailleur block that allows the frame to look super clean when setting it up as single speed. We also designed new sliding dropouts that are reminiscent of something seen on a custom motorcycle. Lastly, we gave the new Nimble 9 the innovative Canfield Brothers 29er geometry.

We will be releasing the new Nimble 9 in nine colors, Canfield Glow in the Dark Sparkle Blue, Sparkle Orange, Sparkle Green, Matte Black, Gloss Black, Deep Red, Midnight, Forest Green and Limited Edition Chrome.

The Nimble 9 is currently in production with an estimated ship date of May 2013.

Features:

  • 4130 chromoly steel
  • 68° head angle with a 120mm fork
  • Adjustable 16.25“ – 16.9” chainstays
  • Lower toptube for increased stand over height
  • Custom sliding 135mm x 10mm rear dropouts for geared or single speed options
  • ED Black treated for corrosion resistance
  • NEW hydroformed toptube
  • Removable direct mount front derailleur block
  • Improved chainstay heel clearance
  • Two water bottle bosses
  • 6.5 lbs (estimated)
  • $750 US retail, ($800 Limited Edition Chrome)

Build Specs:

  • Recommend fork lengths – 100mm – 120mm
  • Headset – 44mm upper and lower cups
  • Front derailleur – Shimano direct mount – top pull, single bolt, or Sram HO series
  • Bottom bracket – 73mm
  • Seat post – 30.9mm
  • Seat clamp – 35mm
  • Rear dropout spacing – 135mm
  • Post brake mount

Click on the image above for more info and discussion over at MTBR.com.


New improved Jones Diamond Frame + Unicrown Fork…

25 02 2013
Jeff Jones headtube badge...

Jeff Jones headtube badge…

Click on any of these images to read a post on Jeff Jones’ Blog about the new and improved diamond frame and unicrown fork he is selling. The attention to quality and detail is quite impressive.

EBB for clean SS/FG or IGH setups..

EBB for clean SS/FG or IGH setups..

Jeff also mentions in his blog that he is testing out a new prototype frame. From the photo below it looks like he has a new frame that can take Surly’s 29×3 .0″ Knard tires on 50mm rims – front & rear. That would be rad! 🙂

Jeff shredding a prototype...

Jeff shredding a prototype…

I’ve admired Jeff’s bikes for a while now, but I’ve been waiting on a full fat Jones before taking any action. A 29er+ Jones would probably be as good if not better. I hope we’ll hear some details on what Jeff has in mind and get an idea on the timeframe for seeing a production frame.

Stay tuned for some news as soon as I get it….


For Sale On One Scandal 29er MTB Frame and Fork…

23 02 2013
My On One Scandal 29er in bikepacking mode...

My On One Scandal 29er in bikepacking mode…

I’ve decided to sell my On One Scandal 29er frame and fork. This is an excellent XC 29er mountain bike. It’s well suited to a role as a bikepacking rig. It comes with SS/IGH dropouts and vertical dropouts so you can run a derailleur. The build quality, finish and attention to detail on this frame is outstanding. It puts my Surly frames to shame.

The fork and frame are in mint condition with very little signs of use and probably under 1000kms of riding on it. With a lot of that being non-technical bikepacking rides.

Scandal in Sedona...

Scandal in Sedona…

It’s a great bike so why am I selling it?

Our terrain around here is technical and steep. I’m finding the XC geometry of the Scandal isn’t ideal for mountain biking where I live. If I am going to have 2 mountain bikes I need to enjoy the second one on the trails as well as for bikepacking trips. My plan is to get another 29er with slacker geometry that will handle the steeps better.

Bikepacking with the Scandal...

Bikepacking with the Scandal…

Here are some Scandal features:

  • AL frame [no rusting] – 19.5″ frame with ~24.5″ effective TT
  • frame weight ~3.5lbs
  • sweet anodized stealth black finish with subtle laser engraved logos
  • tapered heattube
  • lots of clearance in frame for big rubber and mud [up to 29 x 2.5″]
  • swappable horizontal or vertical dropouts
  • accepts a dropper post
  • gusseted downtube for durability
  • large frame triangle for decent sized frame bag
  • rear rack mounts for touring or utility riding versatility
  • Rock Shox Reb RLT 100mm fork + spare seal kit [mint condition]
  • On One headset installed

You can see tons of photos of the bike at this link.

Downtube detail...

Downtube detail…

Price:

  • frame + Reba RLT + headset + BB = $600USD
  • shipping = $50USD anywhere in Canada/US
  • will pack the frame/fork very well for safe shipping
  • I will give preference to a local sale.
Dekerf style seatstay/seattube junction...

Dekerf style seatstay/seattube junction…

My experience with On One was great and I’ll certainly consider another one of their frames. The design details and build quality is one level higher than my usual affordable frame solution – Surly. In fact the only frames I have seen that are nicer are custom builds that cost 7 – 10 times as much.

Swappable horizontal dropouts...

Swappable horizontal dropouts…

Note the rear brake is mounted inside the rear triangle for a clean build.

Red rocking and rolling...

Red rocking and rolling…

Who should buy this frame/fork?

  • I’m 5’11” with a 33″ inseam and long arms
  • I wouldn’t recommend the Scandal for anyone smaller than me
  • someone larger can fit fine as I used a very short stem
  • this would be a very nice XC race bike or XC trail bike
  • it’s versatile so you can bike tour with it using a rear rack
  • or you can bikepack with a set of frame bags
  • setup with an IGH it’s very low maitenance
Headtube/top tube detail...

Headtube/top tube detail…

You can read my review of the Scandal 29er here and you can read another review of the Scandal 29er here.

Thumbs up for the Scandal 29er...

Thumbs up for the Scandal 29er…

There are a bunch of reviews of the Scandal 29er on MTBR at this link.

Alfine 11 IGH drivetrain...

Alfine 11 IGH drivetrain…

In its current build it’s a perfect bikepacking rig and a low maintenance XC trail bike.

Schwalbe Racing Ralph + Stans Flow rim + Hope Pro II hubs...

Schwalbe Racing Ralph + Stans Flow rim + Hope Pro II hubs…


Chromag 29er Love…

15 10 2012


North Shore 29er Porn…

6 09 2012

Photo: Mark Woods – Click for more pics over at NSMB…


On One Scandal 29er Review…

8 08 2012

My On One Scandal 29er mountain bike in bikepacking mode…

Overall

The On One Scandal is a value priced lightweight aluminum 29er hardtail mountain frame with XC geometry and some interesting features like a tapered headset, dropper compatible seat tube and swappable dropouts for vertical or horizontal.

Lots of room for big rubber…

Construction

The tubes are big as you’d expect from an aluminum frame with decent industrial looking welds. The tapered headtube has a gusset at the downtube junction for added strength. The Dekerf-esque seat stays look nice and provide a lot of clearance for big rubber and mud. I got the black anodized finish which is robust and looks good with fairly subtle laser etched logos. For a low cost production frame the quality and attention to detail is very high. Frame weight is under 4lbs. I didn’t weigh my 19.5″ frame, but it was definitely not the usual 6lb Surly steel frame I’m used to. The swappable dropouts offer vertical or horizontal options that can be changed any time.

Gusset…

Here’s what On One has to say about the Scandal 29er:
“Our award winning Scandal is back in a new updated incarnation bringing even more to the big wheeled genre than before. Starting at the front, a new tapered head tube means big fork compatibility. Using our Smoothie Mixer taper headset standard, the Scandal 29 can take taper or straight steerer forks, and is even compatible with our new “slackset” to kick the head angle out for more all-mountain playful handling.

A curved seat tube gives better rear wheel clearance and takes a 31.6mm post, so is “dropper” compatible. Clamp size is 34.9mm.

Gear routing is under the BB for this model, so a bottom pull, low clamp, 34.9mm front mech is used.

BB shell is 68mm English threaded.

Out back, the frame gets the swapout treatment and is fitted as standard with our Type b2 vertical dropout for disc brake compatibility.

Rack mounts are integrated into the rear stays for those that want to do it a.

Frame tubing is a mix of 7046 high strength thin wall multi butted alloy main tubes and 7005 butted and shaped rear stays. Chainstays are bridge less with reinforcing gussets for increased fatigue strength and clearance.

Seatstays are classic on one wishbone style.

Two bottle mount points are fitted. One on the seat tube and one on the downtube. Seat tube one may be obstructed by a high mount front mech. Low mount mechs are possible only with a 42t or larger outer chainring. Sorry.

Likewise, brake hose routing should follow the top tube and seat tube guides due to possibility of interference with gear cabling on downtube.

Geometry is identical to classic Scandal and Inbred 29 geometry. 444mm rear stays with 72deg head angle on all but the 16in model which features a 71deg angle.

Frame weight is slightly more than previous models, but still certainly well under 4lb, which is best in class at this pricepoint.

Frame finish is either : “Super raw”. Rough brushed then anodised, with lazer graphics. This finish is factory raw so each frame is unique.Ano black. Blast finish with black anodise then lazer graphics.  Taiwan Racing Green paint with white outline graphics.

Scandal has our standard 2yr manufacturing defect warranty.”

On One Scandal 29er geometry chart…

Geometry

The Scandal 29er shares On One’s XC geometry with the Inbred and other On One frames. The steep headtube angle can be slackened by using a longer travel suspension fork and/or an On One slackset headset. I’m using a standard headset with a 100mm Rock Shox Reba RLT fork. The steering isn’t overly quick and although the Scandal isn’t the ideal weapon for our steep & techy local all mountain style trails it’s been fine when pressed into service.

Being scandalous in Sedona…

The Ride

My Scandal was built with bikepacking in mind:

  • large 19.5″ frame
  • Rock Shox Reba RLT 100mm fork
  • Alfine 11 IGH
  • Stan’s Flow rims
  • Schwalbe Racing Ralph 2.4″ tires
  • Porcelain Rocket bikepacking bags

For mountain bike touring and non-technical dirt/gravel riding it does very well. The handling is stable, but responsive. I’ve got the horizontal dropouts mounted and the IGH about mid-way back in them. Coupled with a large frame that gives me a pretty long wheelbase. The suspension fork and big wheels take the edge of rough surfaces. The wide supple tires roll well and provide excellent grip. The big wheels and rigid frame climb well. The large frame provides a stretched out riding position for covering ground efficiently and allows a decent sized frame bag to be used. The Alfine 11 provides a weatherproof drivetrain that can’t be damaged during a hike-a-bike or when the inevitable crash occurs.

When it comes to straight up mountain biking the Scandal 29er does great as long as the terrain doesn’t get too rough and steep. The steep angles and stiff frame are not BC all mountain riding friendly. That’s not really a fair test of an XC frame. Having said that the Scandal with a dropper post gets the job done on our local trails even though I’d rather be on my 6″ FS MTB most of the time. The frame has a ton of clearance for big rubber and mud which combined with an IGH make it an excellent winter mountain bike.

If I had bought the Scandal primarily for mountain biking I’d have picked an 18″ frame for a shorter wheelbase for more nimbleness and used a slack set to make the bike more stable on steep sections.

As a bikepacking rig or for XC riding the Scandal is a good choice. If your riding leans towards the steep gnar I’d look for a frame with slacker angles and for really rough terrain you’ll want a FS bike not a stiff aluminum hardtail.

Me and my Scandal with The Porcelain Rocket…

My Recommendation

For a value priced hardtail with a lot of versatility I don’t think you can go wrong with a Scandal 29er. The On One US store has them on sale at the moment for $299USD! The Scandal takes a rear rack, tapered forks as well as standard 1 1/8″ forks, dropper posts, derailleurs, IGHs, or SS/FG setups with clearance for 2.4″ wide 29er MTB rubber. That means you can do just about anything you want with this bike. You can get an On One Inbred 29er in steel if you prefer that frame material, but it will weigh 2lbs more.

If you want to ride all mountain/freeride terrain pick something else like a Canfield Nimble 9 or a Kona Honzo.

Horizontal dropouts with disc brake mounts inside the rear triangle so you can use any standard rack…


Crank Brothers Joplin 4 Review

6 08 2012

Crank Brothers Joplin 4 seatpost on my Scandal 29er…

I’d like to hold out a few more months of riding to post a review of this Joplin 4 adjustable seatpost, but I figure that with the new Kronolog seatpost on the market it made sense to post now while folks were still looking for info on the Joplin. By the end of the year they’ll probably be gone from the market and a review would be of a lot less value.

I’ve been using this seatpost since I built up my Scandal 29er MTB at the start of the year. I’ve also had a Joplin 3 for four years which shares a similar set of internals. My Joplin 3 had a seal failure which was fixed by Crank Brothers under warranty. It’s been fine for 2 years since then. The Joplin 4 on my Scandal has worked well without any issues so far. Kurt had a Joplin 3 for two years and it had a seal failure. His LBS replaced it under warranty with a Joplin 4 he’s used for two more years with no issues.

The Joplin 4 has improved seals to keep dirt out and more effective dual key-ways to keep side to side play at bay. Which seem to have cured a lot of the problems with the earlier Joplin models.

Joplin 4 tech specs – click for larger…

I’m using the Joplin 4 with the under the seat lever. My Joplin 3 has always been controlled by a bar mounted remote lever. The under the seat lever is not nearly as useful as the bar remote lever. I’m swapping the Joplin 4 in and out on the Scandal depending if it’s been used for MTBing or bikepacking. With the frequent changes I’m accepting the harder to use the under the seat lever for now. If my Scandal was a dedicated MTB I’d use a remote bar mounted lever for sure. The Joplin bar mounted remote lever is the best design I’ve seen so far – very easy to use.

The Joplin responds quickly to being raised or lowered. It doesn’t get stuck like the KS post I use on my Nomad. You can set it to any height within the range – although I find it hard to modulate the adjustment using the under the seat lever as I have less control with only 1 hand on the bars. You can’t lift the bike by the seat unless the post is fully extended –  which is a drag, but one I can live with. My solution is to put the seat at max height when I get off the bike so I can move it around by the saddle. There is a small amount of side to side play with the saddle, but it isn’t noticeable when riding. The saddle clamps are a single bolt design with infinite angle adjustment. I haven’t had any issue with mine coming loose.

Kurt’s been riding a Joplin 4 for about two years with no issues. He’s got it on his Nomad with a bar mounted remote and is pleased with it. As far as reliability goes I’m feeling okay about all the Joplins we are using. In total we’ve had 9 seasons of riding and 2 seal failures in the older Joplin 3 posts and no failures with the newer Joplin 4 models. They’ve been maintenance free which is exactly how I like my bike components!

Scandal 29er with Joplin 4…

So bottom line is the Joplin 4 is a decent seatpost. It works well. It’s been reliable for me and for Kurt.

There are some newer better options for adjustable height seatposts out there now. In particular the Rock Shox Reverb and the Crank Brothers Kronolog – both sell for around $300. Given that I’d recommend the Joplin 4 if you can get for $150 with the remote lever or $100 without it. If you are paying more for a Joplin 4 it’s probably a better investment to either wait for a clearance sale or spend the extra $$ on a newer post design.


Surly Krampus – 29+…

20 07 2012

Surly Krampus 29+…

Updates:

Photo: Saddledrive via Facebook

Here is some Krampus video action.

Krampus complete bike green – photo from MTBR…

and another video…


A-Man’s 29er Hammock Ramble…

10 07 2012

A-Man on the move…

Aaron writes:

With all the adventures Vik & Scott have had bike packing I felt that it was high time that I figured out what all the fuss was about. Originally we had planned to get out together but various and conflicting schedules torpedoed our designs for a tour.  Now I was left with a loaded bike but no companions and no place to ride to. Still being keen to camp, and loaded with awesome equipment, I struck out for a nearby summit.

Taking a break along the way…

To provide some companionship, my colleague from work, Grant volunteered to ride to the summit with me and also shoot some photos. Grant has significant photography experience and produced some excellent photos from my humble Nikon. The two of us also happened to be riding on decked-out Moots titanium 29” wheeled machines from two different schools of thought. My bike, loaned to me by Tim Unger (my generous employer) was a MootoXYBB with front and rear (pivotless) suspension. Grant was riding his fully rigid MootoX. The difference in bikes could not have been more pronounced but we still cranked along the trails together and enjoyed the beautiful woods of the West Coast.

Loving those 29er wagon wheels in the forest…

The area that I chose to go camping is accessed by a multi-usage trail system that is open to both hikers and bikers. Typical of Vancouver Island, I saw neither all day. While you are allowed to ride and hike these trails (lets call it “Hill-X”), camping is a no-no. Guerrilla stealth camping was my other trip objective so I wasn’t concerned by this technicality, who was going to see me anyway? Compared to the fire roads & jeep tracks that Vik and Scott have ridden before, my route was way, way gnarlier. Steep single-track climbs, tight corners through the trees, and rock gardens made for a hardcore effort. If I can make it through this fully loaded I should be able to survive anything else. So was my thinking anyways.

Moots loaded for a bikepack…

Because I am new to bike packing (BP), I scrolled over and reviewed some articles on Vik’s blog to gain an idea of how to pack my steed. Besides experience, the other deficit I was working against was a lack of equipment. I possess no bike bags at all but was adamant that I not use a backpack. It is my belief that the bike is the beast and therefore it carries the burden. To my rescue flew my friends, I brought my bike to Scott (founder of Porcelain Rocket), he looked over my bike, thanks again Tim, and dug out an older model seatbag, as-well-as a barbag and small frame bag. The frame bag fit very well for not being designed for the Moots at all. During the ride I was still able to access my bottles and food was always within reach.

Seatbag…

Taking some cues from Vik I loaded the Moots as follows:

Seat Bag           

  • First-Aid kit
  • Fire kit, toiletries
  • clothes (thermo layer, spare socks,toque, & gloves)
  • Dinner food stuffs, & two beers
  • Lashed on top is a canteen & on the bottom is my rain jacket.

Frame bag…

Frame Bag            

  • Pump + tools & spare tube
  • Big bag of assorted candies & Clif bars

Bar bag…

Bar Bag           

  • Main compartment = sleeping bag & Hennessey hammock.

Auxiliary front bag (white) contained:

  • more energy bars & shot-blocks
  • camera & tiny tripod
  • phone
  • compass
  • headlamp
  • leatherman
  • Lashed between the two bags was a ¾ length sleeping pad
  • Secured on the outside was my camp axe & big knife


Cockpit view of bar bag…

For visibility I mounted battery lights on the bars and on the rear so that if it got dark on me I wouldn’t be in a bind. After a mild pavement ride out of town Grant and I reached the trailhead and the real riding commenced. Weighted against the roughness of the trail I was pleasantly surprised on how the bike handled. With no prior experience the positives of a 29” wheel were obvious. Riding out was done at a fast clip and many sections of trails were devoured by my big wheels.

Old and new wagon wheels…

After trying various techniques and watching my riding partner, Grant, I settled on the “Monster Truck” method. Every time a rough patch of roots or rocks came along I headed for the smoothest possible line and let the wheels flow over the terrain. Just attack the trail and float over. Climbs required a decent cadence to maintain momentum but if you kept on top of the gear then getting up at speed was a virtual guarantee. Another element that was an immense help was the titanium frame with the YBB addition. For those who don’t know “YBB” is Moots’ patented soft-tail design that adds a small amount of give in the rear frame triangle. Besides smoothing out the rough stuff, I detected that the frame actually gave me a bit of extra spring to spin up the hills. By compressing and extending in sync with my pedal strokes the frame assisted my efforts with a little extra forward nudging. No doubt the titanium’s flex characteristics also contributed. When Moots makes a bike in 650B with a YBB my wallet’s going to start to twitch. {editor’s note – Moots does full custom bikes A-Man so you can have your 650B Moots dream machine anytime you like… 😉 }

Titanium bikepacking goodness…

Previously whenever I went on a bike camping trip I would utilize my racks and panniers to carry my gear. Adding these parts brought the weight up of my bike significantly, increased the complexity, and widened my trail profile. In contrast, bike bags are far lighter than a rack/pannier combo, much quieter over rough terrain, and I could slip through narrow obstacles at speed with ease. The added benefit of these bags is it keeps your amount of gear to minimum, which helps in keeping the weight down. I’ll never completely get rid of my racks or panniers but the next time I ride into the woods I hope to be using a compliment of Scott’s fine bags. Racks and panniers will still be used on my town bikes for getting groceries or running errands.

Top of the World…

After a brief rest at the summit, accompanied by some cold beers, Grant rode off down the trail whilst I remained to set up my camp. Many times I found a good spacing of trees that were the right thickness for the hammock webbing straps but they were all too close to the trail. Now camping is not allowed in this park and I didn’t want any hassles from the authorities or other militant park users so I hiked the Moots deep into the woods. Close to the edge of a cliff I found my little Shangri-La.

Time to hang out…

Close to the cliff edge so the view would be amazing, good Arbutus stands to support my hammock, and best of all, totally hidden from the main trail. Because I was a hammock newbie it took me a try or two to get the set-up correct. Luckily the instructions are printed on the stuff sack for the hammock. My knot skills did not include the type that’s recommended for tying off but I had an ace up my sleeve.  Because I was within cell range I pulled up YouTube and searched for instructions on tying the knots. Armed with my newfound knowledge I made short work of the set-up and was swinging in no time. Technology is at a very high level of usefulness these days. Total set-up time from un-bagging to stuffing in the sleeping pad and bag was just over 15 minutes. More experienced hammock campers are way faster than that.

Chillaxing with a view…

After setting up it was time to relax and explore my little slice of paradise. A small clearing near camp ended at a steep drop off but was clear of trees and offered a dense panorama of the Malahat Hwy., precipitous hills overflowing with trees, and a beautiful view of the beginning of the Saanich Inlet. I ate my dinner sandwich sitting on an arbutus branch overlooking this domain. After battling my way to the summit and then running around to find a spot to set up I was on low ebb. With the retreating rays I to retreated into my shelter to read a little with my headlamp before drifting way from consciousness.

Killer slug…

I must have been comfortable because when I finally awoke it was after 7am! The sun was up and the canopy was full of bird song. Squirrels roamed through camp but largely ignored me. After about two hours of dawdling about I forced myself to break camp and head for nearby civilization. On the way out I was having a bit too much fun on the single-track and managed to get quite lost.

Lost, but having a great time!

The one thing I can virtually guarantee when I go riding is that I’ll inevitably lose my way. Finally I emerged from the woods and commenced the paved/gravel stages that would bring me home. Because I was so close to home I decided to continue riding north, rather than south-east to my door, and hook up with the Lochside Trail for some gravel action. Another delightful section was the Saanich Centennial Trail, which breaks off in a couple of directions of various names. I took several sections before linking up to the Lochside and rambling home. After about 7hrs of riding and approximately 70-80kms I was home to rest.

A rocky road…

From the comfort of my favorite chair I was able to reflect on what worked for me, what I liked, and what didn’t do it for me:

Pros:            

  • Bags are lighter than racks & panniers
  • Much quieter than panniers being rattled around on racks
  •  Easier access to food and other items while riding
  •  Handling is much less affected with bags
  •  Forces you to pack smartly = no unnecessary stuff
  •  Bicycle profile remains narrow = good for tight trail sections & aerodynamics
  •   Versatile = Seat & Bar bags will mount on any bike
  • Hammocks pack very small & is self contained, no poles or extra parts, very comfortable to sleep in & great ventilation

Light is right…

Cons:           

  • Main frame bag is a custom fit & may not fit other frames as well
  • Storage is limited (but ultimately is that a con? Decide for yourself)
  • Points of access can be limited
  • A hammock requires two specific things to set-up, tree spacing & thickness of stock webbing straps (I saw many more spots where I could have just dropped a tent down)
  • Cramped for space & not possible to bring some gear inside with you to keep out of the elements

One of the best parts of a tour – the delicious meal at the end…


Gravel Pimp – Dead End Recon…

23 06 2012

Enjoying a ride along the coast…

If you haven’t read the Extreme Recon chapter of the Gravel Pimp Saga than click here and read it so you know what’s shaking.

Our last attempt to pioneer a dirt route between Lake Cowichan and Victoria BC failed when we were diverted by a security zone around the Victoria Water Supply Area [aka The DMZ]. Not to be deterred we retreated back to Gravel Pimp HQ and reviewed our maps then plotted a new route.

Pink is the new route – click for larger…

The map above shows our planned route in pink. The green route is what we had hoped to ride last time when we were stopped. As you can see the new route is a significant detour, but better a few extra KMs of dirt than riding pavement home. Where the pink and green tracks meet at the bottom of the map is Leectown and the top of the Galloping Goose MUP.

Our bikes ready to roll…

Trying to schedule a ride between everyone’s work obligations and weather was a challenge, but finally we found a window that worked. A-Man couldn’t make this edition of Gravel Pimping, but he has a sweet Moots 29er ready for next time!

Carbo-loading…

We had a  few beers to adequately prepare for the rigors of the ride….;)

Scott enjoying some sunshine…

Rolling down the Goose MUP was pleasant as always.

My trusty steed got a new frame bag that actually fits!…=)

Our first night’s goal was modest since we didn’t want to try any of the hard route finding until the AM. So in true Gravel Pimp style we detoured to a pub and enjoyed some additional beers as well as some burgers.

Home sweet home…

We took advantage of the Barnes Station Shelter, but threw up the mesh tents as bug nets. You can tell spring is here when you can snack just by riding with your mouth open!

Is it morning already?

Scott was super keen to get rolling so he kicked me out of my sleeping bag at 5am. Breakfast was a variety of cold snacks I had stuffed into my front pouch [aka the Feed Bag].

You can’t bitch about the scenery – Sooke River…

Our first goal was finding Leechtown – an old mining settlement that would mark the start of the hard route finding.

Scott finds Leechtown…

Finding Leechtown was just an easy few km spin up the Goose MUP to its end. Although we realized we were on the wrong side of the Sooke River so we needed to do some ‘schwacking!

It’s all gone green…

We followed some forest tracks to the river.

There was a bit of walking…

A little hike-a-bike never hurt anyone.

Even Scott had to walk…

The nice thing about finding your way next to a river is that you can’t get lost!

Crossing the river part 1…

Although the Sooke River is pretty intense further downstream it was broken up into a few manageable creeks where we were trying to cross.

The might Sooke River has been tamed!

The ‘schwacking continued after the water crossing.

Need any spare parts…

We started to see derelict machinery, but we never did see any old buildings.

Denied by the DMZ again!

As we scouted out route options we encountered the first dead end at the Evil Red DMZ Gate. These gates are all around the water supply area. Happily the guards didn’t notice us and Scott wasn’t beaten half to death this time.

Checking out some equipment we may need later!

Denied by the DMZ we tried some of the logging roads that ran west along the Leech River.

Scott is thinking about a kickstand for the Hunter…

But, before we did anything hasty it was time for a snack break.

I like snack breaks!

I streamlined my food supply – leaving three elements at home – fruit, sandwiches and M&Ms. Mistake! Next time I will have all three with me. Recon work is tough and I got hungrier than I thought I would. I didn’t run out of food, but what I was putting in my mouth just didn’t seem to satisfy me as well as it should.

Steep loose gravel…

After the DMZ gate our first attempt was a rough double track that was clearly made with a bulldozer and never improved for frequent vehicle traffic. The big chunky rocks were hard to ride up and scary to ride down. It was fairly “climby”, but it had a nice remote feel that would have made for a great bikepacking route.

It was good – until it ended!

Sadly the road just ended. We don’t mind a hike-a-bike, but not 30kms of it over a mountain range!

Guess what?

As we backtracked we tried a side trail that had some potential, but it ended as well.

Clear cut…

We ended up back at Leechtown and headed west on a well used logging road on the south side of the Leech River. This was shown on our map as connecting up with the other logging roads we needed to get to further north.

Yup…it’s true….denied again!

But as we found out that was a lie. The road just stopped at a scree slope that was hard to walk across let alone carry a bike across.

Overgrown double track…

Although it didn’t go anywhere this section of the ride had some super fun overgrown double track to pedal. Life could be worse than riding your bike in the forest looking for promising bikepacking routes….;)

Hmmm….why is Scott walking back?

There was a turn off from the main road that went higher and we hoped got around the rock slide. So we cranked uphill and found that it did go a bit further, but it also dead ended despite being shown on our map as continuing onwards.

Scott immersion testing his Rohloff!

So defeated yet again we rode back to Leechtown to regroup. Our time and energy levels were running low as we still had a few hours of riding back home to Victoria. The most promising option was straight up a mountain north of Leechtown and neither of us could handle the thought of 15kms of grinding uphill only to be denied. So we decided it was time to roll for home.

Nearly road kill…

Scott bunny hopped over a snake on the Galloping Goose so we stopped and herded him off the trail so he could live to slither another day!

Another snack stop…

The roll home was pleasant, but to be honest we’re over the Goose MUP. It’s a convenient way to get out of town on dirt, but after you’ve ridden it 12 times in a year you want to load a movie on the iPhone just to stay awake! Don’t get me wrong it’s far better than hoovering exhaust fumes on the side of Hwy 14 while dodging trucks. I’m just a spoiled whiner!

Pink was the theoretical route – dark red the actual GPS track…

All told the ride was ~145kms long with ~1200m elevation gain. Progress was slower and harder than those stats would indicate with a lot of walking & talking to workout what to do next. While it wasn’t successful in finding a route north to Lake Cowichan we did expand our knowledge of the area and confirm that the maps we have are “optimistic” when it comes to the logging roads. You can click on either map to enlarge them.

Our full route – click for larger…

So what’s next?

  • Craig Main is a logging road up a mountain north of Leechtown that connects through based on our maps. It would provide the most direct route so it’s the next priority for recon effort.
  • Butler Main is a logging road that heads west, but offers the potential of then branching north where we want to go. It’s not very direct, but if Craig Main doesn’t go it’s next.
  • After those two options are explored if we aren’t successful I think our next move is to go back to the north side of the route and explore south as far as we can. Eventually we’ll have GPS tracks for everything reasonably close we can ride and we can figure out if an extreme bushwack is possible to connect the route.

Of course my hope is that there is a nice logging road through to Lake Cowichan, but so far such a beast has been elusive. Time will tell!


On One Scandal 29er Bikepacking Mk2…

15 06 2012

My On One Scandal…

I’ve been honing my On One Scandal 29er bikepacking setup over the last while. Here are the recent changes:

Longer cockpit…

The longer TT is nice for getting low and fast when the trail allows for higher speed riding. It’s not bad for non-technical mountain biking, but I really didn’t enjoy the longer stem when riding the steep techy trails at Hartland. For the most part the Scandal is my bikepacking rig so that’s okay. If I press it into duty as a MTB I’ll have to swap in the shorter stem again.

Another view…

Having a frame bag that actually fits the bike is a beautiful thing. The zippers work more easily and it just makes me smile. That can be important when I am sitting on the ground sweating after reaching yet another hot/dusty route recon dead end…you need something to lift your spirits…;)

Fork mounted water bottle cage…

It’s lovely not to have anything on my back when riding hard so having a place to store water on the bike was a challenge. I sometimes stash a large bottle in the framebag, but in that location it’s competing with other important gear. So I used hose clamps to attach to standard water bottle cages to the legs of my Rock Shox Reba fork. They’ve been solid even over some crazy bumpy terrain and with a DIY retention cord my bottles have not jumped ship. I don’t bother taking them off the bike when not needed, but I could as the install/removal process is quick.

Scandal and Hunter…

Overall the On One Scandal 29er has proven to be a decent choice as a first 29er MTB and a bikepacking rig. For ~$400 it’s a great value in a versatile frame. I don’t think I could have done better for that price. For the time being I don’t see any more changes in the works.

If you are wondering what I have packed in each bag click here.


The Rocket goes Pimp!

27 05 2012

Scott’s new bar bag…

I guess my white Porcelain Rocket bikepacking bag bling was so hot Scott decided to make some for himself.

Scott’s pimped out Hunter 29er…

He works incredibly hard making bags for other cyclists so he deserves to rock some sweet gear himself. I think he’s showing some restraint by keeping his old black frame bag.

A lovely white seatbag…

Fresh bikepacking gear looks silly. Time to get that stuff dirty!


Gravel Pimping ain’t cheap…

12 05 2012

My On One Scandal with Porcelain Rocket bags…

On our recent bikepacking recon adventure Scott mentioned that the white fabric used in my Porcelain Rocket bike bags was really, really, really expensive and that folks that were ordering their bags with that fabric based on seeing my bags here on this blog might be shocked at the extra cost.

So I’m letting you know that if you want to rock the white uber cool Gravel Pimp look it’s gonna cost you!

Same bags on my Surly Pugsley…

If you are on a budget he’s got a ton of different fabrics and can steer you towards something equally awesome, but considerably cheaper.

Personally I was a little shocked when I found out what the bags cost in white, but after having them in my hot little hands for a few months I’d spend the $$ and do it all over again. I definitely advise anyone wanting bike bags to skip basic black and consider a vibrant colour or camo.

Black is so 2009!….=-) It’s time to party like it’s 2012 baby!


Bro Session…

10 05 2012

A-Man at the start of Shock Treatment…

Man and dog…

Scott leading the pack…

Lazy up and over…

A-Man tackles the infamous HUMP of doom…

Scott HUMPing…

Grooving in the woods…

Geeking out…

Got Jones?

The Nomad…

Snacking…

Fun times in the trees…

Wall to…

….Wall


Rob English – Custom 29er MTB…

7 04 2012

Rob English is part of the Bike Friday team that made my favourite folding bike the Tikit. He also builds custom bikes and in this video he chats about a custom 29er MTB he built with some pretty neat details.


Jeff Jones Spaceframe bike porn…

29 03 2012

My photo of Scott on the Jeff Jones homepage...


Deep Forest…

25 03 2012

My MTB animal totem is the Angry Squirrel...

Friday afternoon Kurt and Scott dropped by and we hit the road for Hartland Mountain Bike Park.

Spaceframe in action...

Scott is once again schooling us on a rigid mountain bike…this time single speed just to make it interesting for him!

Kurt in the forest...

We managed to pry Kurt away from his books long enough to shred some dirt.

Scott demonstrates a semi-fat roll in...

I’m already thinking of modifying Scott’s brakes so they are 25% engaged all the time he is riding.

I may be slow, but I dress to impress!

Of course I now have the excuse that I’m slow because I have to haul around 8lbs of photo gear to document the ride.

The start of the aptly named "Get Wet" Trail...

For the time being I just jam my DSLR into a basic camera bag which I then jam into my 10yr old Camelback Transalp backpack. I’m always guarding the rear of the pack uphill or downhill so the extra weight/bulk isn’t a big deal.

Happy to be back aboard the Nomad...

Having to pull off the backpack and get the camera out every time isn’t ideal, but I’m keeping my eyes open for a dedicated MTB hydration & camera pack. They exist, but are $$$ so I want to make the right choice and my first priority is a fast prime lens when I’ve got some money saved.

The Dream Team...

It’s good that Kurt came out for a ride so that Scott had someone a bit faster to ride with. Not only do they have more fun, but it takes the pressure off me to catch up as fast as possible so I can enjoy  bumping around in the forest at my own pace.

My typical perspective on Kurt as he rides away from me...

When I run into folks that know me from my blog I often get surprised looks on the trail wondering why I am not the uber biker they thought I was based on my photos and ride reports. So this is me setting the record straight. I’m slow!

Kurt doing his mountain goat impression...

You may have already figured out that my mountain bike photography interest continentally allows for me to stop and catch my breathe while I snap some action shots of other folks riding.

Heading downhill...

Luckily both Scott and Kurt are willing stunt models who don’t mind riding the same section of trail again and again while I futz with the camera.

Wait for me!

Although I love my Pugsley it sure was nice to have 6″+ of suspension at both ends to smooth out the trail and make riding significantly less tiring. My Nomad even goes uphill really well so there isn’t much downside to this bike.

Scott and his buddy Big Fat Larry...

We spent a lot of time messing about on Fun Trail at Hartland which deserves its name.

I'm loving the dark green landscape we have to play in...

I agreed to put away the camera once we got to the top of Mount Work so we could enjoy the ride down without interruptions.

Wall ride...

I may have broken my promise once…

Hartland glamour shot...

…or twice!

Time to play...

Once back at the bottom we rolled over to Two Trees Trail and a few rocks that are always fun to play on.

Kurt going wild...

Bikes, rocks and body armour make for a fun time…=-)

Scott showing how you roll rigid...

Everyone took a few laps on Scott’s Jones Spaceframe.

I'm no Porcelain Rocket...

The Jones is a very fun bike that likes to roll over obstacles and loft its front wheel on command.

Whoa Nellie!

Scott’s got it geared 25T x 36T which seems awfully tall for us weaker folks, but he makes it fly and he rolls smoothly down even the roughest trails. We’re not sure how he does it, but it’s fun to watch!

Two thumbs up for another great ride...


Jones Spaceframe vs. Surly Pugsley…

20 03 2012

My Jonesly/Jugsley with a Jones Spaceframe...

The Jeff Jones Spaceframe mountain bike with wild truss fork is a design I’ve been keen to check out for a while. Besides the usual issues of cost and storage the Jones presents a few new problems that slow any bicycle acquisition plans:

  1. totally unique design makes you ask how is it going to ride?
  2. relatively high cost for a production bike makes you want to make the right choice.
  3. one size frame that is on the small side of what I’d normally get makes me wonder if it will even fit.
  4. rare as hell so forget about a test ride.
  5. Jeff Jones advocates the use of a 5″ front tire/wheel, but since he uses a proprietary front hub/fork any wheel you build will only work on this bike…so do you build it as a 29er of a half-fat? Trying both is expensive.

A boy and his new bike...

As luck would have it Scott “Porcelain Rocket” Felter is even a bigger bike geek than me. So it’s not completely shocking to me that he just built up a shinny new Jones steel Spaceframe. I was very happy to hear this both because I am stoked for a buddy to get some new wheels and because I would finally get to ride a fabled Jones mountain bike and see if everything I read online was real.

What Jeff has to say about his design...

So what’s so special about a Jones Spaceframe design?

  • Jeff has been perfecting his concept for years building custom bikes for himself and customers.
  • his custom business was so successful he no longer takes any orders due to an excessive waiting list.
  • he has a rabidly loyal following of customers on his custom and production bikes.
  • Jeff designs complete bikes including frame/fork and components. This allows him to refine his designs in a way that a frame builder can’t.
  • His bikes put your weight way back over the rear wheel for a light front end that is easy to loft over obstacles.
  • a short TT and swept back bars put you well behind the front wheel sitting, but as you stand your weight moves forward to keep the front wheel planted on steep climbs.
  • an ultra stiff fork with low trail front end and 135 wide front hub makes for very precise steering.
  • clearance for widest 29er tires in rear and Surly’s 5″ Big Fat Larry on the front.
  • EBB for IGH or SS use, but gears are and option as well.
  • design of frame is supposed to help smooth out ride by transferring bump forces away from rider.

It’s too early to confirm or deny the performance claims of the Jones design, but you can agree that Jeff has built a very unique mountain bike that’s pushing the boundaries of the industry paradigm on the trails. I can also say that it’s a beautiful bike to behold in person with lovely lines and a purposeful stance.

She's a playful steed...

Once you get over the unique design you’ll rightly ask yourself what kind of riding is this bike for? Based on the limited experience I’ve had with it so far and what I’ve read about other folks’ rides online I’d characterize it as an all mountain play bike. It’s capable of rolling along smooth XC trails just fine and when the trail gets steep and techy it has the rearward weight bias, leverage at the wide bars and stiff front end to drop down anything you have the balls to try. Now it’s fully rigid – fat front not withstanding – so you will be going slow and choosing your line with care when my Nomad’s 6″ of travel wil allow it to bomb the gnar without a second thought. I don’t think that’s a better or worse option – they are just two different ways to come at a problem.

Lazy gets a spin...

Whether or not the Jones design makes sense for you will depend on where you ride and who you ride with. I don’t ride for the fastest average speed or most miles of trail complete per session. I ride to smile!

So far the Jones has been a smile factory...

Scott set his Jones up single speed with a fat front and Jones Loop H-bars to stay true to the Jones philosophy. It looks like an ideal bike for our local riding which is slow and techy with traction issues and lots of wet dirt for munching an expensive drivetrain. Scott’s a monster so there is no doubt he’ll still crush us mere mortals no matter what he rides so I’m keen to see how normal folks like Sharon, A-Man and myself fare on the Jones.

Ponesly?, Jugsley?, Jonesly?

I couldn’t help, but notice some similarities between my Pugsley and Scott’s Jones:

  • fat front
  • Loop H-bars
  • Pug = 23.4″ eff TT vs. 23″ on Jones
  • Pug wheelbase = 42.6″ vs 42″ for Jones
  • Pug and Jones = 72.0 deg seattube angle
  • Pug HT angle = 70.5 & Jones = 70.0
  • Pug fork offset = 43mm & 55mm for Jones

With a seatback seatpost [or jamming my SA saddle all the way back] to simulate the rearward weight bias of the Jones my Pugsley gets pretty close to the same numbers. The biggest difference is the Jones has lower trail than the Pugsley plus the Pug has a fat rear tire as well.

Cousins?

Before Jeff Jones sends out a hit squad to silence my heresy…;-) I am not suggesting my Pugsley is the same as a Jones. I can’t do anything about the fork offset of the Pugsley so the handling will always be different. All I am saying is that it seems possible to replicate some of the elements of the Jones design in a Pugsley to, hopefully, end up with a fun playful bike that makes a good companion for a Jones on our local trails.

Time for some Nates...

As amazing as the Jones Spaceframe & truss fork combo is the Pugsley has some advantages of its own:

  • can be run full fat, half fat or full 29er
  • Pugsley complete can be had for about the same price as Jones Spaceframe/truss fork/Loop H-bar
  • full fat means a Pugsley can be used in snow/sand where a skinny Jones 29er rear would sink
  • you can use a suspension fork on a Pugsley
  • a stock Pugsley comes setup with a versatile XC geometry and cockpit position
  • if you want you can Jones-ify a Pugsley with Loop H-bars and a setback seatpost
To take advantage of  the full fat option I put some Surly Nate tires on my Pugsley. This gives me a huge rear tire footprint for traction on our sloppy trails and some passive suspension effect due to the 4″ wide low pressure tire.

Jones Loop H-bars...

You can see in the picture above how far back your hands are using the Loop H-bars vs. a flat bar or XC riser bar. This shortens your effective top tube quite a bit so you need to either buy a larger frame if you want the typical centered XC/touring body position or you need to get a setback seatpost and push your body weight further over the rear wheel. The later option allows for using both positions depending on the mission at hand. When I get a chance I’ll try the rear biased body position in sand/snow to see if less weight on the front wheel compromises the traction at that end on flat terrain. If it doesn’t that would be awesome to not have to switch back and forth.

Ramming the SA all the way back...

Without a setback seatpost the best I could do was ramming my SA saddle all the way back…sadly this bent the rails….I’m too chicken to verify how badly….hopefully I didn’t trash and expensive saddle…=-( I’ll be getting this issue sorted as soon as possible.

Scott throwing the Jones around...

Let’s face it talk is cheap…what we need is some back to back trail riding testing. Don’t worry we are happy to oblige…=-)

Dropping into the Green Machine...


Santa Cruz 29er Spew…

29 02 2012


Scandal 29er Upgrades…

19 02 2012

Crank Brothers Joplin 4 dropper seatpost & remote kit...

I’m definitely sold on the idea of an adjustable height seatpost for technical mountain biking and one of the selling points of the On One Scandal 29er frame I bought was a 31.6mm seat tube for dropper compatibility.

Joplin 4 with under the saddle lever...

To be honest I wanted a Rockshox Reverb, but I came across this CB Joplin for less than 50% of a Reverb and figured it was enough post for my needs on this bike.

Bar mounted Joplin remote kit...

I scored the remote kit for the Joplin because I may want that level of ease of use, but I’m going to try the under the seat lever to start with. I prefer the Crank Brothers remote to the Kind Shock remote on my Nomad so if I don’t end up using this remote on the Scandal it will go on my other mountain bike.

180mm disc rotor upgrade...

I’m not one of these guys that has disc brake rotor insecurity issues. For example – my Surly Big Dummy cargo bike rolls on a 160mm front rotor even with heavy loads. However, our mountain bike trails here on the South Shore of Vancouver Island are very very steep and I’ve been wanting a bit more front end braking on the Scandal so I upgraded to a 180mm rotor.

Size matters...

I had a slightly different 29er planned when I bought the RockShox Reba RLT with 9mm dropouts. Which is why I didn’t get the tapered steered tube & 15mm QR version. I decided to stiffen up the front end a bit by using a DT Swiss RWS 9mm skewer vs. the standard 5mm QR I started with. Luckily my Hope front hub will work with just about any fork axle standard out there.

Big and beautiful...

The last upgrade is swapping in one of my old Selle Anatomica leather saddles. I’m expecting some epic long MTB rides in Sedona and my butt loves the SA saddle!

Joplin 4 with Selle Anatomica saddle...


My 29er MTB Bikepacking Setup…

17 02 2012

My 29er On One Scandal mountain bike setup with Porcelain Rocket bags...

Okay first off I beter say that the frame bag you see here is from my Surly Pugsley and doesn’t really fit the Scandal properly. So don’t think if you get a framebag from Scott at Porcelain Rocket that it will fit so poorly. I just jammed the bag into this bike while I wait for Scott to build me a custom bag that will fit this frame perfectly.

The key to a great bikepacking setup is the ability to carry the gear you need on your bike with as little impediment to how it rides off pavement. You can fit panniers and racks to most mountain bikes, but they end up being the weak spot in the bike so you have to slow way down and ride cautiously lest you break something. Your handling is also compromised so that technical riding becomes hard to impossible. When Kurt and I rode our Pugsleys on the CDN GDR with racks and panniers we had fun, but I vowed never to bike tour on dirt with that setup again – unless there was some overwhelming reason to carry that much gear.

Same Porcelain Rocket bags on my Surly Pugsley...

You can see the same bags on my Surly Pugsley above and appreciate how well the frame bag fits the bike it was custom built for. This is a typical bikepacking setup and is designed to keep the weight securely attached to the bike as close to the center of mass as possible. The bags have a limited carrying capacity which forces you to load them with only what you need and the bike remains “thin” which aids in sneaking between obstacles and facilities the seemly inevitable pushing you have to do. If you are fast enough it also keeps wind resistance to a minimum.

So a word about why soft bags are such a great idea for a dirt road or mountain bike trail tour. Standard panniers and racks are stiff and heavy. They hard mount to your bike which means every bump gets transmitted very efficiently from your bike to the racks and then to the panniers. Eventually that will break something. Even if you are lucky and don’t break your gear you will spend your whole trip babying it always taking the easiest/smoothest path to reduce the beating your bike takes. With soft bags the attachment points to your bike are secure, but they can give a little which absorbs the shocks they see without stressing out and breaking them. The upside is that you can ride your mountain bike like a mountain bike while carrying food, water and shelter.

Seat bag...

Seat Bag:

  • thermarest sleeping pad
  •  bivy sack/tent [no poles]/hammock
  • jacket when not being worn
  • this bag acts like a fender when riding in wet conditions

Frame bag...

Frame Bag:

  • bike tools
  • pump
  • spare tube
  • food
  • stove/pot/fuel/lighter
  • mini first aid kit

Top tube bag...

Top Tube Bag:

  • bike light battery
  • camera
  • snacks

Front roll bag...

Front Roll Bag:

  • sleeping bag & spare camp clothes inside 10L OR dry bag
  • tent poles outside bag if you got ’em

Front bag pocket...

Front Bag Pocket:

  • snacks
  • cellphone
  • wallet
  • headlamp
  • maps

Dinotte XML-3 bike light...

Front End Bike Stuff:

  • Dinotte XML-3 900 lumen light [waterproof enough power for full night at low/high power for fast downhill runs]
  • Ergon grips for hand comfort
  • bar ends for extra hand positions
  • 180mm disc brake to slow down on steep hills with a load
  • 100mm suspension fork to allow for faster speeds on rough surfaces
  • BMX platform pedals for lots of grip in whatever shoes I want to wear

The back end...

Rear End Bike Stuff:

  • red blinky for nighttime visibility on the trail and road
  • Alfine 11 IGH for wide range weatherproof drivetrain and strong undished rear wheel
  • wide supple 29er tires with enough tread for loose conditions climbing
  • wide strong rims
  • 160mm disc brake [more than enough braking at this end]
  • comfortable leather saddle

On the trail...

Stuff I need to add:

  • water bottle cages on fork [w/ hose clamps]
  • fuel bottle cage under downtube [w/ hose clamps] for longer trips only
  • GPS [w/bar mount] when needed

Backpack or no backpack?

Backpack?

I ride my mountain bike with a hydration pack when on the trails. I used a slightly larger daypack for the ride out to the Sooke Potholes to carry water and some spare clothes. In general I think it’s better to keep the gear off your back and on the bike. Firstly it forces you to be ruthless with what you are carrying and secondly it’s much more comfortable. Plus it means that for specific trips where you need to carry a lot of food, water or clothing you have an option that isn’t already full of stuff.

I’ll be adding water bottle cages to my fork legs so I don’t need a hydration pack for fluids. I’ll be a bit more efficient about the clothes I bring and carry any spare clothes I am not wearing on my bike – either in the front roll bag or the seat bag. That will mean I can skip a backpack for most trips and if I really do need some extra cargo capacity I can add in a pack at that point.

Stylish and comfortable...

Clothing

It’s hard to be too specific about clothing since so much depends on where you ride, what time of the year it is and what the forecast is for. Here is a sample of what I might bring on a ride here on Vancouver Island:

  • toque [never leave home without it]
  • buff neck warmer
  • sunglasses
  • fleece gloves
  • rain jacket [as breathable as possible means less sweat and you can wear it most of the time]
  • wool top [maybe 2 if it’s cool so I can layer]
  • synthetic capris
  • wool 3/4 tights
  • wool leg warmers
  • wool socks
  • shoes
  • rain chaps and rain glove covers