The last ride of the Lazy Randonneur…

26 06 2013
Adios Amigos...

Adios Amigos…

This blog has run out of space and I’ve sold my rando bike so I can use the $$ to buy a new 650B MTB and so I can focus my bikey energies on mountain biking & dirt touring. It seemed like an appropriate time to let the Lazy Randonneur ride off into the sunset.

Unless WordPress gets mean this blog should continue to exist as a reference for you and me. You can still access my old Lazy Rando Blog over at Blogger if you want to go way back to 2006.

I figure 7yrs and ~2500 posts of the Lazy Randonneur has been a great run. Thanks for reading! πŸ™‚

Bye!

Bye!

I’ve got some other feeds that are still rolling along, but at a slower speed. The links are below. Don’t expect regular updates though – they’ll happen sporadically.

Where did the trail go?

Where did the trail go?

One practical note – I’m going to keep updating the links on this blog. It’s got a ton of good ones and I don’t see any reason to move them to a new site.


Beer Can Stove…

24 06 2013

Rivers pointed me at this stove. The simplest DIY beer can stove I’ve ever seen. πŸ˜‰


South Tyrol…

21 06 2013


Gotthard by Bus…

20 06 2013


Visiting the Queen…

19 06 2013


Ride Positive…

18 06 2013


Haute Route…

16 06 2013


Zermatt Switzerland…

14 06 2013


OR Rader Pocket Cap…

12 06 2013
My 50 Mision cap...

My 50 Mision cap…

Often I tour with just a baseball cap on my head – particularly if it’s going to be hot all the time. It’s light, comfortable and keeps the sun out of my eyes. Oh yeah it stops people from noticing my common bad hair days on tour! πŸ˜‰

Skid lid...

Skid lid…

If I judge that the tour has higher than normal risks of crashing [ie. technical MTBing or I am riding with Scott] I’ll wear a helmet.

My trusty toque...

My trusty toque…

I almost always have a toque with me on tour. Canada gets cold at night and in the AM even in the summer. Plus they make everyone look so sexy [see image above]… πŸ˜‰

OR cap...

OR cap…

A toque folds up and can be crammed in any nook or cranny. The issue with a normal baseball cap is where do you stash it in bikepacking bags when not in use? It’s easy to screw up the brim and then you look goofy. If you are a goofy looking guy like me you don’t want to go further in that direction.

So small...

So small…

One option is a packable cap like this OR Radar Pocket Cap. It folds down into a small thin package that can be carried in a bag pocket without coming back out looking goofy. It weighs 50g for the gram counters and is made of rugged quick dry Β nylon fabric.

Blue Steel? - perhaps not!

Blue Steel? – perhaps not!

This cap is non-adjustable and although I would normally wear a large or XL hat I’m fine in a medium size for the Radar. So beware if you are ordering online. It’s best to try this bad boy on or go one size smaller than normal.

If you are in Canada MEC.ca sells these.

These caps come in black, bright blue and tan.


Ryan Leech – Just riding…

11 06 2013


Bikepacking Clothing…

10 06 2013
Last month in BC...

Last month in BC…

My bike touring wardrobe has evolved over the last decade to the point where I wear/pack pretty much the same items on every tour with some minor variations for weather.

  • microfibre capris [warm when it’s cool and cool when it’s warm]
  • wool socks [longer in the winter and shorter in the summer] x 2pr
  • synthetic boxer briefs [quick dry – I never wear padded bike shorts]
  • synthetic running t-shirt [quick dry great when it’s hot]
  • wool zip neck LS top [adds warmth and can be vented well to adjust temperatures]
  • ballcap
  • softshell jacket [windproof and water resistant]
  • toque
  • fleece gloves
  • MTB gloves
  • buff neck warmer
  • running tights
  • trail runners
  • puffy jacket [great when it gets cold]
  • sunglasses

This gives me a wide range of comfortable temperatures on tour without having to pack too much. The next to skin items can be washed and dried reasonably easily on the ride if needed. Everything layers well if needed on cold day.

Patagonia puffy jacket...

Patagonia puffy jacket…

My puffy jacket is one of the Patagonia synthetic models. I don’t recall which one exactly. It packs small and adds a lot of warmth. I wear it to bed if my sleeping bag is under gunned. It’s fantastic to wear on chilly mountain mornings while eating and packing. If the day starts with a significant downhill I’ll leave this on to ward off a chill until the day warms up or I start to climb.

You’ll notice most of my clothes are high visibility black or charcoal for safety. I bucked that trend here with a red puffer. πŸ˜‰

There are lots of variations on the puffy jacket theme. I’d highly recommend you try one.

What a Big Dummy...

What a Big Dummy…

I’m wearing a MEC Ferrata soft shell jacket in the pic above. I love it. Very durable, windproof and used to resist rain a bit before I trashed the DWR coating. Comfortable to wear next to skin and looks reasonable off the bike if you are in a city. I’ve really thrashed this jacket and it is holding up fine. It should last 20yrs no problem.

Pretty much every outdoor clothing company now offers several soft shell options. Check ’em out they are worth a look.

I’m also wearing a runner’s baseball cap. They fold up pretty small for packing and have a flexible brim that resists permanently getting tweaked thus looking goofy.

I went with high visibility black for safety of course!

Two approaches to rain gear style...

Two approaches to rain gear style…

I hate rain on tour so I usually plan trips for windows of good weather and/or locations that seldom get rain. However, sometimes you gotta hit the road when it’s likely to get wet. In those cases I’ll change what I pack a bit:

  • delete soft shell and replace with light rain jacket
  • delete trail runners and replace with waterproof footwear + mini gaiters to keep socks dry
  • or keep trail runners and add goretex socks to keep feet dry
  • add rain legs chaps
  • add in waterproof over gloves
  • probably add in an additional spare set of socks and gloves
  • swap sunglasses for ones with interchangeable clear lenses
Staying warm...

Staying warm…

When it’s hot I ride in a running t-shirt and capris. Ideally with some short/lightweight socks on. Often the evening turns chilly – especially in camp. So I add some running tights and long wool socks to my capris. I put on the soft shell jacket – possibly with the LS wool top underneath. I also slip on the toque.

If it gets really cold I add the puffy jacket, neck warmer and fleece gloves.

Of course a fire always helps morale when it’s cold as well!

Bug-tastic!

Bug-tastic!

I try to skip tour is horribly buggy areas, but if that’s unavoidable I’ll make the following changes to the packing list:

  • add in bug hat
  • add in mesh bug jacket
  • delete capris and add in full length pants [possibly with zip off legs if it will be hot]

I hate bug spray so I pack mesh clothing and use that to keep the critters at bay.

Wear water shoes in the desert?

Wearing water shoes in the desert?

I’ve posted separately about touring footwear, but I’ll recap here:

  • trail runners [light, comfy and easy to walk in]
  • 5.10 MTB shoes [heavy, rugged, comfortable, excellent pedal grip, great to walk in, but very slow to dry]
  • water shoes [fast drying, breathable, comfortable, but limited support]
  • light hikers [heavy, waterproof, comfortable, great for hike-a-bike, but can get hot]

I never use clip-in bike shoes for tours. Their off the bike performance sucks and I like being able to jump off the bike without a second thought and run an errand or clamber up a hill to get a photo.


Chris Akrigg – Five….

9 06 2013


Bronson Play…

7 06 2013


Surly Pugsley in the Rivendell Reader circa 2007…

7 06 2013
Click to jump to Rivendell bikes...

Click to jump to Rivendell bikes…

I found this 2007 Rivendell Reader article about the Surly Pugsley floating about the interweb. I figured it was worth archiving and reposting for historical interest.

You can read it in higher resolution at these links:

If you think it’s cool Rivendell was hip to fatbikes back in 2007 jump to their website and see what cool gear they have that might be of interest to you.

BTW – if you are from Rivendell Bikes and want these scans pulled down to protect your copyright just drop me a comment and I will do so.


Bike First Aid…

6 06 2013
First Aid kits...

First Aid kits…

I rarely need a first aid kit when I ride, but the odd time I have needed it [for someone else] I was glad to have it with me. I’m no good at remembering to move F/A kits between packs and bags. So I bought 4 or 5 of these small kits and I leave one in each pack or bag I use regularly. They are cheap and they’ll last a long time before needing replacement so they are a good investment.

I also have a large first aid kit in my truck.

Knowing how to do CPR is an essential skill you need to go with your first aid kit.


Knolly Chilcotin in the PNW…

5 06 2013

If Knolly builds a 650 Chilcotin it will certainly be on my short list for new mountain bikes.


JS’ AZT 300 Report…

4 06 2013
John Schilling & the AZT...

John Schilling & the AZT…

John Schilling posted an excellent AZT 300 bikepacking race report on his blog with loads of photos. If you like multi-day mountain bike racing this report is worth a read.


The Lazy Bikepacking Packing Strategy…

3 06 2013
The Lazy Rig...

The Lazy Rig…

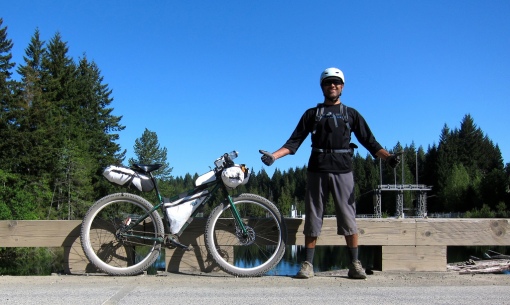
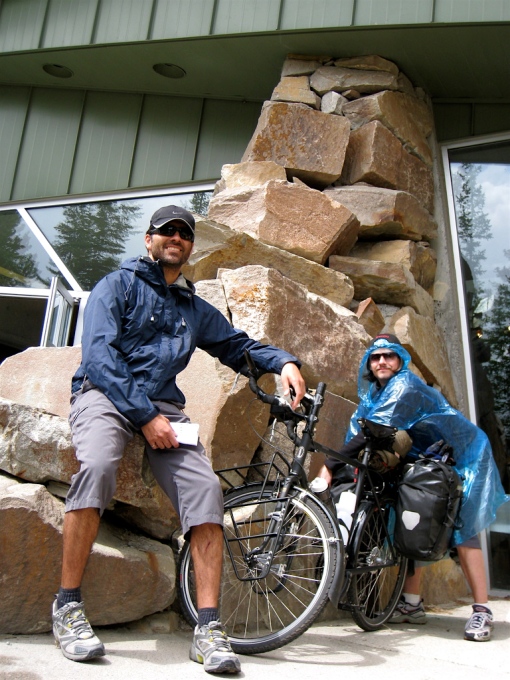
My bikepacking setup has proven to be versatile and capable for my Vancouver Island adventures. I’m using Porcelain Rocket softbags attached to the bike plus a backpack on my body. Some people prefer to ride without a backpack, but I find it adds a lot of flexibility to the mix and if you don’t overload it there isn’t much comfort penalty.

Frame Bag

I use the frame bag for as much of the heavy stuff as I can. This keeps the weight centred and low on the bike in the bag that is most securely attached to the frame.

  • bike tools
  • pump
  • spare tube
  • paper maps
  • TP + hand sanitizer + lighter
  • F/A kit
  • pot + stove + fuel + spork + windscreen + stove stand

Top Tube Bag

I use little TT bag for small items I want easy access to and items that would get lost in the bigger frame bag.

  • chap stick
  • eye drops
  • water purification drops
  • power bar
  • headlamp
  • mini-leatherman

Bar Roll

The main bar roll carries light and bulky items.

  • sleeping bag inside a 10L OR dry bag
  • spare clothes stuffed on either side [items I don’t generally want to access while riding]

Front Pouch

The front pouch is a where I put snacks I want to eat while riding and other items I want to get at during the day that would get lost or damaged in the frame bag.

  • cell phone [or in pack]
  • spare GPS batteries
  • snacks [nuts, dried fruit, energy bars, etc…]
  • tent poles carried between front pouch and bar roll

Seat Bag

The seat bag is also for bulky light items and I tend to stuff a jacket in there that I might use on and off during the day since I find accessing this bag pretty easy at a stop.

  • sleeping pad
  • tent pegs
  • tent body & fly
  • jacket [soft shell, puffy jacket or rain jacket depending what’s going on]
Getting ready to camp...

Getting ready to camp…

Backpack

I use my backpack for carrying food primarily. I also use it for holding extra water on a particularly hot day or stretch where resupply is not easy. I’ll either carry a 2L folded up water bag for that purpose if I know it’s going to happen a bunch or I’ll just buy a plastic water bottle of the needed size at a gas station, used it and then get rid of it if the extra water is just needed for a portion of the trip.

Generally my backpack is not full and I try to keep the weight down for comfort. This means I have extra capacity if something happens or I need to haul more than I planned on for a bit. Since I carry food in the pack and sometimes extra water I know that this bag will usually get lighter and lighter on a trip.

When I camp I transfer all my food items from the frame bags to the backpack for the night and then do whatever is needed with respect to animal food safety. A backpack is great for this purpose.

If I end up in a town or want to go for an off bike hike I can transfer items from the backpack to the bike and vice versa so I have a daypack to use.

I carry my camera either in the pack [DSLR] and/or a point-and-shoot on the waist belt in a pouch which is uber convenient and keeps the camera insulated from a lot of the vibration a camera on the bike would experience. I also keep my money, cell phone, credit cards and ID in my pack. That way I can jump off the bike and not leave anything too valuable on it. I will sometimes pop off my GPS and stash it in my pack on these occassions.

I size the pack for the trip based on how much food/water I’ll need. If I’m carrying the DSLR I’ll upsize for that as well.

  • food [besides snacks for day]
  • extra water in water bag or recyclable plastic bottle
  • ID, cash, credit cards
  • cell phone if not using it for something during ride
  • extra stove fuel if needed
  • tooth paste + brush
  • any other toiletries [usually none]

Two benefits of carry food/extra water in a backpack are:

  1. your bike bags aren’t always over stuffed which makes accessing them and pulling out what you need easy. This is also kind to the zippers and other attachment points.
  2. when you have to hike-a-bike carrying some of the weight on your back is nice when the terrain is loose/steep/challenging.

Water

Running out of water is no fun, but carrying too much water is a heavy tiring mistake as well. Ideally I a carry just what I need between resupply opportunities plus a bit extra as a safety margin. I always ride with a water bottle on the stem. That is very easy to access so I drink when needed as I ride. I’ve got a 1.5L bottle attached to the dowtube which I decant into the stem bottle as needed. I will carry a water bag in my backpack or a plastic water bottle depending on what the specifics of the tour are.

I always have water purification drops with me and refill bottles as they empty and I pass a water source – usually a fast flowing creek. Cycling through my bottles allows the purification process to happen while I ride and I always have water that’s ready to go.

If I really need a ton of water on a tour I can attach water bottle cages to each fork leg and throw a 2nd water bag into the pack. At the moment I can’t imagine needing more than 7.6L of water between resupply stops.

  • stem mounted bottle [0.7L]
  • DT mounted bottle [1.5L]
  • water bag in pack [2L]
  • 2nd water bag in pack [2L]
  • 2 water bottles on fork [1.4L]

Of course I always use the water in my backpack to replenish the stem mounted bottle so the weight on my back decreases as fast as possible.

I haven’t toured with a hydration bladder in my pack. On a really hot tour I would consider doing so and using the bladder instead of one of the water bags.

OMM rack on my Krampus...

OMM rack on my Krampus…

Rear Rack and Panniers

I’ve got a trip planned for this summer that requires I carry food and stove fuel for a long stretch for myself and a few other people. My backpack strategy is fine for a solo effort, but doesn’t work so well when the load gets heavy. So for those situations I attach a rear rack and panniers.

There are downsides to using a rear rack and panniers, but the benefit is you can haul a lot of stuff on the bike easily. Since this extra weight is mostly food and stove fuel it will get lighter as the trip progresses mitigating a lot of the negatives of running with a rack.

In the picture above I’m test fitting an Old Man Mountain Cold Springs rear rack to my Krampus. I didn’t bother attaching the front struts, but they will go on no problem using p-clips on the seatstays. I’ll be using Ortlieb panniers with the OMM rack.

I don’t expect to use a rear rack much for bikepacking trips, but it’s good to know it works and is available when needed.


Santa Cruz Solo…

2 06 2013

125mm travel FS VPP 650B goodness… πŸ˜‰


Vernon,BC…

1 06 2013
Time for some mainland biking...

Time for some mainland biking…

I’ll be in Vernon, BC 7-12 June and I am bringing my Nomad. I’ll be hitting up some shop rides and sampling the trails on my own. If anyone reading is from the Vernon area and wants to show me the trails that would be great. πŸ™‚