Herman loves the Tikit…

30 09 2010

One Way Tikit...

I flew into Victoria last night and wanted to meet up with Sharon and some friends at Herman’s Jazz Club. I rode my fixed gear Bike Friday Tikit downtown so I could throw it into Sharon’s Mini for the drive home.  The ride into town was fun. I sometimes forget how fast this bike can go when I’m in the mood to crank hard.  I blew past everyone on the MUP and I’m sure I left a few wondering what in the heck I was riding.  When I got to Herman’s I folded up the Tikit and rolled it inside.  The place was nicely decorated and the crowd was busy listening to Amy Thiesen sing.  I wasn’t sure where to leave the Tikit.  As I hunted around for a good spot an older fellow [Herman??] came rushing over. I assumed he was going to give me grief for bringing a bike inside so I prepared my best I-don’t-have-a-lock-and-my-bike-is-clean-and-tiny-and-I-plan-on-spending-$$$-here story.  But, before I could even start he shows me a handy little nook that was perfect for the Tikit and comments on my “cool bike”.

Herman’s Jazz Club is really nice and because they let me bring my folder inside I could enjoy a beer and the show without worrying about my bike locked outside.

Score another great Tikit moment!

Liberating my Tikit from Sharon's Mini...


NWT Gearing Part 3

27 09 2010

My lovely chainring has to go...

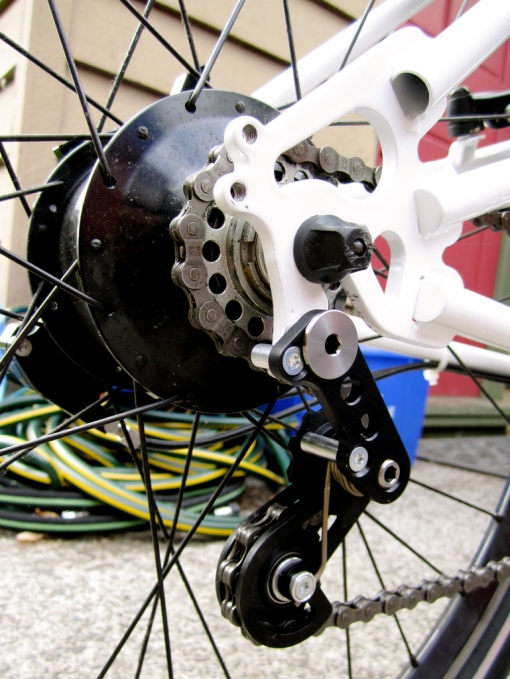
Every time I ride my Bike Friday NWT [New World Tourist] I wish I had higher gearing.  This bike is setup with an 8 spd IGH which is enough gear range when adjusted correctly, but at the moment it’s so low I’m pretty much only using gear 6,7 & 8.

Why so low?

Well I used to think I needed lower gears than I actually did.  Riding a fixed gear makes that point very clear.  By comparison an 8 spd gear box that lets you coast seems positively outrageously luxurious. Even for a touring bike.

The only real problem is I really dig the [expensive!] Sugino 46T ring on the NWT and I can’t fit a smaller cog at the rear with the Surly Singlenator chain tensioner.  So I need to dig through my box of rings and grab any ugly 53T or 54T ring and slap it on.

This blog post will hopefully serve to shame me enough that I actually make it happen!


CETMA Bar Swap

26 09 2010

CETMA sporting KORE riser bar...

I didn’t love the swept back city bars I tried on my first iteration of my CETMA cargo bike build. I felt like I wanted a wider bar for more leverage so I grabbed a KORE mountain bike riser bar I had kicking around.  The install was super easy and I definitely like these bars better.

Old and the new bars...

I was surprised to find out the swept back bars were actually wider then the new bars.  I guess wider was not what I was after…the difference in sweep must have made more difference than I had expected.

Ergon Rohloff Avid happiness...

So far so good.  I’ll keep the KORE bars and given them a good test run.


Sharon’s Bike MK2

25 09 2010

Not pretty to look at, but a pretty useful bike now...

Sharon has become a fulltime cyclist since moving to Victoria.  Going from the occasional Sunday pleasure ride to biking for 90% of her transportation needs. Her bike has evolved accordingly as she’s been demanding more performance from it. Since just about everyone who wants to get into [or back into] cycling has an old MTB gathering dust in the corner or can score one from a friend/relative who does I thought I’d post about the upgrades we’ve done.  Given that this isn’t a kick ass bike to begin with we didn’t want to invest too much $$ in it so almost everything we’ve added/changed has been low cost and/or can be moved to her next bike when this one bites the dust.

Stock front wheel & brakes...

We left her front wheel alone as even an average 26″ MTB wheel is plenty strong for commuter use.  No need for slow heavy knobbies so Specialized Fat Boy 26 x 1.5″ slicks went on.  These are some low cost, but fast and comfy tires…highly recommended.  She hasn’t had a flat with these babies all summer even with daily about town use. Fenders are a must so some Planet Bike Cascadia Hybrid 700c fenders were installed.  They fit fine on the 26″ wheel and provide great coverage with the long rubber mudflap.  Getting them to work with a suspension fork required some DIY action, but it wasn’t too hard. So far they’ve stayed in place nicely with no attention needed.  Sharon likes the extra comfort of the suspension fork so we will keep it going as long as we can without investing any major $$$.

Rack and fenders for all weather hauling...

With only one bolt available at the back end the rack and fender had to share.  The rack is a $40 unit from MEC. So far it’s held up well. I love how low the rear fender mudflap goes – very nice if you are riding behind this bike in the rain.  The back wheel is stock – like the front it’s just fine with some new rubber on it.

Controls, lights and horn...

Sharon likes the Thorn comfort bars on her bike, but we started running out of room for goodies.  Bars a couple inches above saddle height makes for a comfortable riding position.

Ergon Grips...

Ergon Grips are a no brainer.  If you have flat/riser bars and don’t have Ergon Grips go get some!

The Stock brake levers and shifters...

The original Shimano shifters and brake levers work well and are reliable. 7spd chains and cassettes are cheap to replace.

Dual 1W headlights...

The MUP near our house is unlit and pitch black at night so Sharon needs more than visibility lighting. She needs to see far enough down the road at 20kph to avoid obstacles.  These 1W Planet Bike LEDs were cheap and came in a kit with a free Superflash taillight.  They are doing the job, but I can see some better lighting in Sharon’s future.  A dynohub and light would be ideal, but pricey so we’re considering battery powered LEDs as well. Since we started to run out of handlebar space I put a Thorn Accessory Bar on her bike to hold the lights down and out of the way.

Thorn Accessory Bar...

There is still some more room on the accessory bar for more lights and now there is room on the bar for the coffee cup holder sitting on my workbench I’m supposed to install.

Handy mirror...

A rearview mirror is very useful for riding around town.

AirZound mega horn...

The AirZound air horn is a cheap way to get even the biggest truck’s attention.  It’s louder than the horn in my F150!  It’s also under $20 and can be refilled.  I put air into Sharon’s horn about a week and she hasn’t run out yet.

AirZound reservoir...

You can attach the air reservoir anywhere on the bike you like, but it slides right into a water bottle cage.

Trusty v-brakes...

I put new pads on the stock v-brakes.  They are getting a bit hard to adjust so we may score some $25 Shimano Deore v-brakes to replace them in the next while.

Planet Bike Superflash...

Not much to say about the Planet Bike Superflash other than it’s cheap and works great.   MEC sells kits with a PB 1W headlight and a Superflash for the same price as just a 1W headlight – nice!  I’m going to mount a 2nd Superflash on Sharon’s rear rack for redundancy.

Specialized saddle...

Sharon scored a basic Specialized saddle from Bow Cycle that she likes.

Platform pedals...

Plastic platform pedals work well and we’ll keep ’em turning until they wear out when they’ll get replaced with some nicer metal BMX pedals.

MTB triple...

The mountain bike triple crankset up front provides a wide useful gear range.

7 speed cassette...

7 speeds at the back are more than enough – plus I have a box full of derailleurs and cassettes since my conversion to the world of IGHs so I’ll be able to keep this bike running for a long time without going to the LBS.

$3 bell...

The AirZound is a great way to get a driver’s attention, but you won’t make any friends with it on the MUP so a regular bicycle bell is a good idea.

Rack mounted 2nd taillight...

Writing this post I was so ashamed I  hadn’t gotten a 2nd taillight mounted on Sharon’s bike that I got off my ass I put one on.  The ziptie keeps the light from sliding off sideways [not exactly a factory mount] and keeps sketchy people from stealing it [as easily].


Velomobile Commute

24 09 2010


Water Ladies…

23 09 2010

Sharon passing under the wooden MUP bridge near our place...

I took Sharon and Tanya out for a SUP and sea kayak session on the gorge waterway near our house.  Tanya had never been in a kayak or on a SUP and Sharon doesn’t have a lot of paddling experience.  So I spent some time working on the basic strokes to get them moving efficiently.

Tanya SUPing it up!

They did great on both platforms.  I think Sharon really liked being in a kayak and since I’m a faster paddler when I go SUPing next time we’ll try her in a kayak to even things out.  Tanya didn’t fall in the water on the SUP and got the hang of a decent propulsion stroke really quickly.

The colours of paddling...

I’m really happy to have such a tame place to take new water people so they can learn and get confident in a relaxing spot before tackling more challenging conditions.

My SUP photos from the last year or so are here on Flickr.


Arkel Pannier Reviews

22 09 2010

My Surly LHT with an Arkel Switchback pannier/backpack mounted...

I’ve reviewed 4 Arkel bike bags and panniers over at my Bow Cycle Blog:


MEC Nathan Review…

21 09 2010

MEC Nathan merino wool long sleeve top...

I was at MEC a few weeks ago looking for some affordable cozy tops to make me comfortable in Victoria’s cool damp fall weather – without looking like a sports ninja or like I was about to summit K2!  The merino wool Nathan long sleeve top shown in the photo above is new for this fall and caught my eye.

I’ve been a bit leery of wool primarily due to the fact it requires more careful washing/drying then the synthetic fabrics I’m used to.  Wool garments also tended to cost more.  On the upside it is hard to beat the feel of fine wool on your skin and it has the not insignificant benefit of not getting stinky fast.  Wool seems to be warm when you are cold and cool when you are hot…not sure how it does that, but it’s handy when your activity levels shift frequently or the sun pops out and starts baking you.

Specs [from MEC product page]:

“Light and versatile, this long-sleeved top is a must for travel. The merino wool is comfortable, not itchy, and insulates against heat and cold. The natural structure of the fibres is mechanically moisture-wicking, which keeps you warm when wet and prevents dampness against the skin. It also has natural anti-microbial properties.”

  • Made of 100% merino wool
  • Subtle print on chest
  • Tailored with raglan sleeves
  • Regular fit
  • weight 225g [7.9 oz] for medium
  • cost $56cdn

I’ve been really pleased with this top so far.  It feels great against the skin and it takes more than a sweaty bike ride to make it stinky!  I don’t heat my office so in the morning it’s a bit chilly until my big monitor and CPU heat up my workspace.  The Nathan is perfect layered under a hoodie and when things start to warm up around noon it doesn’t get overly hot.

I have really long arms and wide shoulders with a scrawny torso.  I don’t fit Patagonia tops that well since the arms are too short and the shoulders not wide enough unless I size up to the point there is a huge amount of excess fabric around my middle.  MEC clothing on the other hand has an idea fit for me.  I wore the Nathan while tearing down my deck and on several long bike rides.  It has held up well to my abuse without getting any snags or holding any stains.

I’ve washed this top a few times and been careful to wash on cold and not dry it, but I’m worried it will eventually either get washed on warm or put in the dryer.  I’m also not sure how to deal with it if I take it traveling.  In Mexico and India, for example, it’s impossible to tell ladies how to do laundry and you won’t know what they’ve done until you get it back.  So unless you hand wash it every time in your sink you risk fatal damage to anything delicate.  Kind of too bad because the anti-stink properties would be handy on backpacking type adventures.

BTW – MEC also has a great organic cotton hoodie [called the Sherpa] which is not on their website, but should be available in all the stores and potentially also if you call to order stuff.  It’s $39 and very basic, but it’s a great compliment to the Nathan and is also a really cozy piece.


Priority parking at the Canoe Brewpub…

20 09 2010


Our bikes locked safely under cover and out of sight...

Sharon and I went to the Canoe Brewpub near the inner harbour in Victoria BC.  They were showing two windsurfing movies so a bunch of us decided to check them out.  The building and view on the waterfront is lovely, but the neighbourhood is a bit sketchy with lots of tweaked out drug addicts roaming the area aimlessly.  I didn’t want to leave our bikes out on the street even with locks so I asked the bartender if I could put them in a fenced in patio area that was being used to store chairs and BBQs until next summer.  He said no and directed me to a bike rack.

The bike rack was 65′ from the building in an unlit area and partially obscured from view.  This didn’t appeal to me and I was starting to wish we had driven a car!  Then I spotted another unused patio alcove around the far side of the building with a BBQ and some chairs stored in it.  It even had a roof to keep our bikes dry…score!  I locked our bikes to a table [didn’t ask this time…lesson learned]  and didn’t even bother taking off the expensive lights or tools.  The best bike lock in the world is a dark night and your bikes being well out of sight from the wanderings of sketchy people.

We did get the stink eye from a waitress as we walked in, but nobody asked us to move our bikes.  Ultimately I guess you have to accept that average people don’t understand or care too much about bike security so you have to be a little agressive in taking care of your needs – as long as you don’t cause a problem for anyone else.


One of the movies we went to see...

The Canoe Brewpub was huge and nicely decorated.  We sat in the pub area which was one of about 4 areas including a massive patio on the waterfront.  The movies were shown on about 10 different screens throughout the building which was great for getting a good view, but the lack of a single focal point meant that we didn’t meet any new people from the local windsports community.  Without the tell tale wetsuits it wasn’t possible to be sure who was here for the movies or just a drink with friends on a Sunday evening.


Beer & friends...

Their in house micro brews were tasty and inexpensive when purchased in bulk.  The food was fresh and delicious.  Add on to that great service and you’ll understand why we’ll be back.  I bet the patio is crazy busy in the summer, but since we live here all year round we’ll score any warm sunny tourist free days over the winter!


Excellent environmental ethic...

Overall we had a great time other than parking the bikes.  Given their strong commitment to the environment I’m hoping they’ll do something positive about where customers can lock their bikes.  I’ll chat with the manager next time I swing by.


Sean and Sharon enjoying the ambience...

The windsurfing movies were awesome and kudos to the Canoe Brewpub for picking up the tab for the movie showing expenses.  WE definitely appreciate it and are looking forward to the kiteboarding movie night!…=-)


Rain Drops & Cobwebs…

19 09 2010

I don't love cobwebs in my yard...

however, after it rains or there is a heavy dew...

if you take the time to notice...

they are stunning.


Kiteboarding Books

18 09 2010

My two favourite kiteboarding books...

I like reading books to learn things.  When I started kiteboarding [aka kitesurfing] I did some searching online and ordered any books that looked decent.  Only two of them actually are worth buying/reading: Kitesurfing – The Complete Guide and Kitesurfing in the Waves – The Complete Guide. Both are authored by Kristin Boese and Christian Spreckel and available on Amazon.

A typical page showing how to turn around...

If you are just starting out you can skip the “…in the waves..” book for now and just get the straight up Kitesurfing one.  Inside you’ll find both theory and loads of examples with a nice balance of text and high quality images.

How rip up the waves...

You’ll find the writing clear and to the point.  The layout of these books is logical and attractive.  They are bound well and made of thick high quality paper so they should survive many road trips.  Best of all, unlike DVDs or videos, they don’t require a laptop or TV to enjoy them so you can crack them open on the beach between sessions for some tips on the next trick you want to learn.


Sexy First Aid

17 09 2010

As an active outdoors person I like to keep my first aid skills up to date….you might want to watch these videos and brush up on them as well…

I advise getting as much practice as possible. It never hurts….=-)


Not so RadBot 1000 Review…

16 09 2010

RadBot and Superflash...

I had read several good reviews online about the Portland Design Works Radbot 1000most notably on Kent Petersen’s blog.  So when I needed some new lights and I saw the RadBot 1000 for sale at MEC for the same $17.50 as my usual goto lights [Planet Bike Superflash] I got two of them thinking I would be stoked by them.  A month later I am here to report that the RadBot isn’t as Rad as I had hoped…=-(

Before I get into its lack of Rad-ness I should say that:

  • it’s not actually a bad taillight
  • it works
  • it’s bright

Side view...

If you gave me a free case of them I’d use them – something I wouldn’t do if they were junk.  If the Planet Bike Superflash didn’t exist I’d probably be using RadBots and be happy about it.

Would I do this with RadBots?...no!

However, you can tell I didn’t love them because:

  • I put them on bikes I ride at night the least
  • I won’t buy more
  • I didn’t recommend them to a friend when she was buying lights at MEC recently…I helped her buy some Superflashes.

What didn’t I like?  Well compared to my PB Superflashes:

  • the RB is huge
  • it’s damn ugly
  • the mounting clip flexes more and seems flimsier
  • I don’t like the two blinky options it has
  • I don’t think brighter is better [at some point] when it comes to bike lights
  • I can’t operate the function button while riding the bike and get reliable results like I can the Superflash’s much simpler switch [yes I do vary how my lights are working on the fly!]
  • I do think more lights are better and I tend to run 2+ lights aimed at different spots down the road so all of these issues are exacerbated for me
  • I wear reflective material on me and don’t want to have big ugly reflectors on my bikes
  • requires tools to open and swap batteries

Top view...

I should also point out that I’ve never had my Superflashes turn off nor have I had them malfunction due to getting wet. They have never jumped ship on me. The Superflash is so bright and the flashing mode is so similar to police and emergency vehicle strobes that I have had cars slow and stop on more than one occasion when I was pulled over to the side of the road fixing something.  If I mis-aim my Superflashes it’s easy to blind drivers and other cyclists.  Do I need a light that is twice as bright?  Not really.

You may then ask if I don’t need brighter lights why do I use two Superflashes on many of my bikes? :

  • LEDs shoot light out down a narrow cone so they are at peak brightness only from a small angle which makes have two different aiming points [typically I use a near and far setting] valuable.
  • having two lights means one can stop working/fall off/run out of power or I can lend one to someone I’m riding with and still have some lighting back there.
  • sometimes I’m in the mood for a taillight freak show and 3 lights pulsing away is more freaky than 1 or 2!

Just to reiterate although I prefer the Planet Bike Superflash the RadBot 1000 is not a fail…It’s just not as good as I had hoped. I own two and will continue to use them [until I manage to give them away to needy friends!!] so I may change my mind…if so I will report back.

Some RadBot tidbits:

  • RadBot 1000’s will clip to your bike using the Planet Bike Superflash mounting bracket if that matters to you.
  • There is a fender mounted version of the RadBot.
  • the RadBot comes with a mounting bracket that will fit European [ie. Tubus] racks.


Surly Rolling Darryl Pugsley Rim

15 09 2010

Holey Fatness!

I’m liking the new fat rim from Surly called the Darryl:

“82mm width for maximum footprint with fat tires

Single wall with cutouts make it light – some changes to the current cutouts shown at Eurobike (and above) are currently being discussed

64 hole drilling makes one rim work for symmetrical and offset (Pugsley) builds

MSRP: $TBA we’ll let you know

ETA: November / December”


Goodbye Sexy!

15 09 2010

I love the curve!

Gone is that sexy curved top tube on the Big Dummy…=-(  The new version is no less practical and probably cheaper to manufacture, but not nearly as nice to look at.  I’m glad my green beast is in good shape for many more years of cargo biking and other heavy duty mischief!

Straight edge!

Surly sez:

“No more swoopy top tube (come on, get over it.) New straight top tube increases torsional stiffness, reduces weight (a little), and is theoretically stronger. Standover is about the same.

New spec brings complete bike price down – Deore, Truvativ, etc – still Surly approved for durability.

Frameset MSRP: $950  Complete bike MSRP: $1840

ETA: Frames November, Bikes December”


Santa Cruz Nomad + Hammerschmidt Review [Lite]

14 09 2010

Santa Cruz Nomad + Hammerschmidt

I added a Hammerschmidt All Mountain 2 speed bottom bracket/crankset to my Santa Cruz Nomad mountain bike in the spring.  I’ve been holding off posting a review until I got more miles on the bike.  Unfortunately my kiteboarding addiction has seriously cut into my dirt biking time this summer so I have’t racked up quite as many hours on the dirt as I would like, but I figure I’ll share my impressions so far and then post again later in the winter.

My Santa Cruz Nomad before the Hammerschmidt....

The photo above shows my Nomad with double chainring and long-cage SRAM X-9.  I replaced the big ring with a bash guard since it was rarely used. I liked this setup except that I found on technical terrain I was shifting the front derailleur up and down a lot which was sometimes a challenge and rarely using the rear derailleur since I needed a big jump in gear range fast.  This meant a lot of blown shifts and a lot of chain slap as all that slack bounced around in the small ring where I stayed a lot.

Click on the image above to jump to my post discussing the details of the Hammerschmidt and the pros/cons I anticipated before using the system.

All Mountain Hammerschmidt...

I got the All Mountain version of the Hammerschmidt because it provides the equivalent of a 24T [direct drive] and 38T [over drive] chain ring setup.  I chose the 170mm crank length to replace the 175mm SLX cranks on my bike because the Nomad sits very low to the ground and I thought shorter cranks would reduce the number of times I whack my pedals into rocks.

I want to thank Ken at Power in Motion for giving me a pro deal on the Hammerschmidt and wading through all the technical stuff so that we got in the right combination of parts.

SRAM X-9 short-cage derailleur...

I replaced the SRAM X-9 long-cage derailleur with the short-cage version since I didn’t need to take up nearly as much chain slack with a single front ring and to benefit from faster shifting and less chain slap.

Awesome ground clearance...

You need to face the BB shell and the ISCG tabs when installing a Hammerschmidt so everything is aligned properly. Not tools I have at home so I decided to let Bow Cycle do the install. They did a great job installing the Hammerschmidt, X-0 shifter and X-9 derailleur.

If you are keen to do your own install you can get a LBS to face the BB shell and ISCG tabs for you then follow the instructions in the video above.

SRAM X-0 Hammerschmidt shifter...

What do I think so far?:

  • I love the instant front shifting
  • you get a high and a low gear exactly when you want it
  • you can shift when stopped
  • you can shift when coasting
  • you can shift when pedaling backwards
  • you can shift when pedaling forwards
  • as a result you are always in the gear you want
  • HS shifts are fast and crisp
  • rear shifts with the short-cage derailleur are also faster and more reliable
  • nice chainline allows full use of rear cassette in high and low gear range
  • you get less chain bounce when bombing downhill and the chain can’t come off the front ring
  • no performance change in low range as it’s direct drive
  • some noticeable drag in high range
  • very loud angry bee noise when freewheeling or back pedaling in high range
  • extra weight over stock setup not noticeable when riding
  • tons of ground clearance for HS vs. a normal chain ring setup
  • no suspension problems or pedal feedback from running in the small ring all the time
  • no problems or adjustments req’d so far

Nice tight clean chain line...

Should you get a Hammerschmidt?

Leaving cost out of it I would recommend the Hammerschmidt to anyone who rides technical all mountain style offroad terrain as long as you are not bothered by the downsides noted below.  As the trail goes up and down again and again you’ll love the ease with which you shift the HS from high to low and back. It performs well and solves a real problem in mountain biking.  It seems robust and all reports I’ve read indicate its low maintenance.

Unfortunately the MSRP in Canada is ~$1000+install – yikes!  Although I love it so far I can’t say that there is a $1000 improvement over the stock setup.  I wouldn’t have given it a shot if I had paid full retail and even at pro-deal costs it was a big decision.  If your bike is working fine just stick with what you have.  If you need new cranks/front derailleur/shifter then it’s probably worth it if you can hunt around for a deal.

The best plan is to buy a new bike with a Hammerschmidt installed as an OEM component.  You’ll get the HS for the lowest price point and the bike will be designed with the HS in mind.  I think the HS works so well you’ll see more and more all mountain bikes designed for it.

Downsides

Since the HS is so expensive and so unique I wanted to tackle some of the problems it has in detail so you can understand how they apply to you better:

  • The HS weighs more than the parts it replaces.  I haven’t noticed this when riding so it’s not a problem for me.  If you really care about weight you probably have a spreadsheet with the weight of every component of your bike listed so you’ll be able to figure how much extra weight the HS adds.  Chances are if you have such a spreadsheet it’s too much and if you don’t know how much your bike currently weighs it won’t bug you.
  • ISCG tabs are needed to fit a HS. Some people have made the HS work without these tabs, but this requires more than your average DIY skills and may damage both your frame and your HS so be aware of this.
  • There is noticeable drag in the HS high range 38T ring setting.  I don’t find this a problem for my mountain biking since I’m typically in the 38T high range when going downhill and I don’t really care about 5-10% efficiency loss because I’m not really going full out and a lot of the time I coast downhill. If you think you’ll be in the 38T high range a lot and/or you race this will probably be an issue for you.
  • The HS compresses your suspension as if it was in the small 24T ring all the time [which it is!].  Some suspension designs rely on different size chain rings to change the angle of the chain relative to the cassette to account for changes in weight distribution when climbing/descending.  I haven’t noticed this, but I climb aggressively and descend more passively.  So my Nomad is working optimally when I need it to and is not affected when I start going down.  If you really attack the downhills and pedal hard going down you may notice a loss in suspension performance.  Note that if you buy a bike designed for the HS this won’t be an issue.


Thanks Fairfield Bicycle Shop!

13 09 2010

Rohloff dual pulley chain tensioner...

As I was getting close to finishing my CETMA cargo bike build I realized I had forgotten to order a Rohloff dual pulley chain tensioner…*sigh*…a critical component if I wanted to get my new bike on the road.  Since no LBS have stocked Rohloff parts in my experience I usually order this stuff from the UK or the US.  Both of which would likely take 7 days to get the part to me if it was in stock.

I really wanted a Rohloff tensioner as I have had good luck with the one on my Surly Big Dummy. Additionally having two means I can always cannibalize one to get the other bike rolling and they can share spare parts.

I was on the phone with the Fairfield Bicycle Shop and had the crazy idea of asking them – “…you guys don’t have a Rohloff dual pulley chain tensioner in stock….do you?…”  The fellow I was talking to said he’d look and to my amazement he came back on the phone and said he did!  Better yet it was priced at $50 less than the best online price I could find…sweet!

I know how much hassle and cost is involved stocking obscure high-end bike parts so I definitely appreciated the significance of getting this part locally, at a great price with no shipping delay.


Belt Drive Tikit

12 09 2010

Gates belt drive on a Bike Friday Tikit...

Walter posted on his blog about adding a belt drive to a Bike Friday Tikit….looks good.  Belt drive and Shimano 11 speed Alfine IGH on a folding bike would be a great setup.  I’ll be keeping my eye on it for sure!


Friday Night Bike Ride

11 09 2010

My NWT night criterium rig...

The University of Victoria had a bike movie night [Veer – the movie!] which coincided with a regular [6yrs+] monthly mystery night bike ride.  Kurt and I decided to give it a shot.  The movie was really a interesting look into Portland bike culture with some Canadian content/influence that was fun.  The students that were watching the movie with us were all born about the time I left university myself!!!  Crazy..=-)

I rode my Bike Friday New World Tourist [NWT] with a bit of light bling for my wheels.  Kurt rode a Season Tikit with e-bike kit from Power in Motion – he’s turned into a total electric bike freak!

We met up with 40-50 riders after the movie and started our first monthly mystery night ride.  Sorry for the craptacular videos, but I figured they do a better job of giving you a feel for the event than some grainy photos.

It was super fun  to ride with a big boisterous group through the streets of Victoria and the pitch blackness of the Galloping Goose MUP.  We made it about halfway when we decided to bail.  We were enjoying the riding, but the group was stopping frequently to drink beer, smoke homemade cigarettes and socialize.  Which we didn’t mind except for the fact we were covering ground really slowly and figured we wouldn’t get to bed before 3-4am if we stuck with the ride.  Too late for me as I was up with Sharon at 6am that morning and had a long day.  As it was I only got to bed at 1am and Kurt had a longer ride home so he probably didn’t hit the sack until 130am.

We’ll definitely do the ride again – next time with a cargo bike carrying camp chairs + warm jackets for the stops and a generator driven thumping sound system!

Pimp!

Wheel lights are inexpensive electric glowstix stolen from my burning man bike kit. They are attached with clear packing tape.  I got non-stop positive comments from every group of peds we passed.  The downside to this setup is 8 finicky on/off switches to operate.  The upside is they are cheap totally effective and batteries last 50hrs+.

Solidlights 1203D powered by a Shimano dynohub...

On the totally dark MUP my Solidlights 1203D and Shimano dynohub were one of the best lights on the ride and it let me blast away from a couple times with other riders unable to follow since they couldn’t see where they were going at high speed.

Planet Bike Superflash x 2...

Two Planet Bike Superflash taillights set on steady so as not to stun riders behind me made sure nobody ran into me from behind.

BTW – video soundtrack provided by my iPhone 3GS playing in my jacket pocket while I rode.


MEC-tastic!

11 09 2010

My kingdom for a seatstay bracket!

I lost the plastic seatstay bracket from a set of Planet Bike Cascadia ATB fenders. Totally my fault…so I had a new set of fenders missing a critical piece…=-(  I ride down to MEC and ask a fellow in the bike department if they have any small parts for these fenders I can buy.  He says no and walks away from me.  I figure – oh well – time to email Planet Bike and wait a couple weeks for something to show up in my mailbox.  While I’m thinking that I notice the salesperson walking back to me with the last pair of PB Cascadia ATB fenders they have in stock. He rips open the parts bag that is attached and hands me the bracket I need.  No charge and he doesn’t even bother asking me if I had bought the fenders at MEC….=-)

Nicely done MEC…=-)


Vibram Five Fingers Review

10 09 2010

Vibram Five Fingers Flow...

Read my Vibram Five Finger KSO 2yr Review here.

Vibram Five Fingers are a very unique type of sport sandal that allows you to walk, run and play as if barefoot, but with some extra grip and protection from sharp things!  I’ve been using them since last spring and have really enjoyed the benefits of barefooting.

Theory

I’m not an expert in how the human foot works so I won’t pretend I really understand all the details of the Vibram Five Fingers.  Have a look at the videos above/below and check out the links I provide below if you are keen to learn more about the technology behind the design:

If in doubt talk to your doctor before trying these shoes out.

The Five Finger Basics

There are quite a few models of Five Fingers, but they all have some basics in common:

  • rubber Vibram sole [very grippy]
  • individual toe boxes for each toe
  • upper fabric that keeps foot it and debris out
  • heel pull tab to assist in getting them on

Models

I’ve used 3 different models of Five Fingers:

Vibram offers the Five Fingers in 11 different models.

Five Fingers Sprint...

Sprint

The Sprint is an open top Five Finger model that features a velcro strap on the instep and the heel to get a secure fit for athletic pursuits.  This is important when you can’t afford your footwear coming off such as in a river.

  • they are a great general purpose model of Five Fingers for folks that are active
  • I’ve skateboarding, run, biked, SUPed and hiked in these sandals
  • they stay securely on your feet
  • the sipped rubber sole is very grippy wet or dry
  • the open top allows debris to enter which is a problem if you use them in a place with small rocks for example – ouch!
  • the velcro strap means they take a moment longer to get on than Five Fingers that don’t have this strap

Vibram Five Fingers KSO model...

KSO

The KSO [Keep Stuff Out] model of Five Fingers is very similar to the Sprint discussed above, but it features a mesh fabric top that reaches the bottom of the ankle to keep debris out of the sandal.

  • all the points noted above for the Sprint apply, except the problem of debris getting in
  • the mesh top keep most stuff out without being hot
  • occasionally small rocks can get in and you will have to remove them, but it’s 98% better in this regard than the Sprints
  • fine sand will also get in, but this doesn’t hurt – however at some point enough gets it that it must be removed as well
  • because of the extra fabric it takes a bit more effort to get these Five Fingers on

Flow

The Flow model of Five Fingers is similar to the KSO, but the whole top fabric is made of 1.2mm neoprene for warmth and the insole is 2mm EVA to provide additional insulation.

  • these are the warmest Five Fingers I’ve tried
  • all the notes under the KSO apply, but the neoprene fabric keeps out sand and small rocks much better
  • because the material used is thicker top and bottom these fit tighter than the same size Five Fingers in the Sprint or KSO model
  • I found I couldn’t get a good fit since my toes didn’t have enough room in the toe boxes and if I bought a bigger size they’d be too loose on the rest of my feet to stay on well
  • using them in water for 2-3hrs I actually injured the skin of my toes as it became soft and was squeezed by the tight Flow toe boxes
  • Vibram needs to make the toe boxes bigger to account for the thicker materials used in this model
  • I ended up returning them and rec’d the KSO’s in exchange which fit much better

Pros

  • Once I got used to them I really enjoyed how the Five Fingers felt on my feet
  • revolutionary design with nothing similar on the market
  • I don’t wear shoes at home so it’s nice to be able to go out and feel the same way, but with some protection
  • being able to feel the ground or board under your feet lets you interact with it in a way not possible with thicker footwear [fun while walking and critical for board sports]
  • provides good protection from typical debris in the city and on the trail/beach incl scorching hot pavement/sand
  • my feet feel better when I walk barefoot a lot and the Five Fingers allow me to do more of this
  • excellent customer service [Vibram replaced my Flows with KSOs even though I was outside the warranty period]

Cons

  • requires some practice to get efficient at putting them on
  • requires some break in time to get your foot used to them if you don’t walk barefoot much
  • won’t fit odd shaped feet/toes [only one option for shape is available]
  • doesn’t provide cushioning so you have to use your body to absorb shock [not a real con, but be aware of this]
  • if debris does get inside it cannot get out unless you remove the Five Fingers and dump it out
  • debris inside is painful as you are forced to walk on it
  • durability problems [see my detailed explanation below]
  • fit problem with Flow model due to thicker material used
  • takes more time to get on and off than other sports sandals [might be a problem if you have to remove them many times a day]
  • expensive considering the materials and construction

Sharon wearing KSOs to kiteboard...

Durability Problems

My main problem with Vibram Five Fingers is that they use a sole that’s good for 3 seasons of hard use and top fabric that is not going to survive 1 season of hard use without multiple repairs.  If you use your Five Fingers for any activity where small bits of rock or other sharp debris get between the toes you will have rips forming in short order.  Unfortunately if you use these sandals anywhere other than in a yoga studio, sailboat or on pavement/grass you will have small bits of debris abrading the fabric between and around your toes.  I’ve also had the seams give out on my KSO around a couple toe boxes simply due to stress from movement of the foot.  So I’ve pulled out a needle and thread to repair my Five Fingers a few times already and expect it will continue.  The sad part is as I’m fixing the uppers the soles looks nearly minty fresh and will clearly out last the fabric on top by several years.

What Vibram should do:

  • wrap the rubber sole up between the toes so debris between the toes wears on rubber not fabric
  • use reinforced stitching on toe boxes or use all rubber toe boxes
  • make the soles thinner for better ground feel since we don’t need soles that out last the tops by a factor or 3x
  • thinner soles will also provide better board feel for surfers, SUPers, kiteboarders and land longboarders.

Why I wear Five Fingers kiteboarding...

What do I think?

I’ve got some real criticism for the Vibram Five Fingers in this review and I cannot give Vibram 2 thumbs up, but this product is so revolutionary and so much better than anything else out there for sports like kiteboarding that I’ll continue to support Vibram in the hopes they correct the main short comings of this footwear.   I use neoprene surf booties when I’m kiteboarding and the water is too cold for my Five Finger KSOs.  They work okay, but being able to feel the board underneath you and use your toes independently is a huge huge benefit so I’m always grabbing my Five Fingers if I can handle the water temperature.  A lot of kiteboarders go barefoot because of this, but at most beaches there are sharp rocks, glass, coral, barnacles or other pointy things to cut your soft feet.  I’m just not willing to deal with multiple foot injuries so I can kite barefoot and with my KSOs I can get 80% of the board feel with 0% of the injuries.

So in general I think the benefits of Five Fingers out weigh the problems.  My feet are healthier and happier wearing them and they provide excellent foot protection with most of feel of going barefoot.  Since I wear my Sprints mostly on pavement or grass they are going strong and should last a few more years.  My KSOs have only seen 1 summer of kiteboarding [which keep in mind is 99% on the water with no debris around] and have been repaired a few times.  I’ll keep them going as long as I can.  My hope is by then Vibram will have improved the design so that they last longer.  I’d love to have a pair of Flows since they are warmer and the water in Canada is cold, but until they redesign them I simply can’t use them.

Note my feet are Five Fingered!...

Should you try them?

Yes. They are worth a shot.  Start with a basic model like the Sprint, the Classic or the Moc.  Use them around the house, yard and around town to strengthen your feet and let you see what you think about the Five Finger concept.  Since this type of use doesn’t cause a lot of top fabric wear you won’t experience the durability issue I talk about.  After some use your feet will be happier and you’ll be 100% on the sizing you need. At that point you can check out some of the more sporty versions of Five Fingers.

When you get your first pair of Five Fingers wear them for a short time and then take them off.  Start with 1hr a day and increase slowly.   If you don’t walk barefoot a lot your feet will get tired and sore.  As long as it’s not acute pain this is normal. Just wear them for shorter durations until you get used to them.  Eventually you’ll be able to wear them all day.

SUP fingers!


MSR Mug Review

9 09 2010

Who knew a camping mug could be sexy?

Like all gear heads I tend to focus on my more elaborate gear – like my Rohloffs – at the expense of other equally worthy items that never seem to get posted about.  One of these items is the MSR camping mug.  I’ve used two of these for the last couple years and absolutely love them.  I’ve tried a bunch of plastic camping mugs and they all get smeggy pretty fast so that you taste the mug more than your morning tea.  I’ve taken stainless steel mugs from home camping, but they are bulky and the handle gets in the way when trying to efficiently pack your panniers.  Then one day I saw these odd shaped mugs from MSR at MEC and grabbed two.  I haven’t had my morning tea in anything else since when camping.

Shape fits the hand well and packs easily.

That last statement isn’t 100% accurate as I lost my beloved red MSR mug on my last camping weekend at Lake Nitnaht….=-(  I had a spare plastic mug [a reasonably new one] in my cooking box so I let Sharon use the one remaining MSR mug and I used the plastic one.  Arrrghhh….I tasted lots of things that were not part of my typical morning tea flavour….=-(  I also lamented that the bulky handle and round shape wasn’t as nice to use as the MSR mug I had grown fond of.  So naturally I took Sharon’s mug for round 2 and 3 of tea….=-)  Normally I’m a ladies first kind of guy [as demonstrated by my letting Sharon have my spare Canon SD870IS a couple weeks ago], but this was unbearable so I promised her that when the zombies came I’d take one for the team and let her escape as long as I got to use the last MSR mug!

Rubber coated exterior and handy sipping lid...

Since we were close to MEC yesterday I ran inside and grabbed 3 new MSR mugs so we had a couple spares!  My new Ninja Black mug looks pretty sweet.  I can’t wait to go camping…=-)

Stuff I like:

  • 370ml [12.5 fl oz] capacity for a solid cup of tea in the AM
  • 111g [3.9 oz] weight is reasonably light for bike tours
  • stainless steel is easy to clean and tasteless
  • no chemicals leeching into my tea!
  • funky shape fits the hand well and packs easily [4 will nest into a large MSR pot]
  • since they are unique it is harder to lose at a campfire party!
  • insulated to keep beverages hot or cold and hands don’t get burned/frozen
  • EVA coating is very grippy so no slipping or dropping [removable for dish washing]
  • lid fits well and allows sipping on the move
  • colour options mean you can keep your mug for personal use
  • cost $13cdn at http://www.mec.ca [not a bargain, but I enjoy using them so much I’m happy to pay it]


How to clean and dry your surf booties…

9 09 2010

Booties a necessary evil...

It’s the time of year that most of us water sports enthusiasts have to dig out our surf booties to keep our feet warm. To be perfectly honest I’ve been wearing mine on cold days this summer because I get chilly easily!  The problem is that neoprene booties don’t dry very easily and they get stinky very fast.  I like my music funky, but I prefer my footwear to be funk-free…=-)

So what do you need to do to keep your booties in good shape?

  • rinse out your booties with clean fresh water
  • dry them out completely as often as possible
  • dump out the water and let them hang upside down with the toes higher than the heels [it’s always faster to let water drip out than evaporate
  • I leave them in the sun when I can to dry out [this will shorten their lifespan due to UV damage, but I’m prioritizing quality over quantity here!]
  • use a boot dryer if you have one as long as it doesn’t get too hot [you can buy 12V DC models for use in your car]
  • if you can’t dry your booties very easily or often then rise them out with a mild vinegar/water solution or use Mirazyme to keep bacteria growth in check between uses
  • if you can buy two identical pairs of booties and alternate them so that each pair can dry out more between uses

What fatal mistakes can you make?

  • leave wet booties in the hot trunk of your car for a few days
  • put the booties somewhere uber hot to dry [next to a fire or really hot radiator]
  • lend them to a friend who lets them stay wet and get their funk on

The good news is that surf booties are relatively cheap so you can always buy new ones, but with a bit of care they should last a long time and remain stink free.

When you are shopping for neoprene footwear some brands/models are touting anti-bacterial treatments or materials.  This has been a growing trend in the footwear industry as a whole and I just haven’t noticed stark contrasts in stinkiness between my footwear that has these treatments and the ones that don’t.  I certainly don’t think it’s a bad idea, but if you are choosing between two options I’d go with the best fitting and best quality over a feature like an anti-microbial treatment.

BTW – almost all of this advice applies to any athletic footwear that gets wet a lot – such as sandals, water shoes, trail runners, hiking boots, etc…


CETMA Impressions…

8 09 2010

A shopping cart of groceries plus beer & wine...

Here are my thoughts on the CETMA cargo bike so far:

  • linkage steering is different, but easy to get used to
  • bike handles as well loaded as empty…maybe even better loaded
  • long frame offers a nice suspension effect when loaded and going over bumps
  • Schwalbe Supreme/Big Apple tires were a good choice
  • City style swept back bars are too narrow [will swap in some MTB risers for more leverage]
  • Ergon grips are comfy
  • Rohloff is working well – excellent gear range for this bike and love being able to shift at a stop
  • climbs well [for a heavy cargo bike!]
  • Selle Anatomica saddle is kind of wasted on this bike due to shorter riding distances so I’ll replace with something cheaper
  • front brake is very mushy due to long full run cable housing [not sure it’s worth the $$ to fix….may just wait until next year and put a hydraulic disc up front]
  • shorter run rear brake is fine
  • very easy to use since cargo box is ready to accept stuff without strapping it in or doing anything at all
  • center stand is awesome…very easy to deploy and retract…very stable when deployed
  • definitely a truck made for serious hauling
  • length and width take some consideration when riding in narrow or crowded areas
  • need to fit fenders

I’ll continue to post CETMA photos to Flickr here.


Starboard Windsurfing Porn…

8 09 2010


Greg’s CETMA Cargo Bike

7 09 2010

Greg's sweet CETMA cargo bike ready to roll...

I rec’d this comment from Greg about my CETMA build:

“Hello Vik. I just stumbled on your site and thought you might enjoy seeing my recent CETMA cargo build. I just posted some photos to flickr. They’re here:

http://www.flickr.com/photos/gscallon/sets/72157624781296885/

I absolutely love my new rig, and the kids love

Best regards,
-Greg”

Congrats to Greg on a lovely CETMA build.  I’m stoked to hear from other cargo bikers out there and see what rigs everyone is riding…=-)


Camera Update

7 09 2010

Canon PowerShot SD1400IS

For those that are into pocket cameras I’ve made some changes to my cameras.  I lost my Canon S870IS which has taken the majority of my blog shots the last few years…=-(  I liked it enough that I had a spare!  But, Sharon has adopted it after seeing how well it worked compared to her Sony – I’ve never tried a Sony camera I liked…mediocre photos every time….=-(  My Olympus Stylus 850SW no longer focuses reliably and after 2 trips back to Olympus for repair I have given up on it…=-(  So I was left with my Pentax Optio W20…which to its credit has never failed me, but it has also never taken great photos.

I had two thoughts in mind: 1) get a cheap decent pocket camera to tide me over until I found something I loved  2) buy a higher quality compact-ish camera like the Canon G11.

So I walked over to Best Buy [love the new neighbourhood since everything is so close!] and checked out their offerings.

I left with the Canon Powershot SD1400IS for a few reasons:

  • it was cheap
  • it used SD cards which I have a lot of
  • wide angle lens
  • specs looked decent
  • I needed a camera to keep blogging!
  • Canon has never let me down and has always produced quality photos for me so they deserve my brand loyalty

I wanted to grab a Canon G11, but didn’t because:

  • it cost double what the SD1400IS cost
  • I really need a pocket camera even if a have a larger format G11 so I needed the smaller camera regardless
  • although the G11 is clearly a better camera so far I haven’t demonstrated a tendency to use larger cameras effectively since I like to travel lightweight with minimal gear
  • I’ll keep thinking about it and grab one later if I come to the conclusion it’s a good move

All my CETMA photos and anything since then has been shot with the SD1400IS.  I’ll post a review later after more use, but I’m generally pleased with it.  Not quite as wide angled as the SD870IS I lost, but not bad. I’m enjoying the very small form factor – although using it one handed is a bit harder than my larger cameras. Overall confirms to me that Canon is the go to brand for consumer point and shoot compacts.

Future camera plans:

  • I’ll use the SD1400IS for now for my general purpose camera needs
  • I’ll use the Pentax Optio W20 for my waterproof camera needs
  • I’ve got enough Air Miles to buy a camera so I’ll see if they have a better waterproof camera option than my W20…if so I’ll grab it….I checked and they don’t offer the G11 unfortunately or that would be a no brainer!
  • I’ll ponder the G11 as I use my SD1400IS and see if it makes sense…my ability to take kiteboarding shots with my SD1400IS is limited and may motivate me to get a camera with better long range capabilities
  • I’ve tried a SLR and it’s just too big and complex to make any sense to me for use beyond my home and that’s not flexible enough
  • Ultimately I need a good pocket camera and a good waterproof pocket camera…if I had a G11 on top that would be bonus!


Sharon working on her trainer kite…

7 09 2010

Before going out on the water for a lesson Sharon was working on her kite flying skills using a trainer kite. She’s doing great and nearly ready to give up the lessons and hit the water on her own.


How to fold your kite fast…

7 09 2010

This video shows you an easy and fast way to get your kiteboard kite folded compactly. Note this will only work if you kite has a single point inflation system with a dump valve in the middle of the leading edge such as the Ocean Rodeo Rise and the Liquid Force Envy.


Guincho Beach, Portugal…

6 09 2010