NWT MK3

31 03 2009
My NWT as it rolls at the moment...

My NWT as it rolls at the moment...

I’ve made a few more changes to my NWT getting it ready for spring and the start of touring season.  It’s a sharp looking bike…=-)

How long will the tape stay white?

How long will the tape stay white?

I removed the Shimano Nexus 8 twistshifter and replaced it with a JTEK bar-end shifter designed for the Nexus8/Alfine IGHs.  It seems like a very well made product and the shifting is precise and positive.  I’ll report more about this shifter in another post.  I messed up the bar tape when I installed the JTEK shifter so I threw caution to the wind and went bling with some white bar tape.  It may not stay white that long, but it looks sweet for the moment!

Greenspeed Scorchers 40mm-406

Greenspeed Scorchers 40mm-406

I love the Greenspeed Scorcher tires on my Tikit so I got a set for the NWT.  I’m hopeful they provide the same fast and comfortable ride in this size.  I picked up the TR version which is supposed to resist flats well.  I haven’t had a single flat on my Tikit which is running TRs so it seems to be working.

Sugino 46T ring

Sugino 46T ring

I’ve been adjusting the gear range on my NWT trying to get it just right so I can tour with only a single ring up front.  A Sugino 46T ring gives me a warranty legal 2:1 ratio with my 23T cog at the back and *fingers crossed* gives me a nice blend of low end and top speed.  Only time will tell and it’s really sloppy out at the moment as spring tries to arrive so the NWT is grounded until roads are dry.

In-line barrel adjuster.

In-line barrel adjuster.

The JTEK shifter has no cable tension adjustment so I added an in-line barrel adjuster near the hub.


Snow Day

30 03 2009
More snow?....no problem!

More snow?....no problem!

We had a big dump of snow Saturday night so of course Sunday we jumped on the Pugsleys to explore the fresh new winter wonderland that is Fishcreek Provincial Park.  It was much warmer out [-4 deg to 0 deg C] than our last Pugsley mission to Fishcreek Park.  Last time we were uber cold.  This time it was sunny and mild with fresh snow and lots of trails to ride.

Kurt plots our route.

Kurt plots our route.

The warmer temps meant heavy sticky snow that offered excellent traction.  The only problem we had was veering too far off the trail an suddenly sinking in 2′ into the deep snow that had not been packed down by foot traffic/skiis all winter.

We ran into some folks that were super curious about our Pugsleys...

We ran into some folks that were super curious about our Pugsleys...

We had a great conversation with some hikers that were also bikers and had been following our tracks from earlier in the day trying to figure out what had made them.  When we doubled back to return to the C-train we ran into them and had a nice chat.  Natirally a test ride enused and many smiles.  Hopefully we’ve converted a couple more folks to the fat tire world.  Resistance is futile!…=-)

Kurt bombs the steep trail....

Kurt bombs the steep trail....

All in in all we had a great day riding our Pugsleys.  I’m really looking forward to riding bikes in shorts and t-shirts, but until that day arrives I’m going to make the best of it everytime we get some fresh snow.  I may even miss winter *GASP!* when I have no snow to ride my Pugsley in this summer.


Gareth’s 100mile Tikit Review

28 03 2009
The first 100 miles down...

The first 100 miles down...

Gareth posted a review of his first 100 miles on his lovely new Alfine Tikit with disc brakes.


Burton Super Model 159

27 03 2009
My new ride...happy birthday to me!

My new ride...happy birthday to me!

So I’ve been riding my 10 year old Winterstick All Mountain 164cm board.  It’s long and stiff which makes it great for fast riding in open terrain.  You can lay down these big deep carves on a nicely groomed run while keeping your speed at full throttle – super fun.  What it’s not so great at is being nimble and darting between trees.

Since my birthday is coming up I decided to add a new board to my quiver.  Something shorter with more flex that would let me explore some tighter terrain in the mountains – trees, gullies, etc…

My local snowboard shop is selling boards at 25% so I jumped on a Burton Super Model 159cm.  I mean who doesn’t want a super model in their lives?…=-)

Burton Mission bindings

Burton Mission bindings

I’ll be using the Burton Mission bindings pictured above and the Burton Driver X boots pictured below.  The Super Model uses Burton’s new ICS binding system, but I already have these non-ICS bindings so I’ll use ’em.  At some point I’ll get some ICS bindings and swap them out.  Unless you are snowboard geek ICS won’t mean anything to you – so jump to Burton’s site and click on Tech, then boards and then The Channel for an explanation. The simple answer is it’s a proprietary Burton binding attachment system.  Since I’m using non-ICS Burton bindings I’ll need to use an adapter disc to mount my bindings.

Burton Driver X boots

Burton Driver X boots


Walter’s Tikit was stolen!…=-(

26 03 2009

Update: Walter’s Tikit was recovered – no details yet…=-)

Have you seen this Tikit?

Have you seen this Tikit?

Walter Lapchynski’s Tikit has been stolen.  You can see photos of his bike here and read his post discussing the theft here.  It’s a unique bike so hopefully he’ll get it back.


NWT Gearing Redux

26 03 2009
The search continues...

The search continues...

In aid of my dream to run my NWT with a single chainring and a Nexus 8 IGH I’ve tried using a 23T cog at the back with a 43T ring up front.  The resulting gear range was too low so I tried a 21T cog in the back.  Unfortunately that cog is too small to work with my Surly Singlenatortensioner chain in the push up mode [pictured below with the 23T cog].

Surly Singlenator just works with a 23T cog

Surly Singlenator just works with a 23T cog

So I put the 23T cog back on and I’ve ordered up a 46T front ring which will hopefully get the gear range where I want it. I’m pretty close!

Speaking of gearing I rec’d my JTEK Alfine/Nexus bar end shifter and I have installed it on the NWT.  I’ll post details separately.  It seems to work great, but since my NWT drivetrain is in pieces at the moment I haven’t road tested it yet.


Do what you love…

25 03 2009

Be passionate...

Be passionate...

I think it’s important to do what you love and so conversely to not do what you don’t love.  Sorry for the lack of posts lately.  I just haven’t been stoked with blogging as much as normal.  Not 100% sure why, but it feels like a temporary thing.  I do have some posts in mind for the next little while, but they may not be as frequent as in the past until I get my mojo back.


I’ve been busy riding…

17 03 2009
Top of Castle Mtn - Alberta, Canada

Top of Castle Mtn - Alberta, Canada

I’ve been a bad blogger lately.  Busy hanging out with friends and getting a different sort of riding in.  Coming back to mountain biking after a 3yr lay off made me realize I’ve been ignoring a few other sports I used to enjoy a lot – snowboarding and paragliding.  Since it’s still winter in Canada I figured if you can’t beat ’em join ’em.  My board needed surprisingly little work after at least 5-6 years of storage.

Gotta love the minimal lift line...=-)

Gotta love the minimal lift line...=-)

I spent the day at Castle Mountain today riding in 1-2′ of fresh powder.  On a day when nobody showed up at the hill.

Check out all those empty chairs...

Check out all those empty chairs...

We never waited for a chair and we literally had whole bowls of fresh snow entirely to ourselves.  This was pretty much the best day of boarding that I can remember in the 10 years I’ve been riding.  Amazing!

Kurt had a great day poaching fresh lines in trees...

Kurt had a great day poaching fresh lines in the trees...

Thanks to the internet snow reports it’s easy to decide when to ride – a flexible job helps.  Weekday snowboarding rules…=-)


Improving my VO2 Max…

13 03 2009
A cunning new technique I read about online...=-)

A cunning new technique I read about on-line...=-)


She’s dirty…

12 03 2009
My Santa Cruz Nomad is not very clean any longer1

My Santa Cruz Nomad is not very clean any longer1


Flypaper Pedals Part II

11 03 2009

Here is a video I shot of the inventor/manufacturer of the Flypaper MTB pedals discussing their features.


Thanks Bern!

10 03 2009
I got to try out my helmet...

I got to try out my helmet...

I picked up a Bern helmet before I left on this trip.  It has turned out to be very comfortable while riding and I really like the visor.  I got to test out its protective properties on a ride in Sedona when I hit a low tree branch I had not seen.  The impact was considerable, but I came out of it unscathed.

I’m no expert on helmet impacts, but I think the hard shell Bern was a benefit as instead on collapsing and grabbing the branch like a foam helmet would the hard shell slide along the branch minimizing how much my head was jerked back.

Luckily other than my tree branch incident I managed not to land on my head!…=-)


Sometimes the end of the ride is the best part…

9 03 2009
Did you know beer is a performance enhansing substance?

Did you know beer is a performance enhancing substance?


Slime Part II

8 03 2009
Pre-slimed tubes - handy!

Pre-slimed tubes - handy!

After dealing with a ridiculous number of flats on the Sunday group ride we were convinced that getting Slime in our tubes was necessary for more Sedona riding.  Due our Baja Slime fiasco I wasn’t going to mess around so we picked up 4 tubes with Slime already in them at the Fat Tire bike shop.  They cost ~ $10 each it was basically the same price as buying tubes and Slime separately without any of the hassles of squirting Slime into the tubes.

Our very first ride Kurt got a thorn puncture in a Slime tube and after spinning the tire a few times the hole sealed on its own – nice.

If you are headed to the desert to mountain bike Slimed tubes make sense and it’s better to just get that problem solved right at the start than have 21 people waiting for you while you fix flats on a group ride!!!


5.10 Impact 2 Bike Shoes

7 03 2009
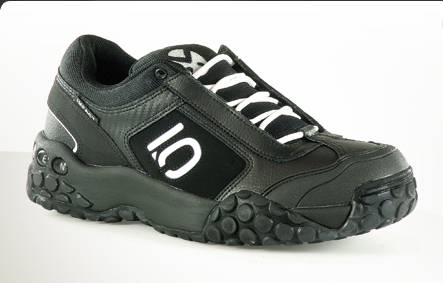
5.10 Impact Low

5.10 Impact 2 Low

I’ve slowly been moving away from SPD type pedals on my bikes in favour of BMX platforms and street shoes.  This has worked well for most of the riding I do which is generally urban transport, utility/cargo cycling and touring.  I wasn’t 100% sure I’d be happy with this setup for mountain biking as it’s a much more aggressive style of riding. I also harbored a fear of flying off the pedals at an inopportune moment.

When packing for Moab/Sedona I included some SPD type pedals and shoes just in case I couldn’t stand platform pedals off road.  Kurt only brought SPDs and so I started to worry I was making a bad choice.  However, I had the platforms on my Nomad and was too lazy to swap them out so the experiment was set in motion!

Kurt's 5.10 shoes & Kona BMX pedals

Kurt's 5.10 shoes & Kona BMX pedals

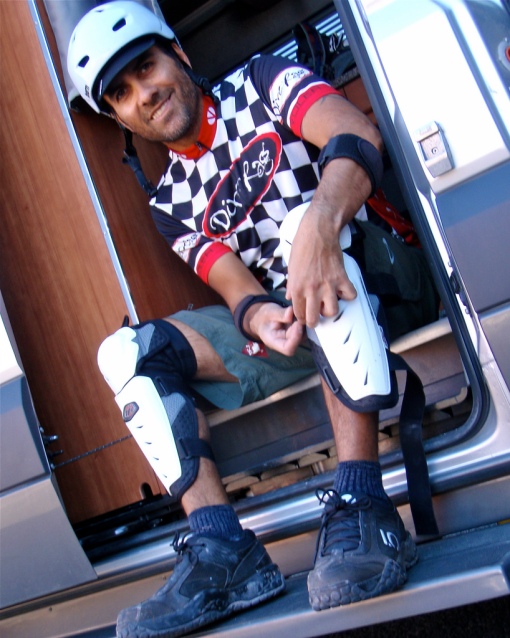
After a couple rides in Moab it was pretty clear that platforms were an excellent choice.  So much so that Kurt ditched his SPD pedals/shoes and bought some BMX pedals.  He also bought some 5.10 bike shoes.  With climbing rubber and a flat sole these shoes stuck to his pedals like glue.  I was a bit dissatisfied with my trail runners on BMX pedals as the sole did not grip the shoes as well as I would have liked – not their fault – trail runners are not designed for bike riding.

I pulled the trigger on some 5.10 Impact 2 low shoes [Kurt got the Impact 2 mid version with a slightly higher ankle   section].  The difference was impressive…climbing rubber is understandably sticky and a flat sole engages all the pins on my NRG BMX pedals.  The result is loads of control and the ability to put a foot down instantly.  I felt much more comfortable tackling technical sections since I could take a foot off the pedals easily or jump right off the bike if needed.  I also never had any issues with coming off the pedals on fast downhill sections or jumps.  In fact it pretty much feels like your feet are glued to the pedals until you want them off.

Shoes you can walk in - what a concept!

Shoes you can walk in - what a concept!

Interestingly of the local riders we’ve seen in Moab and Sedona the ratio of platforms to SPD pedals is about 4:1.  These 5.10 bike shoes have been one of the most popular choices of footwear for the platform pedal crowd.  I’m not surprised since they are well made and quite comfortable as day to day shoes off the bike.

Of course there is a downside to not being clipped in to your bike.  You can’t pull up on the pedals to generate extra power or bunny hop an obstacle.  I haven’t noticed the lack of power as a problem and with 6″ of travel at the back as long as I get my front wheel over the obstacle I’m home free.  I’ve also watch loads of riders with BMX pedals bunny hopping so it’s doable I just have to learn some new skills.

I find this change back to normal footwear a bit funny as I used to think cycling without SPD pedals was crazy talk…=-)


I’ve got a butt of steel!

6 03 2009

5hrs of riding and zero butt pain - I love it!

5hrs of riding and zero butt pain - I love it!

As a cyclist for over 20 years my Achilles heel was my butt.  It didn’t take too long for my butt to hurt and make me want to stop biking.  I tried loads of saddles and loads of different bike shorts. I tried creams and lotions.  I tried toughing it out in silence.  My butt didn’t stop me from riding – however it did limit how long I wanted to ride for and how many days in a row I was able to ride.  I tried so many things that I just assumed I was destined to ride a bike in discomfort for the rest of my life.

One day I heard about Brooks saddles and bought one. I was surprised to find I was a lot more comfortable on them then all the plastic saddles I’d tried over the years.  I still wore bike shorts initially, but the amount of riding I could do before I had any saddle issues was greatly improved.  Eventually I decided to ditch the bike shorts entirely.  That seemed like a crazy idea, but I never enjoyed the padded “diaper” feeling of bike shorts and they were hot and sticky in the summer.  Not to mention fairly expensive to buy.  I was quite shocked to find out I was more comfortable without bike shorts on my Brooks saddle than I was with them.  Wearing synthetic boxers I stayed dry and comfy all day long. Brooks saddles changed my whole relationship with bikes since I didn’t have to equate riding bikes with butt pain any more.  I still felt a minor amount of irritation at the end of a long day of touring, but barely enough to note.

My next move was to get a Selle Anatomica saddle [waterproof leather made in the US].  I had heard of many riders loving these saddles so I took a chance on an expensive purchase and received my SA saddle in the mail.  If my Brooks was 8.5/10 for comfort the SA saddle was a 10/10.  Not only was I comfortable all day long, but I literally couldn’t tell I had been on a bike all day with the SA.

On Sunday Kurt and I rode a grueling 6hrs suffer-fest with the gang at Mountain Bike Heaven.  I was tired and beat up at the end of the ride, but my butt was one part of me that felt like it hadn’t been doing anything all day.  That’s pretty amazing given my history.

I can’t recall the last time I wore padded bike shorts.  I bought a new pair of mountain bike shorts in Moab.  The salesman was trying to tell me why the padded liner was so great and I cut him off by saying first thing I’d do when I bought the shorts was to cut out the liner.  He thought that was crazy talk.

I’m not telling you this to brag or suggest Brooks or SA saddles are going to revolutionize your cycling world.  What I want to do is let people who are having issues with bike comfort know that there are solutions out there and to keep trying until you find what works for you.


S&M Trail

5 03 2009
Kurt & Jen enjoying a beautiful desert sunset

Kurt & Jen enjoying a beautiful desert sunset

Kurt and I hooked up with Dave [owner of The Fat Tire bike shop] and his posse of locals for a group ride Tuesday afternoon.  I should have known we were going to be in trouble when everyone was telling us how much fun we were going to have on the ride!  The trail involved climbing up to a ridge and then riding a winding exposed [ie. death on the right] technical trail down.  Since we left a bit late we then descended some nice singletrack in the dark to top things off.

To make matters worse my bike felt totally setup wrong and I couldn’t clean a technical section to save my life.  It was just one of those days.  Luckily Kurt was having an off day as well so at least I didn’t have to suffer on my own.  Oh well these days have to happen.  I just wish they could happen we I’m riding alone – not on a group ride full of kick ass mountain bikers.

The trail itself was quite impressively diabolical – equal parts fun, pain and humiliation so I’m going to call it the S&M Trail.

The best part of the ride was the post-S&M beer session at the Fat Tire.  It was fun to chat with everyone.

BTW – turns out my Nomad was setup wrong and I was fighting the bike the whole ride.  I’ll post about that separately.


The Fat Tire Bike Shop – Sedona

5 03 2009
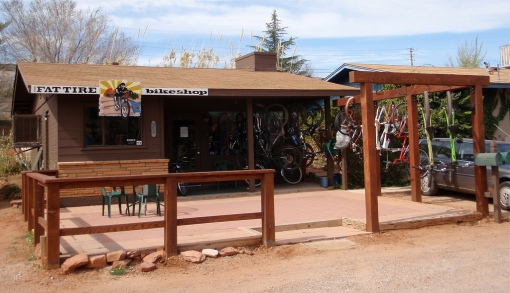
The Fat Tire Bike Shop - Sedona AZ

The Fat Tire Bike Shop - Sedona AZ

The Fat Tire bike shop is a small one man operation in Sedona Arizona.  The owner, Dave Cichan, is a super friendly guy who is extremely passionate about bikes.  That in itself is not remarkable in the bike industry, but he backs up his passion with a deep knowledge of how modern bike designs work.

To give you an example I was having issues with my front tire washing out in turns – which was frustrating and scary.  I mentioned it to him after the Tuesday night ride expecting a quick suggestion on how to resolve the problem.  Instead we spent well over an hour as he showed me CAD renderings of bike suspension designs, leverage and sag curves – all  the while applying this theoretical knowledge to adjust the suspension on my Nomad.  After we adjusted everything I rode the bike and it was a completely different experience.  I could turn hard on the gravel parking lot and instead of washing out, the tire dug in and the bike carved.  Dave jumped on it and decided we were most of the way there, but needed to tweak the suspension a bit more – so he took even more time to make changes.  Keep in mind this whole time the rest of the ride group is chatting, drinking beer and generally carrying on – while Dave worked on my bike.

After a delicious dinner at the local pick – The Hideaway Restaurant – we went back to Dave’s shop to grab our bikes.  It was late and we were all beat from the hard ride, but Dave eagerly jumped on Kurt’s Nomad and gave him the same treatment.  Totally adjusting the suspension setup on his bike as well.  Finally for good measure he made a couple more changes to my bike that came to mind over diner and working on Kurt’s rig.  By the time he was done it was 11pm.

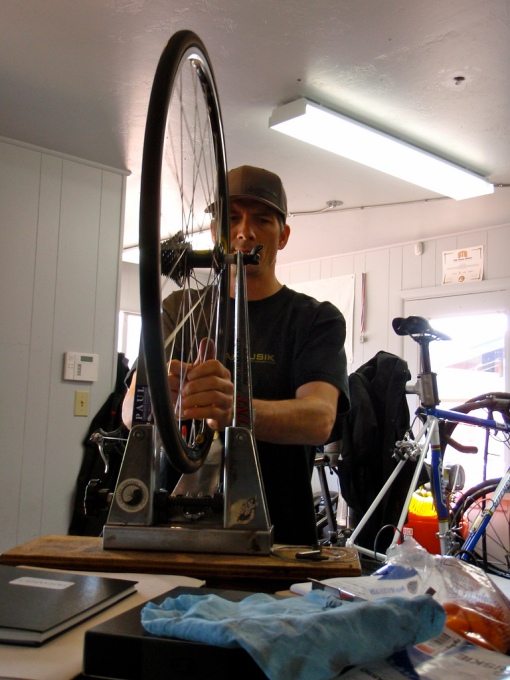
Dave truing up a wheel.

Dave truing up a wheel.

Both of us were stunned at how well our bikes performed afterward.  We are both smart people with engineering backgrounds, but bike suspension is not our forte.  I now know how little I actually know and appreciate Dave’s expertise a whole bunch.  When someone understands both the theoretical and practical sides of a subject they become extremely competent – that’s Dave.

It should be clear that the service at the Fat Tire bike shop is exceptional.  It will certainly be my first stop on any trip to Sedona.  In fact if I got a new full suspension bike or had issues with my Nomad in the future Dave would be my go to guy.  Even if it had to be over the phone or on-line.

If you need trail advice, repairs, parts or just want to get a feel for town before you start riding head over to the Fat Tire bike shop and chat with Dave.

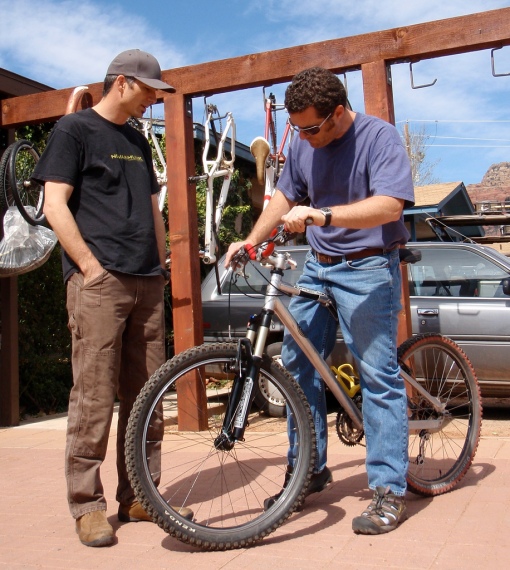
Dave helping a customer setup his bike.

Dave helping a customer setup his bike.

The Fat Tire Bike Shop

325 Jordan Rd., Sedona, AZ 86336

928.852.0014 [tel] – 928.852.0044 [fax]

dave@thefattire.comhttp://www.thefattire.com

Update: I got to go back to the Fat Tire Bike Shop in 2012 and had another great experience.


Gregory Reactor Hydration Pack

4 03 2009
Gregory Reactor Pack

Gregory Reactor Pack

I’ve been using a Gregory Reactor hydration pack for a couple years now.  The Reactor has served me well with a comfortable fit, light weight and lots of different pockets to organize my gear.  At 11L it’s not overly big, but holds a surprising amount if you use the external mesh pockets effectively.  I haven’t had any wear issues with the sil-nylon fabric the pack is made out of, but this material does need to be treated with more care than some of the heavier pack fabrics being used in the industry….that seems a fair trade off for a lighter pack.

The Reactor is very comfortable when riding.

The Reactor is very comfortable when riding.

These packs are on sale at MEC at the moment for $49CDN [no hydration bladder incl.]:

“Weight: 700g

This hydration pack has a stripped-down, minimalist design that is light and fast – excellent for adventure races and other endurance events.

  • Silicone-impregnated 30-denier nylon, with 210-denier high-tenacity nylon reinforcements.
  • Front panel pocket.
  • Front mesh compression pocket.
  • Hydration pack ready (hydration pack not included).
  • Dual hydration ports.
  • V-pull compression straps.
  • Gullwing waistbelt with mesh pockets for food bars, gel-packs, etc.
  • Yoke-style harness with breathable Aeroteck-lined back panel.
  • Ergometric canted bottom.
  • Reflective taping.
  • Capacity is 11L.”
Just enough space for a long day of MTBing.

Just enough space for a long day of MTBing.

With the relentless march of innovation it seems the Reactor is not on the Gregory website any longer…however the Wasatch pack [shown below] is a current model with many of the same features as the Reactor.

Gregory Wasatch Pack

Gregory Wasatch Pack


Straightline Rock Guard

3 03 2009
Straightline Rock Guard replaces my big ring.

Straightline Rock Guard replaces my big ring.

6″ of travel and extremely technical terrain means that your chainrings get pounded into rocks more often than you’d like. Not much you can do about it really.  So I pulled off my big ring and installed a Straightline rock guard.  I wasn’t using the big ring since by the time I am going fast enough to need a 42T ring off road I’m just holding on for dear life!  Although the admittedly decent derailleur setup on the Santa Cruz Nomad works fine trying to double shift and  clean techno moves is not much fun.  I’m convinced that a Rohloff on this bike would give me way more useful gears without all the grinding, missed shifts and chain slap.   I think that’s going to happen this spring and so more than a single chainring up front is irrelevant in the long term.

Not too much I can say about this rock guard.  It looks cool, isn’t too heavy and does the job.


Flypaper MTB Pedals

2 03 2009
Ultra low profile MTB pedals made in Sedona.

Ultra low profile MTB pedals made in Sedona.

From Kurt:

“Saw some interesting ultra flat peddles on a locals ride in Sedona.

They are machined from one piece of aluminum and the bearing set surrounds tip of each crank arm.  The advantage is no outboard bearings to dump in the sand and the petal can be ultra flat thereby reducing the roll over potential.  They also look very cool!

I tried them for a few spins around before the ride and was quite impressed, the only drawback is that they require custom crank arms and therefore extra cost if you already have arms.

We are going to meet the inventor to get more information. “

As seen on the inventor/manfucaturer's bike.

As seen on the inventor/manufacturer's bike.

There are a few more photos of these pedals in our Flickr Sedona Set here. We’ll report with more details later this week.

Here is the manufacturer’s website.


Deuter Futura 22 Pack

2 03 2009
Kurt loves his Deuter Futura 22 pack for biking & snowboarding...

Kurt loves his Deuter Futura 22 pack for biking & snowboarding...

Kurt wrote this review of his favourite bike & snowboarding pack a Deuter Futura 22:

“Can’t say enough good things about this little pack.  The steel frame suspends the load on top of the harness system with several inches of gap for air to flow through.  This increased ventilation keeps you cooler so you sweat less and any sweat that does come gets to do it’s job by evaporating to cool, not soaking into your shirt and pack.


Good stowage options, simple but versatile diaphragm divider that switches the main chamber from one large to 60/40 up down split.


The waist belt comes with handy clips to tie down your loose ends that actually work.  An integral rain cover is a good idea, though I have yet to use it.


All in all the clean, tight form factor coupled with a superior suspension system make this my go to pack for most day trips.”

I'm a bit jealous of the airflow back that keeps Kurt's back from getting sweaty!

I'm a bit jealous of the airflow back that keeps Kurt's back from getting sweaty!

Pros

  • Ventilated back
  • Wide open access
  • Compression straps
  • Cinches to your back
  • Dual main pocket system
  • Waist straps come with loose end retaining clips


Cons

  • Rides high on the neck when cinched down
  • Rain cover takes up space but never used it
  • Always wants to tip over when set down
Deuter Race EXP Air

Deuter Race EXP Air

Unfortunately the Futura 22 is out of production, but the Deuter Race EXP Air is a similar pack that has all the same features Kurt loves in his Futura 22 and it comes in black for those formal occasions…=-)

Note MEC still sells the Deuter Futura 22 even though it’s not on the Deuter USA website any longer.

Slightly larger Deuter Futura 28

Slightly larger Deuter Futura 28

The Deuter Futura 28 is a slightly larger version of the Futura 22.


Ergon Enduro Grips

2 03 2009
Ergon Enduro Grips

Ergon Enduro Grips

I tried the larger Egron GP1 grips on my Nomad when I first got the bike and didn’t love them as I want to move all over the bike when riding technical trails.  The larger grip is great for riding where your position on the bike doesn’t change much.  I put the stock grips back on the bike and used them for the time we spent in Moab.  They weren’t awesome, but they let me move my wrist freely which I liked…then I stumbled on these Egron Enduro grips at the Poison Spider Bike Shop.  I didn’t even know such a beast existed.

For $29USD I figured they were worth a try.  I’ve used them since I’ve come to Sedona and liked them a lot.  Unlike the stock grips they have an ergonomic shape that is great for my most used in the saddle riding position, but they are fairly round so when you stand or get your butt low over the back wheel your hands can rotate on the bars to follow your movement.

Ergon says:

Updated for 2009, Ergon’s GE1 offers enduro and downhill riders the advantages of an ergonomically designed grip which minimises the effects of the pounding that your hands and forearms take in these disciplines. Featuring an updated slimmer alu clamp, the grip’s sculpted shape better distributes the load away from the nerves entering your hand. It may not look revolutionary, but the effect is noticeable. Available in two sizes, and three colours”

They also have a stop at each end to keep your hands in place when the going gets extremely rough.

You can also get an all mountain grip that is similar to the Enduro grip, but with a less pronounced ergonomic shape.

Egron GP1 & Enduro Grips

Egron GP1 & Enduro Grips


Mountain Bike Heaven Sunday Group Ride

1 03 2009
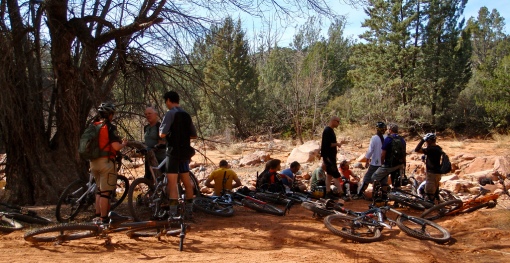
Taking a break in the shade.

Taking a break in the shade.

We dropped by the Mountain Bike Heaven bike shop in Sedona for their Sunday group ride.  Our posse was 21 riders strong which was an interesting change from all the riding Kurt & were doing alone on this trip.   Everyone was super nice and didn’t complain too much when the Canadians got flats – of course everyone else was running slime!  The ride itself was quite long between Sedona and the nearby town of Cottonwood with lots of nice singletrack and a route that Kurt & I would have never found on our own.  After fixing two flats and drinking all our water we were pretty happy to see the shuttle vehicles and sip some cold beer.

We made a few friends on the ride who we will hopefully ride with during the rest of our stay in town.

Since we had to keep up with the group we didn’t take many photos.  You can see the ones we did take on Flickr here.

Thanks to the folks at Mountain Bike Heaven for organizing the ride!…=-)

Kurt making sure his bike is well secured in the shuttle truck.

Kurt making sure his bike is well secured in the shuttle truck.


Gareth Dent’s Tikit

1 03 2009
Gareth riding his new Bike Friday Tikit

Gareth riding his new Bike Friday Tikit

Gareth got a lovely new Tikit with disc brakes, dyno hub and Shimano Alfine IGH.  His bike looks great and I’m looking forward to hearing how it works for him.  You can read his intial impressions here.

Congrats Gareth keep us posted…=-)

A Tikit with disc brakes.

A Tikit with disc brakes.


Moab Top Ten

1 03 2009
Our favourite all around trail - so far!

Our favourite all around trail - so far!

  1. Shorts and t-shirt weather in February – nice!
  2. Zero crowds and empty trails.
  3. Asama Back Trail – great climb and descent.
  4. Porcupine Rim Trail – can’t wait to go back and ride the whole enchilada when the snow is gone.
  5. Poison Spider Bike Shop – uber friendly folks, great selection of parts and skilled mechanics…=-)
  6. Porcupine Rim Shuttle – fast, cheap and friendly lifts to all the rides.
  7. Arches National Park – awesome hiking when you want a break from the bike.
  8. Moab Diner – great service and good breakfasts.
  9. Fiesta Mexicana – our one stop spot for delicious Mexican food.
  10. The Archaway Inn – for providing free internet service we could poach!
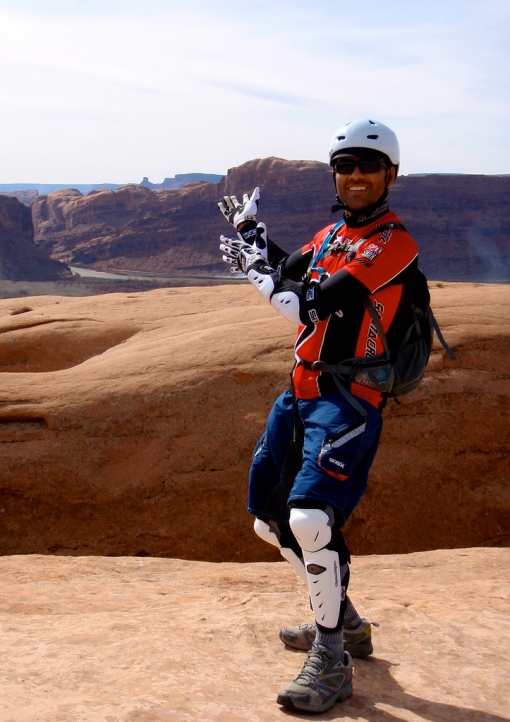
Amazing views all over the place...=-)

Amazing views all over the place...=-)