Landboarding

29 05 2009
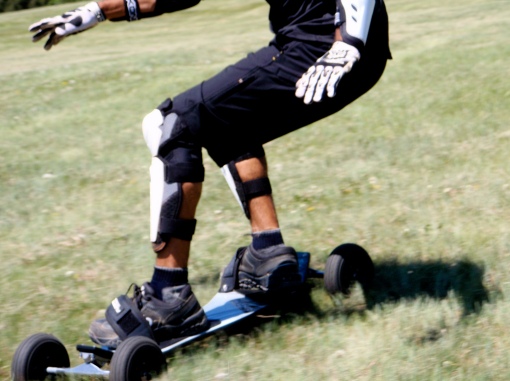
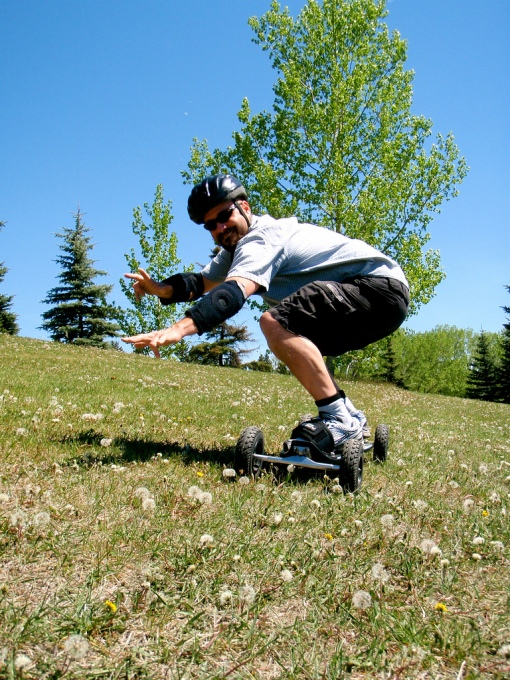
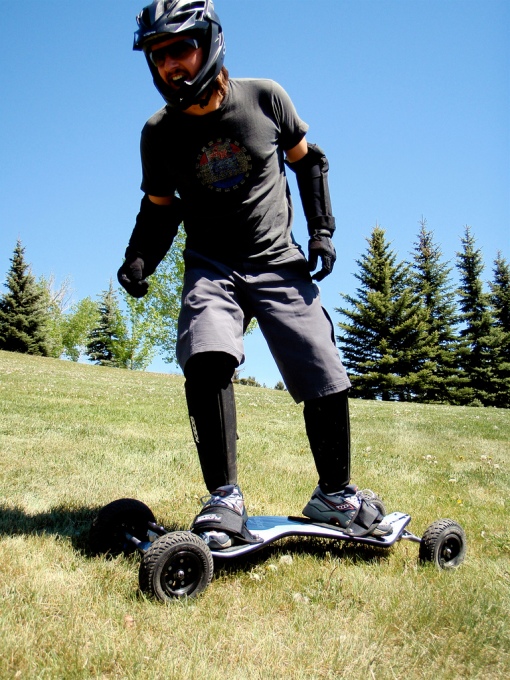
Learning to carve the Flexfoil Flexdeck landboard.

Learning to carve the Flexfoil Flexdeck landboard.

We hauled a couple landboards a.k.a. mountain boards over to a nice grassy hill adjacent to the Foothills Hospital today to hone our landboarding skills.

It wasn't as hard as we thought it was going to be.

It wasn't as hard as we thought it was going to be.

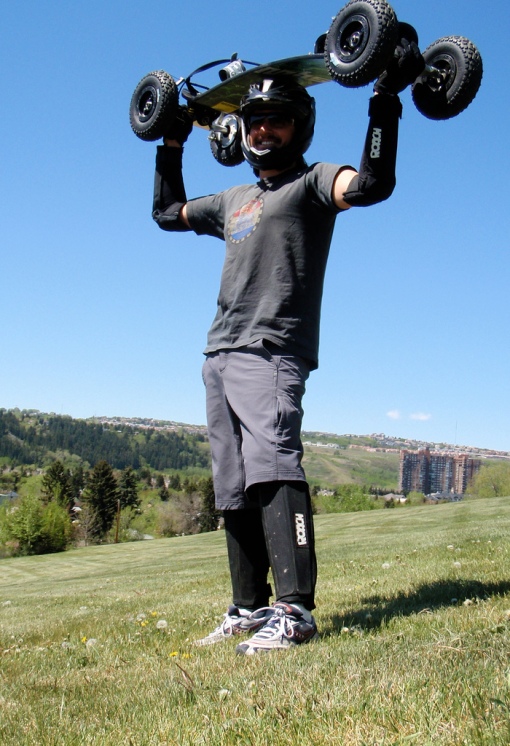
I wore all my MTB body armour, helmet & gloves just to be safe – not to mention there was a hospital emergency room only 5oo metres away…=-)

Kurt ready to rock!

Kurt ready to rock!

As it turned out years of snow boarding and skate boarding prepared us well.  There were no horrible crashes and well had a blast.

Kurt's brother SEan was the most fearless rider - bombing the hill uber fast!

Kurt's brother Sean was the most fearless rider - bombing the hill uber fast!

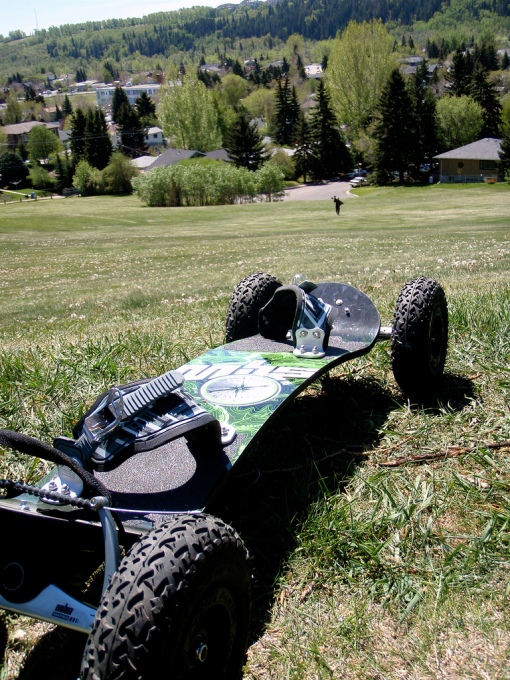
We picked a perfect hill to learn on..long gradual slope…wide enough to turn as big as needed and a large audience of hospital workers taking their lunch breaks to keep us honest.

The long walk back to the top of the hill.

The long walk back to the top of the hill.

The toughest part was waking back uphill with a 15lbs board over your shoulder!

Sean taking another run.

Sean taking another run.

We spent about 3hrs riding in total by which time we were tired from all the hiking and getting hungry for some lunch.

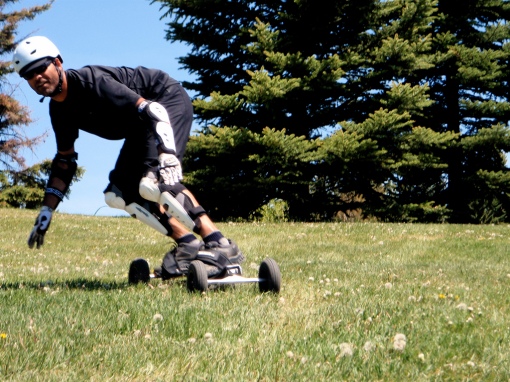
Kurt really enjoyed the Mountain Board Systems Comp 95 board.

Kurt really enjoyed carving on grass.

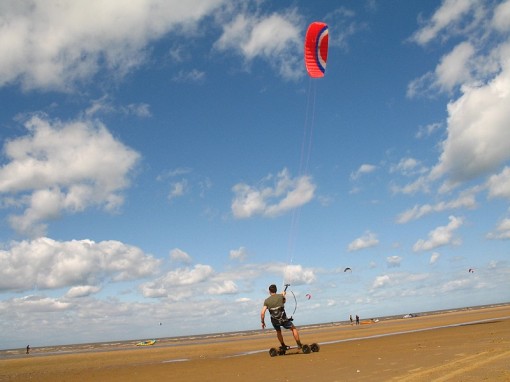
We’ll probably take another opportunity to practice with our kites and boards separately before trying them together.  It will be sweet – no hiking uphill!…=-)


Caution Notice for Tikit Owners from Bike Friday

29 05 2009
he lower seat mast part of the tikitTM frame. Both Site #1 and Site #2 are on this part of your tikitTM.

The lower seat mast part of the tikit frame. Both Site #1 and Site #2 are on this part of your tikit.

Several tikit owners have reported a crack forming on their tikit frames that is potentially dangerous to the rider. DO NOT RIDE YOUR tikit UNTIL YOU HAVE CHECKED FOR THIS CRACK or HAD IT CHECKED AT A BIKE FRIDAY DEALER.

If your tikit DOES NOT have a crack it is safe to ride. We will be mailing you an upgrade kit soon.

If your tikit DOES have a crack then do not ride it until you get that piece replaced. See directions and pictures below.

There are two sites to check for a possible crack. Site #1 is right below the joint of the straight arm of the lower seat mast. It is the area we have had the most reports from. Site #2 is at the “keyhole” of the seat mast. We have only had 2 reports of a crack developing here out of all the tikit we have made.

The customers that have reported these cracks tend to be taller and/or heavier than average and ride their tikit a lot.

Bike Friday co-founder Alan Scholz has been riding his early 2007 tikit daily for commuting, as well as long (80+mile) tours through the mountains with 50mph descents, such as on Cycle Oregon last year. We destruction test our bikes, but also ride the *!@#* out of them ourselves!

Since we have found a potential safety issue please take it seriously and check your bike. The chances of your bike having this problem is very low but we don’t want you to get hurt!

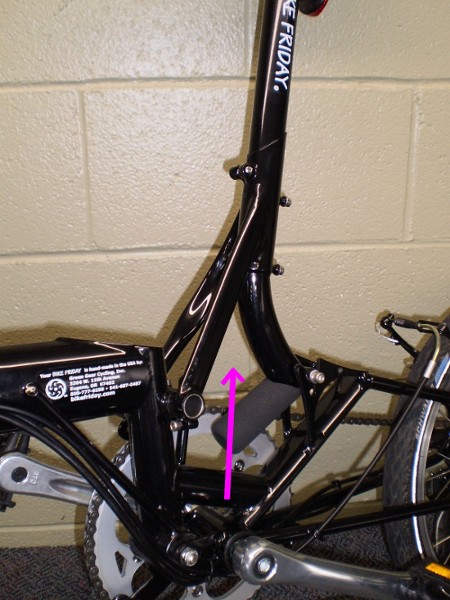
Potential crack site #1. The crack area is usually right below where the straight leg of the seat mast begins. This picture shows a crack there. We will be sending a special brace that can be easily installed on your tikit to prevent any crack forming in the future.
Potential crack site #1. The crack area is usually right below where the straight leg of the seat mast begins. This picture shows a crack there. We will be sending a special brace that can be easily installed on your tikit to prevent any crack forming in the future.

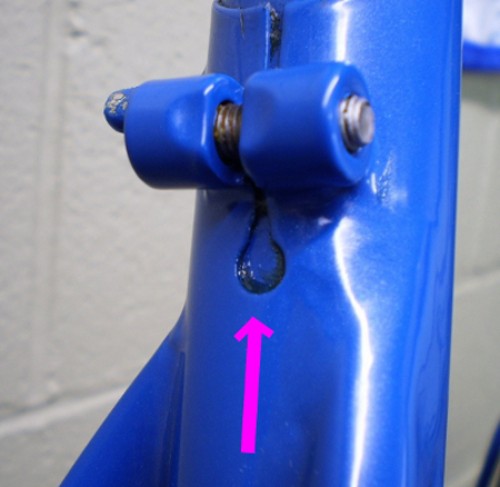
Potential crack site # 2. This crack begins from the round hole and travels outward. There is no crack in this picture. The 2 cases that have been reported were traced back to a very unusual manufacturing process problem. We have made adjustments in our process to eliminate those factors.This change was made on tikitsTM built after April 20, 2009.

Potential crack site # 2. This crack begins from the round hole and travels outward. There is no crack in this picture. The 2 cases that have been reported were traced back to a very unusual manufacturing process problem. We have made adjustments in our process to eliminate those factors.This change was made on tikits built after April 20, 2009.

This is the crusher machine specially built to reproduce the problems reported by our customers.

This is the crusher machine specially built to reproduce the problems reported by our customers.

If you do not have a crack then you can safely ride your tikit until the safety upgrade arrives (we are sending it soon). Then you or your local dealer/bike shop can install the brace that will prevent any crack from happening in the future. It is a very simple and easy process.

If you do have a crack then give us a call or e-mail and we will build you a replacement seat mast. 1-800-777-0258 or safetyupgrade@bikefriday.com

Please be aware of the weight limits for the tikit:

– Weight limit for Small and Medium tikit is 190lbs/86kg.
– Weight limit for Large tikit is 220lbs/100kg.

– If you are over these weight limits then you need a heavy rider upgrade available for up to 260lbs/118kg.

General caution for all folks riding any bike regularly (not just Bike Fridays):

You may be aware of several bicycle and bicycle component recalls going on right now in the industry. With this reminder about possible bike part problems it is a good time for a general safety reminder.

Bicycles are one of the most highly stressed commonly manufactured products in the world. A typical bicycle is asked to support about 10 times its own weight with little maintenance and in an extreme open environment. There is a conflict in regular bike design between light weight and durability. We all like a light bike to go with our low horsepower motor. Bicycles are one of the wonders of the world but you must care for them. The more frequently you give your bike a check over and needed tune-ups the longer it will carry you safely. . Click here to see an ABC bicycle maintenance list

Let Bike Friday Customer Service know if you have any questions about how to deal with this issue. safetyupgrade@bikefriday.com

Safe summer riding!

Hanna Scholz
General Manager
Bike Friday

BIKE FRIDAY. PERFORMANCE THAT PACKS

Performance That Packs


3364 West 11th Ave, Eugene, OR 97402 USA
Phone 800-777-0258 | Fax 541-687-0403


Flevobike Greenmachine

27 05 2009
Internal drivetrain detail

Internal drivetrain detail

The geeky engineer in me couldn’t help, but appreciate the cunning internal Rohloff drivetrain utilized in the Flevobike Greenmachine.


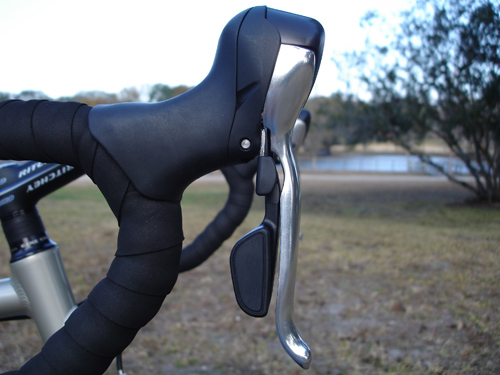
Nexus/Alfine Brifter!

25 05 2009
www.bikecommuters.com

Photo:www.bikecommuters.com

BikeCommuters.com is reviewing a new road bike by Dynamic Bicycles which features the cunning Nexus/Alfine brifter shown above….awesome!  So finally you can use one of these hubs and enjoy the brifter experience.  Between this shifter and the JTEK bar end shifter I reported about earlier the options for Shimano IGH setups has just increased dramatically.

It seems that at this early prototype stage Dynamic has not confirmed it will sell these components separately from their bikes, but given the potential demand I have to believe that will happen.

Read the BikeCommuters.com post here.

Update [from Austin on Two Wheels]:

“Well, good news if you want to convert your old road bike with horizontal dropouts or track bike to Shimano internally geared hubs. Dynamic sent us an e-mail this week letting us know they will be the U.S. distributor for the Versa shifters as well as the Versa cranksets. The shifters will retail for $229 and the cranksets will come in two versions, the VCS46-EX with external bottom bracket included ($139) and the VCS46-SQ for square tapered BB ($39). Both cranks come with a single 46T chain ring.

Beginning in mid June, you should be able to order these through your local bike shop. In the meantime, Dynamic is offering a limited number of shifters and cranksets directly to the public at the introductory price of $199 for the shifters, $109 for the crank with external BB, and $29 for the standard crank. Anyone wanting to order these directly for this limited time can call Dynamic at 1-800-935-9553 to place an order.”


I’m a bike commuter…

25 05 2009
My Bike Friday NWT daily commuter!

My Bike Friday NWT daily commuter!

How can a guy who works at home be a bike commuter?  Easy you just need a girlfriend who has much nicer place to live than you do so you stay there overnight a lot and have to bike back to your home office in the AM.  It may be a self-imposed commute, but it’s a commute nevertheless!  It’s only a 2km ride, but I forgot how much I enjoyed getting on my bike every morning for a ride before starting work.  Fresh air, bright sunshine and crazy motorists – smells like victory!…=-)

Kona Wah Wah BMX pedals

Kona Wah Wah BMX pedals

I needed some BMX platform pedals for my Surly Big Dummy and my LBS Bow Cycle was sold out of the NRG Slabalanche BMX pedals I have on a few other bikes so I had to settle for some bright white Kona Wah Wah pedals.  Not afraid to bling out my Bike Friday NWT I took the black NRG pedals from the NWT and swapped in the white Konas.  A bit ridiculous? – sure, but if you can’t have fun with your bikes what can you have fun with?  Just like you’d expect the Kona’s are comfy, versatile and grippy.  I tend to commute in a pair of 5.10 Impact low bike shoes so staying firmly attached to the bike is not an issue.

Ortieb panniers on my Bike Friday rear rack.

Ortieb panniers on my Bike Friday rear rack.

I haven’t toured with the NWT yet, but carrying enough wine, beer and ice for a sunny afternoon in the backyard is a decent test of the rear rack and panniers.  The NWT is rock solid with a heavy rear load.  I love how fast I can adjust these Ortlieb panniers to go from one rack to the next.  Although my feet are fairly large 11.5-12US I don’t have any heel strike issues with this rack  & pannier combo.  I even have an additional inch of adjustment if I wanted to move my panniers further back, but I prefer to keep the load as far forward on the bike as I can without hitting my feet on the panniers.

The Bike Friday rear rack provides lots of ground clearance.

The Bike Friday rear rack provides lots of ground clearance.

Without any bags on the rear rack the Bike Friday rack looks like it sits excessively high, but once you have full size rear panniers on it you can see the extra height is needed to get a reasonable amount of ground clearance with the smaller 20″ wheels.


My 2nd Selle Anatomica

19 05 2009
Adjusting my new Selle Anatomica

Adjusting my new Selle Anatomica

Anna bought a Selle Anatomica Titanico saddle and after trying it for a while decided she preferred her old Brooks B-17 Champion Flyer.  Her rides tend to be on the shorter side around town and she didn’t find the SA was any more comfortable for this sort of use.  Being the good friend I am I bought it from her since I love my Selle Anatomica saddle.  I put it on my Bow Cycle 2-4 test bike as the stock saddle isn’t comfortable for 4hrs+ road rides.

The SA saddle on my BBC cross bike.

The SA saddle on my BBC cross bike.


Rohloff Oil Change

19 05 2009

Kurt helped me change the oil in my first Rohloff hub that’s driving my Surly Big Dummy.  The Rohloff manual says to change the oil every 500okms or once a year.  I don’t think I’ve racked up 5000kms yet, but it’s been about a year since I put that hub into service.  The whole procedure was quick and painless as shown in the video.

Life with a Rohloff hub is rough.  I’ll have to repeat this oil change procedure in 12 months….*sigh*…=-)

Rohloff Oil Change Kit

Rohloff Oil Change Kit - photo: SJS Cycles


Kite Biking

18 05 2009
Kurt flying a 4m Scout power kite

Kurt flying a 4m Scout power kite

With another sunny day forecast Kurt and I decided to ride across town to Nosehill Park and fly some kites.

Urban Assault

Urban Assault

We stuck to the Calgary Bike Path System most of the way which was nice and peaceful, but took quite a bit longer as the route was decidedly not very direct.  A problem shared by most dedicated bike paths.

Kite flying @ Nosehill Park

Kite flying @ Nosehill Park

The 4m Scout is still a beginner kite, but a lot more powerful than the 2.3m Rush trainer.

I rode my Thorn Nomad

Thorn Nomad

I rode my Thorn Nomad touring bike.  It’s a very comfortable solid ride, but it has all the good and bad qualities of a truck!  Not a fast accelerating bike, but uber stable and confidence inspiring.  It plowed capably through everything on and off-road I threw at it.

Getting hauled all over the place!

Getting hauled all over the place!

I was impressed by how hard the 4m Scout pulled.  We literally went skidding all over the grass when the kite was in the power zone.  However, with a little bit of caution we were able to control it quite well and nobody sustained any dragging injuries!…=-)  Next time out we’ll bring along a all terrain skateboard and try it out with the smaller trainer kite – of course wearing all our DH biking body armour and a helmet.

On the way home.

On the way home.


Kite Training

17 05 2009
Kurt training with a 2.3m 2 line power kite.

Kurt training with a 2.3m 2 line power kite.

The 12m kites we have for our kite boards are uber powerful – like drag you across town in a heartbeat powerful – so it’s essential to learn how to control them properly in order to stay safe.  Two ways to get proficient are professional instruction [we are working on this] and flying smaller trainer kites on land.

Kurt & I went for a 120km ride up in the mountains between Banff and Lake Louise Saturday.  After some post ride beer and pizza we busted out a trainer kite for some practice.  it’s amazing how hard such a small kite can pull.  A couple times I was leaning back as hard as I could and was still dragged forward across the field.  We are getting fairly good at controlling these small kites, but we’ve been told the next step is to get good at flying them with our eyes closed!  Wow – I feel like Luke in the first Star Wars movie….or is that the 3rd Star Wars movie???…=-)  This advice makes sense as you want to keep your eyes on where you are going when kite boarding not on your kite.

HQ Power KItes Rush 2 Line Trainer

HQ Power KItes Rush 2 Line Trainer

Even these small trainer kites generate a lot of useful power so we started to think some all terrain skateboards might be in order, but we are taking baby steps and we’ll stick with just the small kites for a while before adding a board.  Hmmm…Burning Man + kites + landboards could be a lot of fun…=-)

photo: Simon Coggins

photo: Simon Coggins


Dynohub vs. Battery

16 05 2009
Solidlights 1203D works with a dynohub

Solidlights 1203D works with a dynohub

I’ve owned the Solidlights 1203D LED dynohub headlight for a couple years now.  I bought it for riding brevets and it worked well for that.  However, since I was riding brevets on a recumbent and hate swapping stuff between bikes before a ride [too lazy] I didn’t use it much for casual use around town on my upright bikes.  Instead I used the battery powered Dinotte 200L-AA LED lights shown below.

My Dinotte lights work well enough and are so easy to swap between bikes [o-ring for mounting the light & velcro strap for batteries] that I don’t mind moving them around a bit.  On fresh batteries they last long enough that running time is not an issue for my in-town night riding.  One problem I have had many times is grabbing my bike and heading out only to find the batteries are dead or very low.  This happens because I don’t use the lights everyday and the Dinotte light draws some minimal amount of power even when off.  I have learned to unplug the power cable from the battery pack, but I don’t always remember to do this and it adds an extra step to getting ready to ride that is a bit of a pain.  I used the Dinottes last year as my main headlight and probably had a 75% success ratio for having enough power to meet my night riding needs.  That means that 1 out of 4 times I rode without a head light or it died mid-ride….=-(

This year my main urban night time bike has been my Bike Friday NWT.  Since my night rides usually end at someone’s house I don’t need the foldability of my Tikit and my NWT is equipped with the Solidlights 1203D dynohub powered headlight.  I can grab my NWT any time and know that my headlight will turn on automatically as soon as I start riding [I use it as a daytime running light as well] and between my two Planet Bike Superflash taillights one will always be flashing.  I didn’t realize how much hassle the battery lights were until I had the dynohub equipped NWT to compare to.

Of course there are downsides to the dynohub light:

  • requires a dynohub front wheel
  • requires longer wiring than a battery light
  • more expensive [at least initially, but there are no batteries to buy/replace]
  • more hassle to swap between bikes
  • there is some extra drag from the dynohub

However, if you do a lot of night riding – particularly always on the same bike – the advantages of having as much lighting as you will need without thinking about it is well worth the disadvantages in my opinion.  If you only night ride occasionally and are always on a different bike it doesn’t make so much sense.

Since I have a fleet of bikes my strategy is to have one or two bikes dedicated to all weather day/night riding.  These bikes will have a dynohub & headlight so I will always have a bike ready to ride when I need it.  If I really want to ride one of my other bikes at night I’ll use a battery powered headlight and hopefully have some fully charged batteries available.

At the moment my only dynohub equipped bike is my Bike Friday NWT, but I have another dynohub wheel using a Shimano hub and a 26″ Velocity rim. I’ll most likely use it on my Thorn Nomad, but I’m pondering getting a second Solidlights headlight [the new XB2] so I won’t have to deal with swapping lights and I can use all my existing Solidlights cables & accessories.

Dinotte 200L-AA battery powered LED lights

Dinotte 200L-AA battery powered LED lights


MEC World Tour Panniers

15 05 2009
MEC.ca World Tour Panniers

MEC.ca World Tour Panniers

I was in the process of upgrading my GF’s MTB into something that fit her better, was more comfortable and had some useful cargo capacity when I started looking for panniers.  My initial thought was get some grocery panniers since they’d be simpler and really all she needed at this point since she doesn’t bike tour.  After poking around a bit I found that some decent Jandd grocery panniers cost as much as the MEC panniers shown above.  Being the eternal optimist I am I figured why not get these real touring bags?  They’d carry loads of groceries and if she wanted to tour she had some bags to start with.  Seemed like a cunning plan at the time.

MEC pannier mounting system - not my favourite...=-(

MEC pannier mounting system - not my favourite...=-(

I bought them [$95CDN] and installed them on her bike.  They were a struggle to mount on the Filzer rack [also bought at MEC], but I got them on.  What was really unfortunate was I almost couldn’t get them back off the rack.  After battling the mounting hooks off I realized how stupid it was to buy touring panniers that didn’t work well and weren’t really designed for the task at hand.  So I returned them and bought some Jandd grocery panniers – they are simple, easy to use and go on and off in a snap.  If she is interested in trying bike touring at some point I’ll just get her a set of Ortliebs and life will be good!

Jandd Grocery Pannier

Jandd Grocery Pannier

For what it’s worth the MEC World Tour Panniers seemed well made and are a great deal at $95CDN a set for rears.  Maybe if you don’t remove your panniers from your bike often the challenging mounting system wouldn’t be a problem.  You could even rationalize that it makes them a bit theft resistant!  Personally I’m going listen to the advice I’ve given loads of people – “buy Ortlieb”.

Filzer Rack from MEC

Filzer Rack from MEC

I generally like MEC products, but they need to redesign the way these bags mount.  The problem is that when you try and mount them seating the lower hook is finicky and it’s very hard to get the top hooks on securely.  The bigger problem is that once you get the top hooks on securely it is extremely tough to get them to disengage.  Compare that to the easy one handed mounting/dismounting of an Ortlieb pannier and you can appreciate my frustration.  This may be an issue with the combination of this specific rack and these bags, but the rack was purchased from MEC as well and seems pretty vanilla as racks go.  The mounting system of the Jandd panniers is not as slick as that used by Ortlieb, but it works well and is easy to use.


Thanks guys!

8 05 2009
Lefty & Righty - you guys rock!

Lefty & Righty - you guys rock!

I just wanted to send a shout out to my feet for being so awesome the past couple months.  Since I hurt my left foot back in Aug ’07 it took until Feb ’08 to be mostly back in action and really it wasn’t until March ’08 that I was pretty much able to do everything I wanted again without pain.  I spent a lot of time limping along and I was quite unhappy about my situation due to the slow pace of my recovery. Then the other day I was running to catch up with my friends and realized “…I’m running!  Sweet!…”

These days I appreciate my mobility a lot more than I did before my injury.  Every time I go for a walk, bike ride or out dancing I remember that wasn’t possible just a short time ago.  On the upside having gone through this process has made so many everyday tasks special.

I keep the cast and crutches in the corner of my bedroom to remind me how lucky I am to be back in action…=-)


RANS Hammer Truck Update

7 05 2009
RANS' crank forward cargo bike in action.

RANS' crank forward cargo bike in action.

If the Surly Big Dummy intrigues you, but you want/need something different in the way of ergonomics RANS has continued to develop its crank forward cargo bike design.  RANS’ crank forward bikes move your weight rearward and lower down onto a wide comfy seat.  The lower position means you can get your feet flat on the ground at stops while remaining seated.  For many people this translates into a natural and comfy ergonomic position.

RANS has posted more info about the Hammer Truck on their website here.

Loading up the Hammer Truck

Loading up the Hammer Truck


Installing Watchamacollars on a Big Dummy

6 05 2009
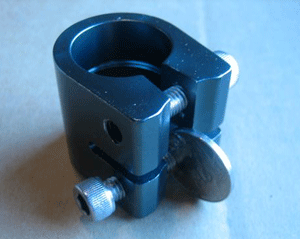
Use a nickel to spread the lower portion of the clamp.

Use a nickel to spread the lower portion of the clamp.

Check out the Xtracycle Blog for a useful tip on installing Watchamacolars on a Big Dummy.  Since the tubing of the Surly Big Dummy is larger than the Xtracycle sub-frame the lower portion of the Watchamacollars is a very tight fit.  By using a nickel to spread the lower part of the clamp you can get it on much easier.

Good tip!…=-)


DIY Watchamacollars

5 05 2009
$4.50 V-rack clamps for your Big Dummy

$4.20 V-rack clamps for your Big Dummy

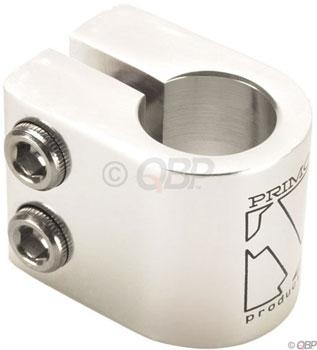
If $39 for 2 Watchamacollar V-rack clamps is too rich for your bank account you can’t get the seatpost clamps pictured above for $4.20 each after discount.  They are slightly larger than the tubing on the Big Dummy so you’ll need to wrap the area you are clamping with some tape to get the right fit.  A reasonable compromise given the cost savings.

$19.50 V-rack clamps from Xtracycle

$19.50 V-rack clamps from Xtracycle

Watchamacollars in action:

Watchamacollars securing V-racks to an Xtracycle

Watchamacollars securing V-racks to an Xtracycle

Note that the Xtracycle Watchamacollars have a built in o-ring to keep water out of the Big Dummy/Xtracycle sub-frame.  So if you use the DIY clamps and live in a wet area you’ll want to use something like some inner tube to keep water out.


How we roll…

4 05 2009
Photo: James Tworow

Photo: James Tworow

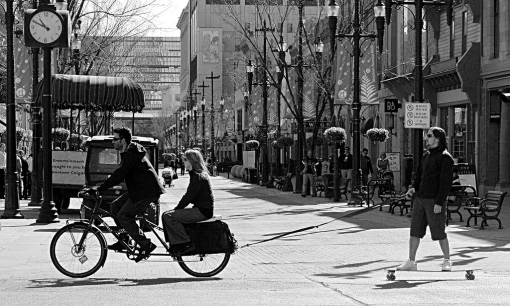
A typical Saturday in Calgary found us rolling across town in search of smooth pavement to longboard and a delicious brunch.  The Big Dummy wasn’t even maxed out.  We had room for one more passenger!  Good work Surly…=-)