Heckler Time!

30 06 2012

…framing the action

Apparently we didn’t scare Sean and Deanna off of mountain biking on the South Shore of Vancouver Island. They decided they’d come back for more dirt hijinx.

Sean taking a good line on Ruffles…

We covered a lot of the same terrain as last ride so they would have a chance to work on stuff they’d seen before and “figure out” typical tech moves that crop up repeatedly at Hartland.

Deanna on the move…

Their Hecklers are a bit more XC oriented than our Nomads, but they are capable bikes and well suited to local riding conditions.

Sharon starts up a climb…

Their bikes have steeper head tube angles and lower front ends than ours which makes for easier climbing, but it also makes steep drops more challenging. Especially without height adjustable dropper seatposts.

Bouncing down the trail…

It’s great to have a larger group out on a ride. You end up waiting around more, but that gives you time to chat and hang out with your friends.

Sharon’s turn to roll on in…

Sharon’s enjoying the pay off from so much time spent learning her MTB skills as she isn’t at the back of the pack any more and she can offer up some tips to others.

Sean on the edge…

Sean comes from a rugby and karate background. His style is to throw himself at the trail repeatedly and see who is tougher. This approach has been surprisingly effective, but has also resulted in some spectacular crashes. I gave him some body armour I wasn’t using for future rides as I suspect otherwise his MTB career could be really intense, but really short!

Deanna checking things out…

Deanna is a lot more cautious and she’s rebuilding her MTB skills at a measured pace. It’s going to take her longer to master the challenges of our local trails, but she’ll get there soon enough and won’t have to visit the hospital during the learning process!

Fun in the forest…

We are continuing to get the riding position and the suspension setup tweaked optimally for their Hecklers. I’ve learned with my Nomad how important it is to continually adjust and evaluate your bike’s setup. Small changes can result in big improvements. Plus you get to understand your bike better.

In the groove…


Cabrihna Kites – Drifting…

29 06 2012

Worth watching full-screen in HD.


Lost & Found!

28 06 2012

That little silver retaining collar at the far end of the shock is really important!

When Deanna and Sean came out of a ride this past Sunday the silver collar at the front of Sean’s shock jumped ship leaving the spring grinding away against his frame. That’s not a good thing obviously.

Come out, come out – wherever you are!

The shock is from ~1998 so finding a replacement part could be a challenge. We decided it would be best to go back to Hartland and search for it Monday before the trails had seen much traffic.

I spent a lot of time looking down…

We spent over an hour doing a detailed search of the section of Little Face Trail where we noticed the part was missing. Our rationale was that it must have come of within a few hundred metres of that spot.

Still looking…

Eventually we gave up looking and decided to go for a short ride since we were at Hartland anyways. I figured there was a slight chance it had fallen off on the first trail we rode on Sunday, but that was 20 mins earlier before we noticed it was missing so that seemed like a long shot. We decided we’d hit that trail right before we went back to the car.

There’s my baby!

Sure enough at the first corner of that initial trail from Sunday the collar was sitting on some moss waiting for us.

No longer MIA…

I love it when a plan comes together… 🙂

Glad the Heckler is back in business.. 🙂


Gravel Pimp – Moto Recon 1…

27 06 2012

My nemesis – the red DMZ gate!

With such a long ride out to Leechtown and each new option being a longer detour I decided to expedite the progress of our Gravel Pimp Recon missions with my KLR650 dualsport motorcycle. Click on the image above to read about my [mis]-adventures…;)


A herd of Santa Cruz bikes….

26 06 2012

Sean and Deanna…

My friends Sean and Deanna both ride Santa Cruz Hecklers. I helped buy the older Heckler in 1998 and then refurbished it a few years ago. When they were looking at buy another Heckler I gave their newer Heckler a once over before it was purchased off Craig’s List.

New and old Santa Cruz Hecklers…

So I’m sort of godfather to their Santa Cruz bikes… 😉

Sharon, Deanna & Sean…

I noticed their bikes weren’t getting dirty so I employed some constructive peer pressure to get them out to Hartland Mountain Bike Park for a rip.

Sharon leads the pack…

Since I wanted them to come back for a second ride we plotted out the easiest loop we could that still covered some ground and gave them a taste of the riding at Hartland.

Deanna sessioning some rocks…

Even with an uber slow pace, lots of stops to check out/try tech sections and some instructional tidbits we still managed to break one of their bikes and crash a few times – one crash was a helmet wrecker! Riding on the South Shore of Vancouver Island is really not easy!

Sharon providing some tips of how to shred the gnar…

Sharon did a great job cleaning almost everything and showing off how well her skills have developed in the last year or so. I think it was a real morale boost for her to see folks who were struggling to get over tech sections she can easily do now – not to laugh at their crashes, but to gauge the improvement in her own skills.

Rockstar!

I blew one steep rooty/rocky climb only to have Sharon come barreling past me and make it to the top for the first time ever. She did a victory dance worthy of a NFL Super Bowl touchdown… 😉 Her time with the Dirt Girlz MTB Club is paying off.

Sean tries the rocks…

We got everyone back to the cars mostly in one piece and mostly smiling.

Deana & Sean post ride…

I guess we’ll know that we did a good job of being mountain bike guides if we can get them to come out with us a second time… 😉


After Work Shred…

25 06 2012

Getting sweaty and dirty after work is a great way to end the day…

Going with the flow…

Dressed for an evening out…

Rock-star!


Gravel Pimp – Dead End Recon…

23 06 2012

Enjoying a ride along the coast…

If you haven’t read the Extreme Recon chapter of the Gravel Pimp Saga than click here and read it so you know what’s shaking.

Our last attempt to pioneer a dirt route between Lake Cowichan and Victoria BC failed when we were diverted by a security zone around the Victoria Water Supply Area [aka The DMZ]. Not to be deterred we retreated back to Gravel Pimp HQ and reviewed our maps then plotted a new route.

Pink is the new route – click for larger…

The map above shows our planned route in pink. The green route is what we had hoped to ride last time when we were stopped. As you can see the new route is a significant detour, but better a few extra KMs of dirt than riding pavement home. Where the pink and green tracks meet at the bottom of the map is Leectown and the top of the Galloping Goose MUP.

Our bikes ready to roll…

Trying to schedule a ride between everyone’s work obligations and weather was a challenge, but finally we found a window that worked. A-Man couldn’t make this edition of Gravel Pimping, but he has a sweet Moots 29er ready for next time!

Carbo-loading…

We had a  few beers to adequately prepare for the rigors of the ride….;)

Scott enjoying some sunshine…

Rolling down the Goose MUP was pleasant as always.

My trusty steed got a new frame bag that actually fits!…=)

Our first night’s goal was modest since we didn’t want to try any of the hard route finding until the AM. So in true Gravel Pimp style we detoured to a pub and enjoyed some additional beers as well as some burgers.

Home sweet home…

We took advantage of the Barnes Station Shelter, but threw up the mesh tents as bug nets. You can tell spring is here when you can snack just by riding with your mouth open!

Is it morning already?

Scott was super keen to get rolling so he kicked me out of my sleeping bag at 5am. Breakfast was a variety of cold snacks I had stuffed into my front pouch [aka the Feed Bag].

You can’t bitch about the scenery – Sooke River…

Our first goal was finding Leechtown – an old mining settlement that would mark the start of the hard route finding.

Scott finds Leechtown…

Finding Leechtown was just an easy few km spin up the Goose MUP to its end. Although we realized we were on the wrong side of the Sooke River so we needed to do some ‘schwacking!

It’s all gone green…

We followed some forest tracks to the river.

There was a bit of walking…

A little hike-a-bike never hurt anyone.

Even Scott had to walk…

The nice thing about finding your way next to a river is that you can’t get lost!

Crossing the river part 1…

Although the Sooke River is pretty intense further downstream it was broken up into a few manageable creeks where we were trying to cross.

The might Sooke River has been tamed!

The ‘schwacking continued after the water crossing.

Need any spare parts…

We started to see derelict machinery, but we never did see any old buildings.

Denied by the DMZ again!

As we scouted out route options we encountered the first dead end at the Evil Red DMZ Gate. These gates are all around the water supply area. Happily the guards didn’t notice us and Scott wasn’t beaten half to death this time.

Checking out some equipment we may need later!

Denied by the DMZ we tried some of the logging roads that ran west along the Leech River.

Scott is thinking about a kickstand for the Hunter…

But, before we did anything hasty it was time for a snack break.

I like snack breaks!

I streamlined my food supply – leaving three elements at home – fruit, sandwiches and M&Ms. Mistake! Next time I will have all three with me. Recon work is tough and I got hungrier than I thought I would. I didn’t run out of food, but what I was putting in my mouth just didn’t seem to satisfy me as well as it should.

Steep loose gravel…

After the DMZ gate our first attempt was a rough double track that was clearly made with a bulldozer and never improved for frequent vehicle traffic. The big chunky rocks were hard to ride up and scary to ride down. It was fairly “climby”, but it had a nice remote feel that would have made for a great bikepacking route.

It was good – until it ended!

Sadly the road just ended. We don’t mind a hike-a-bike, but not 30kms of it over a mountain range!

Guess what?

As we backtracked we tried a side trail that had some potential, but it ended as well.

Clear cut…

We ended up back at Leechtown and headed west on a well used logging road on the south side of the Leech River. This was shown on our map as connecting up with the other logging roads we needed to get to further north.

Yup…it’s true….denied again!

But as we found out that was a lie. The road just stopped at a scree slope that was hard to walk across let alone carry a bike across.

Overgrown double track…

Although it didn’t go anywhere this section of the ride had some super fun overgrown double track to pedal. Life could be worse than riding your bike in the forest looking for promising bikepacking routes….;)

Hmmm….why is Scott walking back?

There was a turn off from the main road that went higher and we hoped got around the rock slide. So we cranked uphill and found that it did go a bit further, but it also dead ended despite being shown on our map as continuing onwards.

Scott immersion testing his Rohloff!

So defeated yet again we rode back to Leechtown to regroup. Our time and energy levels were running low as we still had a few hours of riding back home to Victoria. The most promising option was straight up a mountain north of Leechtown and neither of us could handle the thought of 15kms of grinding uphill only to be denied. So we decided it was time to roll for home.

Nearly road kill…

Scott bunny hopped over a snake on the Galloping Goose so we stopped and herded him off the trail so he could live to slither another day!

Another snack stop…

The roll home was pleasant, but to be honest we’re over the Goose MUP. It’s a convenient way to get out of town on dirt, but after you’ve ridden it 12 times in a year you want to load a movie on the iPhone just to stay awake! Don’t get me wrong it’s far better than hoovering exhaust fumes on the side of Hwy 14 while dodging trucks. I’m just a spoiled whiner!

Pink was the theoretical route – dark red the actual GPS track…

All told the ride was ~145kms long with ~1200m elevation gain. Progress was slower and harder than those stats would indicate with a lot of walking & talking to workout what to do next. While it wasn’t successful in finding a route north to Lake Cowichan we did expand our knowledge of the area and confirm that the maps we have are “optimistic” when it comes to the logging roads. You can click on either map to enlarge them.

Our full route – click for larger…

So what’s next?

  • Craig Main is a logging road up a mountain north of Leechtown that connects through based on our maps. It would provide the most direct route so it’s the next priority for recon effort.
  • Butler Main is a logging road that heads west, but offers the potential of then branching north where we want to go. It’s not very direct, but if Craig Main doesn’t go it’s next.
  • After those two options are explored if we aren’t successful I think our next move is to go back to the north side of the route and explore south as far as we can. Eventually we’ll have GPS tracks for everything reasonably close we can ride and we can figure out if an extreme bushwack is possible to connect the route.

Of course my hope is that there is a nice logging road through to Lake Cowichan, but so far such a beast has been elusive. Time will tell!


Blade Fat Lady Kite – The session saver!

22 06 2012

My Blade Fat Lady Kite…

I’ve been meaning to post a review of my Blade Fat Lady 17m kite, but I’m – well – lazy! I’ll get to it at some point, but I did want to share some stoke for this kite. Like most kiteboarders I don’t stay awake at night dreaming of flying a 17m kite in light winds. However, there is nothing worse than driving a couple hours to the water only to sit on the beach in wind too light for your gear. It’s enough to make a grown man cry!

Me and the Fat Lady…

That’s why I decided to buy the Blade Fat Lady from Kite Paddle Surf Bellingham. She is my super secret session saving weapon. If I have the Fat Lady at the beach I know that if there is any wind at all I’ll be out riding and having fun. The great thing is the pay off is there even when the wind blows hard enough for a smaller kite because I can go to the beach without any stress knowing I’ll be out riding something. Very cool!

The Fat Lady and me on the KLR650…

Now if the Fat Lady was a total pig to fly there wouldn’t be much point getting out on the water at all. Happily she’s reasonably nimble…about the same as the 12m kites I’ve flown. Which is to say you can throw her around without waiting 20mins for her to turn – of course she’s no 8m rocket!

Strapless Fat Lady fun…

One last point about the Fat Lady – she depowers well. So if you go out early to poach some turns while it’s crazy light and the wind picks up you can stay out there without getting your arms torn off. Just haul in on the depower and keep riding.

The KLR and the Fat Lady…

So far the Fat Lady has saved me a number of sessions that would have otherwise been spent on my ass bitching about the lack of wind. Light wind kiting is gentle on gear so I expect I’ll be dancing with the Fat Lady next decade!


Craig Stappler – Tour Divide 2012…

21 06 2012

Craig’s Porcelain Rocket equipped bike…

The Tour Divide is a self-supported bikepacking race from Banff to the USA/Mexico border. It’s a long hard event with many challenges including snow in the mountains, rain, mud and long stretches without supplies. The pace the leaders are on is amazing. One of the two leaders is riding with a custom Porcelain Rocket bikepacking bag kit.

Leaderboard – click to jump to current update…

Scott told me I should watch out for Craig Stappler a Calgary based cyclist and he was right. Craig’s been leading the race right from the start and is closing in on the finish at a record setting pace.

Just ’cause they are racing doesn’t mean there isn’t time for a beer!

Craig is riding with a Kiwi named Ollie Whalley so it will be interesting to see if they cross the finish line together or if they battle it out in the home stretch for victory.

BTW – I stole the photos of Craig from this thread over at bikepacking.net. You can read updates about the race there.


Toni Lund’s Porcelain Rocket Anything Cage Bag Review…

20 06 2012

Click on image to read the review…

Since I posted about Salsa Anything Cages yesterday I figured I’d share this review of Scott’s Porcelain Rocket Anything Cage bags that Toni Lund did. He’s got a nice blog that’s worth a read as well.


Kiteboarding BC and Baja…

20 06 2012

Click to read Baja Kiteboarding article….

I came across a couple of articles about kiteboarding in my two favourite spots – British Columbia and Baja. If you want to see why these spots rock for windsports just click on either image to read the articles.

Click image to read BC kiteboarding article…


Salsa Anything Cages…

19 06 2012

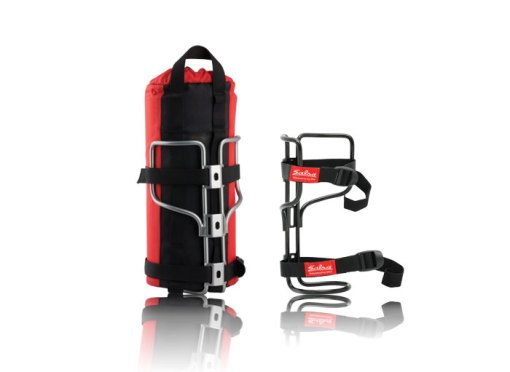
Salsa Anything Cage…

Salsa Anything Cages are a hot item at the moment. Sadly they seem to be breaking as fast as they are selling. I know of one bike tourist who is on his fifth Anything Cage. I suspect we’ll see a new improved version from Salsa just as soon as they finish selling the current batch and need to order more from Asia. If you want some of these cages and can hold off a bit I think waiting for a more robust version is the smart move.

BTW – if you do buy some of these cages Scott over at Porcelain Rocket makes some sweet bags that fit them perfectly.


Bike to Work Week…

18 06 2012

Victoria Bike to Work Week T-shirt…

Victoria’s Bike to Work Week took place in May. Sharon is our household bike commuter and she participated fully. I on the other hand have an across the yard commute I do on foot. I must say I miss my old bike commuting days and look forward to resuming that fun transportation habit one day when I have an office to go to again.

Scott and I at our bike to coffee get together…

Neither Scott nor I have a bike commute yet we wanted to support Bike to Work Week in some small way we decided to ride to a coffee shop downtown.

Scott at work…

Scott is a work-a-holic and is very popular with bike geeks around the world. So needless to say he brought a computer to our rendezvous so he could stay in touch with his biznatch!

Might as well get some stuff done…

Since I was downtown I took care of an errand or two on my Bike Friday Tikit cargo bike…:-)

Sharon our uber bike commuter…


Lance vs. USADA…

16 06 2012

Click here to read the USADA Doping Letter…


On One Scandal 29er Bikepacking Mk2…

15 06 2012

My On One Scandal…

I’ve been honing my On One Scandal 29er bikepacking setup over the last while. Here are the recent changes:

Longer cockpit…

The longer TT is nice for getting low and fast when the trail allows for higher speed riding. It’s not bad for non-technical mountain biking, but I really didn’t enjoy the longer stem when riding the steep techy trails at Hartland. For the most part the Scandal is my bikepacking rig so that’s okay. If I press it into duty as a MTB I’ll have to swap in the shorter stem again.

Another view…

Having a frame bag that actually fits the bike is a beautiful thing. The zippers work more easily and it just makes me smile. That can be important when I am sitting on the ground sweating after reaching yet another hot/dusty route recon dead end…you need something to lift your spirits…;)

Fork mounted water bottle cage…

It’s lovely not to have anything on my back when riding hard so having a place to store water on the bike was a challenge. I sometimes stash a large bottle in the framebag, but in that location it’s competing with other important gear. So I used hose clamps to attach to standard water bottle cages to the legs of my Rock Shox Reba fork. They’ve been solid even over some crazy bumpy terrain and with a DIY retention cord my bottles have not jumped ship. I don’t bother taking them off the bike when not needed, but I could as the install/removal process is quick.

Scandal and Hunter…

Overall the On One Scandal 29er has proven to be a decent choice as a first 29er MTB and a bikepacking rig. For ~$400 it’s a great value in a versatile frame. I don’t think I could have done better for that price. For the time being I don’t see any more changes in the works.

If you are wondering what I have packed in each bag click here.


Lib Tech Ramp Surfboard

14 06 2012

Lib Tech Ramp Waterboard – Surfboard…

This is the model of Lib Tech surfboard I’d buy if I had the cash laying around. 5’4″ x 20.25″ is a great size for maneuverability under a kite with decent floatation. Bonus points for the cat themed graphics… 😉


Vibram Five Fingers Ultra Repair

13 06 2012

They are not supposed to do that!

So far Vibram Five Fingers are the best kiteboarding footwear I have found. They protect my feet well and give me decent board feel so I can enjoy my time on the water.Trouble is the fabric between the toes is weak and gets abraded by rocks when you walk down the beach. It doesn’t take long to put a hole in this critical area of the slipper and once you get rocks inside them they hurt like hell. I’ve sewn them closed a few times, but it seems to happen again pretty quickly and I was running out of material to try and sew back together. I was ready to give up on this pair and simply buy another, but my low cash flow situation motivated me to try one last effort at a longer term repair. Since the rest of the slipper still has years of life left in them it seemed worth another shot.

Step one sew the holes shut as best I can…

With all the previous repairs there is not much fabric left between the toes that is still attached to the rubber sole. I find just enough to sew the holes shut, but I know this will tear again in a few hours if not reinforced.

Shoe Goo to the rescue!

I then coated the whole inner toe area with Shoe Goo. This will reinforce the fabric and the stitching. I made sure it overlapped the rubber sole to give it maximum strength.

Drying one toe at a time…

Then I let each toe I repaired dry before tackling the next one. This prevented the Shoe Goo from gluing them all into one unit.

My Vibram Five Finger KSO’s back in action…

Here is the finished product ready to ride. It’s not pretty, but my toes say inside and the rocks stay outside. I’m not sure how long the repair will hold. It seem pretty solid so far. Since I was about ready to discard these slippers if I get another summer or another year of use out of them that’s great.

Not pretty, but the repair is holding – so far!

If this works reasonably well I may even proactively coat the fabric between the toes with some Shoe Goo [perhaps a thinner layer] to protect them from getting damaged in the first place.

Sharon loving her Five Fingers…

I may be sounding like a broken record on this front, but if anyone from Vibram reads this here is what we need for a perfect watersports version of the Five Finger:

  • thinner sole [most of our time is spent standing on a board so feeling where our feet are is more important than a thick sole for durability]
  • area between toes needs to be more durable [ this is the weak spot] currently the sole of a KSO will last 4yrs+ of kiteboarding use, but the fabric between the toes will only last a few months. Not good.
  • a tall version of the Five Fingers made out of neoprene for cold water riding would be sweet. At the present I have to switch to surf booties in the winter when my Five Fingers are not longer warm enough
  • Neoprene Flow slippers have a problem. The fabric is thick, but the exterior dimensions of the slipper are the same as the thinner KSO fabric. That means the space inside the toe box is less on the Flow. Since the rubber part of the slipper doesn’t give the big toe is forced to bulge out along fabric the seam. As the skin softens from hours in the water you get hurt/cut from the inside of the booties which makes them unsuitable for a lot of people like me! The space in the toe box needs to be the same across the model range and account for the Flow’s thicker fabric. If we buy a bigger size the slipper is too long to fit properly so that’s not a useful approach. Besides we don’t need a low cut insulated slipper anyways since if it’s cold we need to connect with a wetsuit leg to stay warm.

Here is a reminder of why I bother with booties kiteboarding…


Patagonia Nano Puff Hoody Review

12 06 2012

Patagonia Nano Puff Hoody…

Vancouver Island is a land of cool damp windy weather. It can be dry and hot, but that’s rare. It’s challenging to pack light and be comfortable. To get enough insulation from fleece you end up with a bulky load. So some form of compressible insulation is mandatory. There are quite a few lightweight down and synthetic jackets on the market. I tried on a MEC product, but it didn’t fit well. Next up was the Patagonia Nano Puff Hoody. It fit pretty well so I bought it. Really Sharon got it for me as a birthday present – thanks! 🙂

Product details – click on image for larger…

I’ll let you read the product details above. What I like about this hoody is:

  • fit me pretty well
  • warm in our typical cool temps
  • windproof
  • rain resistant [don’t get your hopes up too much on this feature!]
  • packs small
  • dries reasonably fast
  • bright colour pops in photos
  • priced similarly to other products I looked at
  • lifetime warranty
  • Patagonia has good environmental policies

Warm and toasty at Nitnaht Lake…

This hoody and similar garments are pretty useful, but they have limitations:

  • there isn’t that much insulation in this hoody so don’t expect it to keep you warm in a Edmonton blizzard.
  • while it’s windproof and water resistant don’t mistake this for a rain jacket…you will get wet.
  • if you get wet the synthetic insulation won’t work so well…it’s better than wet down, but not that much better. What synthetic insulation buys you is a shot at drying out the hoody after it gets wet.
  • to get so light the outer fabric is delicate…it won’t explode while hiking, but it’s not going to survive a ton of bushwhacking or being rubber against sharp rocks.

As long as your expectations are realistic you’ll be happy with this hoody.

Almost too red for my camera!

I’ve only had the Nano Puff for 3 months, but it’s become a regular resident in my backpack or bike bags. It’s almost always handy to have around and it packs small enough that if I don’t use it I don’t feel like it’s a burden to have along. My only concern is how durable it will be. The fabric isn’t very heavy duty, but on the plus side the sewn through quilted construction is easy to repair with a patch so it shouldn’t be too hard to get a few years of use from it.

Are you a Patagoniac?

Almost every major brand has a comparable product these days. Although I appreciate Patagonia’s environmental policies and lifetime warranty – getting a good fit is critical for the minimal insulation to work for you. Definitely try on before you buy and select the garment that fits you the best.

Scott packing his bike…

I have to give Scott credit for demonstrating how practical these lightweight insulated jackets are. He was right…=)


Airport Camping…

11 06 2012

Our deluxe suite at the Calgary Airport…

On our way back from LA for the Moontribe 19yr Anniversary full moon gathering we got stuck in Calgary for 21hrs due to a big storm system. With hundreds of other stranded travelers there were no hotel rooms available near the airport. No worries – we are seasoned campers and we had our gear with us still dusty from the Mojave Desert. So we found a nook on the arrivals level where we could throw down our sleeping pads and bags. We got a few strange looks, but I fell asleep pretty quickly and appreciated 6hrs of horizontal time.

Sharon enjoying our “campsite”…

Sharon and I both used Exped air mattresses – mine is a Downmat 9. It can be a PITA to inflate this thick mattress, but it’s perfect for very hard or rocky surfaces due to it’s huge volume. It’s also very warm thanks to the down inside that keeps the air from circulating. Sleeping on a concrete floor at the airport was no problem at all.


Hooray for Earth!

10 06 2012

Too good not to share again! 😉


Aaron’s Sedona Fat Tire Bike Shop Thoughts…

8 06 2012

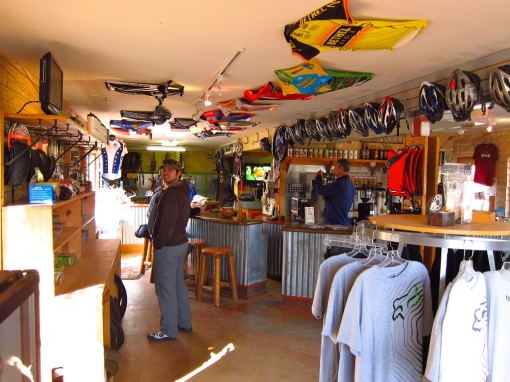
Looking out from the Bike and Bean…

Aaron writes:

Sedona, AZ was an awesome sensory blending experience and I’ll write up my impressions of the trails/territory in another installment. Primarily I’d like to mention the humble huts that make your riding experience all the more enjoyable, and in the case of a major mechanical, possible. Vik and I went to several different shops to see what the scene was like. The Bike & Bean is essential if you want great espressos, americanos, or just a regular coffee while you ogle the merchandise or solicit the staff for some trail advise. At Over The Edge you’ll find some good riding gear, friendly staff, cool bikes, and more good suggestions of where to ride. Absolute Bikes is fairly large and well stocked with the usual casual, friendly folks.

Interior of the Bike and Bean…

And then there’s The Fat Tire Bike Shop. I realize there are more bike shops in Sedona but I only had so much time. The Fat Tire Bike Shop (TFTBS), owned and skillfully operated by one Dave Cichan is a famous institution in mountain bike circles. I’ve had the pleasure to be employed by the industry that I love for over 12 years and I’ve never come across a shop that is like this one. If it were the only shop that I ever worked at then I’d be starting out at the top of the heap. Those of you reading this likely read other entries of Vik’s and have read his write-ups about TFTBS so I won’t get all deep in history. Rather I’ll relate my experiences and observations as a TFTBS first timer.

The Fat Tire Bike Shop – Sedona AZ…

Always affable, and possessing a nonchalant professionalism, Dave will invariably take the time and ask the right questions to make your cycling experience more enjoyable and the service will leave you moderately stunned. At least that’s how I felt for a bit when I first walked in the door with Vik. I believe that it was back in 2009 that Vik last visited TFTBS. Immediately Dave recognized him and offered greetings to the both of us. After intros I felt like one of the tribe. Besides Dave the other thing I noticed right away was the absence of piles of merchandise. This is not to say Dave isn’t well stocked, he has everything he needs & likely what you’ll need as well. Rather than find out what you think you want & then try and push whatever he has that’s related on you, Dave will ask intelligent questions and then offer up a bull’s eye suggestion.

Dave and Aaron talk shop…

Many people came in the shop over the times I was there and invariably they were dealt with in a professional manner. Myself included. My poor bike took a great deal of thrashing and the door to TFTBS was always open. My rear tire wore out, the rear brake pads got contaminated, and my Rock Shox Motion Control damper started to leak. All theses issues were dealt with immediately with the greatest speed and assistance possible. Not just allotted to me, Vik and any other who wandered through the door were treated the same. Often I marveled at how this was possible, Dave puts in a lot of long days at TFTBS.

Inside the Fat Tire Bike Shop…

The worst issue I had, the leaking damper seal turned into one of the most satisfying experiences I had at Dave’s. The stock part wasn’t on hand but Dave put in a call on the red phone to Rock Shox HQ and had one shipped out immediately. On morning of our last day of riding we went over to TFTBS to see if the part was in. Through no fault of Dave’s it was not in yet. Rather than leave it at that, Dave dove into some drawers and managed to find what I needed.

Rock Shox upgrade…

Apparently what I needed was a gleaming, titanium/carbon fibre Motion Control unit of the BlackBox persuasion. That of you who don’t know, BlackBox is Rock Shox’s ultra high-end, factory only kind of goodness that us mere mortals can only slobber over. Before I could rub the dazzle from my eyes Dave had my Kona in the stand and was draining the factory oil.

Dave and Aaron working on his fork…

Fresh oil at a different viscosity ( Dave’s recommendation ) and the new damper was in. “How much?” I asked and his response was “go ride it and see how it works for you”. Again, not your usual shop experience where stepping out the door without first leaving collateral is akin to going #2 without wiping after, it’s frowned upon. After what felt like a reversed payment agreement was reached Vik and I hit the trails.

Aaron testing his fork out…

Immediately I noticed the small bump compression sensitivity was vastly improved over the original, plastic damper and the fresh oil made for very smooth operating suspension. Even though I was physically beat after all the days of riding I was still excited to be riding in fantastic Sedona and having had the pleasure of dealing with Dave Cichan. As far as I’m concerned you couldn’t do yourself and your bike a bigger favour than going down to TFTBS for the very best that Sedona bike shops can offer. Be forewarned that TFTBS is a time vortex in the most wonderful way possible. Huge thanks to Dave for making a sweet holiday all the more excellent.

Dave working it at the Fat Tire Bike Shop…


Tikit PR Racks Options…

7 06 2012

My Tikit porteur rack…

I rec’d some mail about getting a Tikit PR made and wanted to just throw out a few options and non-options for those Tikit riders who are interested:

  • I have spoken with Bike Friday about getting a production Tikit PR rack made and they can/will do it if they feel there is a market for them. So the more people that request such a rack the more likely they’ll build one.
  • I was asked if Lane at CETMA really wouldn’t build another PR rack for these bikes even at a premium price. That’s my understanding, but you can always ask politely.
  • Alex Wetmore doesn’t want to build any of these racks for $$$. I asked him!
  • You can buy a Tikit 2 pannier rack and attach a platform to it for a DIY PR rack. I haven’t tried this so there may be a problem, but it looks like an easy way to get a PR solution on your Tikit.
  • Anyone who fabricates with thin wall steel can build you one of these racks if given the bike and some photos to work from.
  • Keep in mind a custom rack can be expensive. I asked a local bike rack builder for a quote and he wanted $450+ to tackle the project.
  • If you or a buddy can weld this isn’t a hard project. It will just take some time to test fit and get everything dialed.


Fresh Crocs!

6 06 2012

I love a new pair of Crocs…

Okay this may tarnish my image as a style icon, but I wear Crocs more than all my other footwear put together…;-) They are comfortable for my troublesome feet that usually demand orthotics and so easy to slide on/off for my missions that require frequent footwear removal.

Not hard to tell which ones are new…

Crocs are excellent for wet weather use which suits the climate around here and the fact I spend a lot of time at the beach.

Not good…

The only trouble is once the tread wears off they can get uber slippery on wet surfaces like my deck!

Problem solved…

I’ve been slowly wearing out my Croc fleet in Victoria and having a hard time finding replacements locally. After enough near death experiences I finally found an online source in Canada to replenish my Crocs. I’ll keep the old ones to take down to Baja where wet surface traction isn’t important and looking a bit gnarly is par for the course.


Bike Friday Tikit Porteur Rack…

5 06 2012

My Tikit porteur loaded up…

I’ve been meaning to share some photos of my Bike Friday Tikit loaded up with cargo on the custom porteur rack I had built.

Locked, loaded and on the move…

I got my inspiration from Alex Wetmore’s blog posts about the custom PR rack he built for his own Tikit.

The box almost hides the bike!

Having tried all the available racks for the Bike Friday Tikit I think the PR style rack offers the most capability for a variety of loads as long as you are okay with a slightly wider fold.

At the UPS Store…

You certainly can’t beat the ease of placing a box or bag on the PR rack and securing it with one strap.

Worm’s eye view…

The low forward position of the cargo minimizes the impact on handling and it’s right in front of you so you know the status of any precious cargo.

A wider folded profile with the PR rack…

The Tikit rolls and folds normally with the PR rack in place, but the overall width is larger which may not suit folks who take their Bike Friday on busy public transport. I don’t ride the bus with my bike so this isn’t an issue for me.

Rear of the bike is empty…

I rarely need more cargo hauling capacity than the front PR rack provides, but the whole rear of the Tikit is empty for carrying another box or a couple full-size panniers on a folding touring rack.

The PR rack off the Tikit…

If you are keen on one of these racks for your Bike Friday there is sadly no production source at this time. However, there are a number of custom fabrication options in most towns that can replicate this rack if they have your bike and some photos to work from.

BTW – if you are wondering why they are called “porteur”racks or PR racks it’s because in French “porteur”means Pretty Rad = “PR”….;


A ruthlessly streamlined fleet…

4 06 2012

Santa Cruz Nomad – mountain biking….

I was war gaming a really aggressively stripped down bike fleet recently.

On One Scandal 29er – bikepacking…

These are the bikes I’d keep.

Boulder Bicycle All Road – brevets/road biking…

Not saying I’m about to do anything rash.

Surly Big Dummy – cargo bike/touring bike…

This is just a mental exercise at this point.

Bike Friday Tandem Traveller XL – road biking and touring…

But, you never know!

Bike Friday Tikit – commuter bike and errand rides…


Glad I have spares…

3 06 2012

Chilling with my fatty…

My Santa Cruz Nomad is in the shop to have its fork serviced. A long overdue bit of maintenance. I don’t like to rush folks doing important work on my gear and I realize that May is not the ideal time to drop off a mountain bike for quick turn around repairs.

Riding my On One Scandal with Grant and his sweet Chromag Surface 29er…

So I’ve been riding my other mountain bikes – a On One Scandal and a Surly Pugsley fatbike.

Grant pondering the beauty of our local trails…

It’s great to have other bikes to ride so I am not waiting for the Nomad to come back before I can ride some trails.

Scott happy to be out riding…

And although my other bikes are not as supremely awesome as my Nomad they keep me rolling and help me better appreciate my main mountain bike.

Sharon glad I had a spare bike to ride…


RIP – Santa Cruz Nickel & Butcher…

2 06 2012

Santa Cruz Nickel…

Word on the street is that Santa Cruz is going to stop selling their two APP bikes the Nickel and Butcher this year. Although the APP bikes have been well received by reviewers it seems that Santa Cruz couldn’t find a clear message of how these bikes fit into their line up between classics like the Heckler, Nomad and Blurr. The APP bikes were priced less than the top shelf VPP offers, but not as low as the single pivot Santa Cruz bikes. It was probably hard to sell these bikes to price conscious riders who could save quite a bit more going with a bike like the Heckler which has a long standing reputation in the mountain bike world. At the other end of the spectrum folks with some money to spend would be tempted to spend a few extra $$ to get the legendary VPP performance of a bike like the Nomad.

Santa Cruz Butcher…

At another company the APP bikes may have flourished, but with such a strong line up and established lower priced bikes such as the Heckler they just didn’t find their place. Ultimately the reality of selling mountain bikes is you need more than a great bike for success. You need a great story and a clear message that prospective buyers can digest in a few minutes.

With 650B bikes likely around the corner for the mountain bike industry Santa Cruz needed to simplify their product line up to make room for the confusion that’s going to reign with 3 different mountain bike wheel sizes!