DeFeet Woolie Boolie Socks…

31 05 2013
Short pants + long socks...

Short pants + long socks…

I like capris for riding and camping in because they are adaptable from hot to cool temperatures. When it gets really chilly I layer a set of running tights underneath. For less cold days I like long socks with my capris. There are lots of long sock options, but one I sourced locally at MEC.ca was these DeFeet Woolie Boolie socks.

Side view...

Side view…

They are wool, they are long and they are black. Thin enough not to be too hot and thick enough to be useful. Layering these with my running tights should be nice and they can be rolled down if it gets hot.

If you are into more snazzy fashion look for colourful ski socks on sale now that winter is over.

Here is the DeFeet product page for these socks.

They cost $25 & 1yr warranty.


Summer Bikepacking Shoes…

30 05 2013
On the move...

On the move…

I’m trying to figure out what shoes best meet my needs for summer bikepacking trips.

  • all day pedalling comfort with MTB platforms
  • reasonable grip biking through technical sections
  • able to hike-a-bike comfortably for 4-5hrs at a time over rough ground
  • excellent traction off the bike
  • breathable
  • fast drying after rain or creek crossings
  • need to accept my semi-custom insoles
5.10 Impact Low...

5.10 Impact Low…

My favourite cycling shoe is this 5.10 Impact Low model. They are super comfortable, very durable, grip the pedals like glue and have great traction off the bike. The only downsides are 1) they take forever to dry if they get wet, 2) they are pretty heavy/overbuilt for touring and 3) they don’t breath all that well. If they dried fast I could live with everything else.

I really hate riding in wet feet so these are not a good choice if I think it might rain and/or I would have to carry my bike through any creeks/rivers.

Montrail trail runners...

Montrail trail runners…

I love these Montrail runners. They are super comfy and work great on/off the bike for touring. Although they dry faster and are more breathable than the 5.10’s they are not great in either category. They are also on their last legs having been shredded on many previous adventures – soles are almost worn away at the heel, cushioning is compressed and uppers are starting to tear. I just repaired the uppers with shoe goo so I could use them on my last tour, but Sharon laughed at me and said it was time to let them go. I probably will have to do that, but not until the end of the year! 😉

La Sportiva trail runners...

La Sportiva trail runners…

I bought these La Sportivas to replace the Montrails above, but never loved them enough to actually part with the old shoes. There is nothing wrong with the La Sportivas. They do everything well enough, but somehow the fit/performance just isn’t as good as I would like. On the plus side they are light and breathe/dry well. I’ve worn them enough that they are starting to fail at weak spots, but some strategic shoe gooing means they be good for another full year.

At the moment these are the best bikepacking shoe I own and when I have to throw the Montrails out they’ll keep me rolling until I find a replacement.

In terms of bikepacking downsides:

  • raised instep not uber grippy on the bike pedals [not awful, but just okay]
  • not as stable during hike-a-bike as my other shoes
  • lightweight construction not super durable [I’m okay with this as a trade off for fast drying]
Merrel Gaulley water shoes...

Merrel Gaulley water shoes…

I bought these Merrells when I broke my foot and needed a soft stretchy shoe to accommodate my swollen foot. They are water shoes which means they breathe and dry very fast, but they are very flexible and don’t offer much support. I have toured in water shoes before with no issues, but those tours did not involved any hike-a-bike over rough ground which my current trips seem to feature. These shoes also have a fairly non-aggressive sole so I don’t know how well they will do walking/pushing on steep loose terrain.

On the plus side is they fit me, they accept my insoles and they are paid for! 😉

I need to try a hike-a-bike tour with them and see if they work okay. They would definitely be my choice for a trip that I knew would involved a lot of wet feet.

Vibram Five Fingers...

Vibram Five Fingers…

So far I haven’t bothered with a second pair of shoes on tour. Wearing trail runners on my bike means they are comfy for wearing around camp and BC has barefoot friendly campsites [no thorns or sharp rocks] so I can just go without shoes if I need to air out my feet. However, I started to think that maybe carrying these Five Fingers wouldn’t be a bad idea. I could wear them during creek crossings to keep my main shoes/socks dry and they’d be fine in camp if I didn’t want to go barefoot. I could even ride or hike in them if I needed to. Plus they are also paid for! 😉

Most bikepackers who carry a second set of footwear seem to favour flip flops. Presumably for their lightweight, easy packing and low cost. That makes sense – except flip flops are pretty useless in a raging rocky creek or for anything more demanding then chilling in camp.

I’ll test the Five Fingers out this summer and see if they are worth hauling along or not.

Montrail Mountain Masochist trail runners...

Montrail Mountain Masochist trail runners…

I’ve got troublesome feet so I can’t simply order some shoes out of a catalogue and have much success. I’ve got to try on every pair that interests me and see what feels okay in the store. If I am hopeful I’ll buy a pair and wear them at home for a couple days to see what problems crop up once they are on my feet for several hours at a time. If that seems promising I start wearing them outside and give up any hope of returning them for a refund.

My success rate even with this sensible systematic approach is pretty grim. Shoes my feet really love are few and far between. I have given away quite a few pairs of shoes over the years that I thought were winners until an extended trip where their comfort was lacking. Which is why I’m starting to think of this now even though I can keep my La Sportivas going through to summer 2014. It could easily take that long to find a worthy successor! 😦


BFLs Wanted…

29 05 2013
Big Fat Larry on a Jones...

Big Fat Larry on a Jones…

Update – Found some. Thanks! 🙂

I would like to buy 2 BFLs. I need the 120tpi version in good shape at a price that rewards me for not buying new. If you have some you aren’t using drop me a line and we’ll talk. 🙂


Bikepacking Cooking…

28 05 2013
The cooking gear...

The cooking gear…

Here is the latest iteration of my bikepacking cooking setup:

  • 700 ml MSR pot w/ lid
  • Trangia stove
  • stove stand
  • MSR windscreen
  • spork
  • small lighter
  • 30 ml alcohol fuel x 2
  • 125 ml alcohol fuel
Carried inside pot...

Carried inside pot…

The stove, lighter and 60 ml of fuel fits inside the pot. The stove is typically wrapped in a small cloth that doubles as protection from the pot’s handles that get hot. For longer trips where I might cook regularly vs. boil water for a camp meal I would add in a small bottle of dish soap and a cut up scrub pad.

Weight with 60 ml of fuel...

Weight with 60 ml of fuel…

I’m not trying to go ultralight here. I just want the weight to be low enough it’s not a major burden and I also want the packed shape to work with my bike bags.

125 ml of feul...

125 ml of fuel…

Each 30 ml bottle will boil 500 ml of cold water. I carry two 30 ml bottles inside my pot and the Trangia can hold a lot of fuel in the stove body itself if you want to pre-load it before you pack it. If I need more than that I have a bunch of 125 ml bottles like the one shown above that I can carry.

Trangia and stand...

Trangia and stand…

I love my little Trangia stove. It heats water well. Is easy to use and very reliable. It can be used to simmer food unlike a lot of lightweight alcohol stoves. The stand is very strong and stable.

Stove ready to rock...

Stove ready to rock…

I use a MSR windscreen to keep drafts at bay. It’s a bit large and I’m going to downsize it a bit so it fits better and packs smaller.

Stove in action...

Stove in action…

With no moving parts and constructed of brass the Trangia is a bombproof piece of gear.

Ready to light...

Ready to light…

You can see in the picture above that 30 ml of fuel is just a dribble at the bottom of the Trangia. I purposely spill some fuel on the top of the stove to make lighting easier.

Let's boil some water...

Let’s boil some water…

I timed boiling 500 ml of cold tap water using the Trangia in 8 mins. The 30 ml of fuel burned for 10 mins before running out.

Pot inside my framebag...

Pot inside my framebag…

The shape of this pot fits nicely into my Porcelain Rocket framebag. It also works great in my bar bag or seatbag – just depending where I want to carry it.

Methyl Hydrate...

Methyl Hydrate…

I use methyl hydrate to power my Trangia because it’s easy to find locally. I’ve spilled this fuel in my bike bags and unlike gasoline or naptha there is no horror show. It just evaporates and no damage or smell occurs. I like that!


Continental Trail King Tires Review and Renew…

27 05 2013
Fresh rubber...

Fresh rubber…

I love my Continental Trail King tires. I’ve used my first pair for over a year and had zero flats, burps or other issues. Just great traction and reliable performance.

So when I started to uncharacteristically spin my tire on steeper looser climbs I checked my rear tire and it was worn badly. Time for new rubber.

The new tires say Rubber Queen on them because that’s what Trail Kings are called in Europe. Different name, but same tire. I bought the UST version again. They are heavy, but I love the traction and how great they are to setup tubeless. I chose the 2.4″ size a second time because I love how the large diameter tire rolls over roots and rocks. Skinny tires aren’t faster if you get hung up in every tech section.

I’ve heard some good things about the Schwalbe Hans Damf tire, but I figure why mess with success?

I really can’t say one bad thing about these tires. I hope Continental makes a 650B version when I get a new mountain bike.

She's hefty...

She’s hefty…

I kept the old front tire as a spare...

I kept the old front tire as a spare…

The rear was toast...

The rear was toast…

The Stans sealant in the tires had dried up...

The Stans sealant in the tires had dried up…

Letting the tires seal...

Letting the tires seal…

I used CO2 to seat the tires...

I used CO2 to seat the tires…

My Nomad waiting for the new rubber...

My Nomad waiting for the new rubber…

No more slipping on climbs...

No more slipping on climbs…

Ready to ride...

Ready to ride…

Time to shred the new tires for another year...

Time to shred the new tires for another year…


BC Rando 400K…

25 05 2013
Mike in control...

Mike in control…

I helped Mike and Steve run the Hell Week 400K last Thursday. The weather was awesome and the riders put in strong performances which made running controls easy. We enjoyed some lovely sunshine running a control near the Denman Island Ferry and then retreated to the Best Western Hotel in Chemainus where we watched the NHL play offs while waiting for riders to come in for a 280K control plus the final control. Luxury hotel rando volunteering. 😉

I posted some photos to Flikr here.

The start...

The start…

Folks familiar with the BC Rando Club’s Hell Week will notice far too much smiling in these photos. Sadly the excellent weather meant that the legendary level of suffering for this week long Super Randonneur series has not materialized.

Eric on the move...

Eric on the move…

I offered to blast riders with cold water from a garden hose at the 280km control so they could get more suffering value out of their ride, but nobody took me up on it! 😉

Ken doesn't look like hell at 280kms...

Ken doesn’t look like hell at 280kms…


Vargo Triad Stove Review

24 05 2013
Looks sexy...

Looks sexy…

These Vargo Triad Ti stoves look sexy, but work like crap. Don’t waste your time buying and returning it! =( I tried one of these out in 2008 and was disappointed. I figured they might have improved it since then so I bought another at MEC.ca.

I filled it with methyl hydrate which is the easiest alcohol fuel for me to source. Lighting it was no problem, but even with a windscreen and inside my garage it was unable to boil 2.5 cups of water that I typically need to rehydrate a camp meal. The water ended up warm, but not boiling.

With my usual Trangia burner I can boil that much water for a meal and if I am lucky boil another cup for tea.

Too bad!

Too bad!

I’ll go back to using my trusty Trangia and try some of the DIY beer can stoves for an ultralight option. This Triad is going back to MEC and I won’t waste my time trying them again.


Knolly – Sunshine Coast, BC…

23 05 2013


Sharon’s First Bike Tour…

22 05 2013
Sharon on the move...

Sharon on the move…

After a lot of tries to get out on a bike tour the stars aligned so Sharon and I hit the road this past weekend for some bike camping. We fitted Porcelain Rocket bikepacking bags to her Surly Pugsley and head up the Galloping Goose MUP towards the Sooke Potholes Campground. This a 50km dirt ride which is challenging enough on a loaded fatbike to be interesting without being so hard it might deter a novice bike tourist from going on a second tour. The scenery is nice and it’s 99% car free.

Sharon carried her own sleeping bag, pad, food, water and clothing. I carried all the group gear [tent, stove, cups, tools, spares, F/a kit etc..]. I ended up using rear panniers on my Pugsley to carry the extra group gear. It worked just fine, but the whole time I wished I had Porcelain Rocket softbags on my bike. Riding rough terrain with panniers is not a lot of fun.

We stopped on the ride out for a bite to eat at the 17 Mile House Pub which is perfectly situated about an hour from the campground. I wanted to reinforce all the good things about bike touring so stopping to eat, drink and relax seemed important!

I was a bit worried that the campground would be full of party animals as it was a holiday weekend in Canada. Happily we found a whole section of the campground unoccupied and the rest of the campers were chill. Some hot tea, a campfire and a chill session rounded out the evening.

My 2 person bike touring tent is cozy, but once Sharon got the hang out climbing in a out she had a good nights sleep.

The next morning we fired up the stove for tea and oatmeal before checking out the potholes down by the Sooke River.

The ride back was pleasant if repetitive. – sadly there isn’t a good loop route from the potholes back to Victoria that doesn’t involve significantly longer distances and a lot of climbing. We stopped for some Thai curry on the way back – again to emphasize that every good bike tour is an excuse to eat well!

By the end of the ride Sharon had enough energy to beat me to the top of a few climbs while smiling. That was a great sign that we had picked an appropriate route for her first tour. I’ll post something about using a Pugsley as a touring bike separately, but let me say that if you own a Pugs and you want to tour don’t think you need to buy another bike or even another set of wheels.

All in all the tour was a success. I’m sure Sharon will want to head out again once she’s recovered from knee surgery over the summer. The trick will be to pick routes that offer the most smiles for the least gnarliness.

Trip photos are here.

Click for detailed map...

Click for detailed map…

Enjoying the sunshine...

Enjoying the sunshine…

Corn dogs?

Corn dogs?

My Pugsley...

My Pugsley…

Where is the pub?

Where is the pub?

Lazy pulling up the rear...

Lazy pulling up the rear…

Beer!

Beer!

Great reason to bike tour - no traffic jams...

Great reason to bike tour – no traffic jams…

Strait of Juan de Fuca...

Strait of Juan de Fuca…

Rest stop...

Rest stop…

Barnes Station Shelter...

Barnes Station Shelter…

We made it!

We made it!

Our camp....

Our camp….

Getting a fire going...

Getting a fire going…

Where are you sleeping?

Where are you sleeping?

Let's ride!

Let’s ride!

Where did the trail go?

Where did the trail go?

The mighty Sooke River...

The mighty Sooke River…

I think I can ride this!

I think I can ride this!

Bridge to somewhere...

Bridge to somewhere…

Back at the water...

Back at the water…

Let's get 'er done!

Let’s get ‘er done!

Still smiling...

Still smiling…

Watch out for falling rocks!

Watch out for falling rocks!

Almost home...

Almost home…


OMM Racks – Born in the USA..

21 05 2013

Some behind the scenes footage at Old Man Mountain [aka OMM] racks. Made in the USA by some nice guys that love bike touring. 🙂


Sharon’s Porcelain Rocket Surly Pugsley…

20 05 2013
Sharon's Pugs in adventure mode...

Sharon’s Pugs in adventure mode…

Getting Sharon out on her first ever bike tour is one of our goals before her knee surgery at the end of the month. I got her a new seat and bar bag from Porcelain Rocket so she’s ready to roll. The white frame bag is the same one I use on my Krampus. It actually fits her Pugs better than the Krampus so Sharon will use it when we tour together.

PR seatbag...

PR seatbag…

The seat bag fits her bike great. It’s nice and tight. Plus it just clears that uber fat rear tire! Sharon will put her sleeping pad and extra clothes back here.

New design PR bar bag...

New design PR bar bag…

The PR bar bag has a new attachment system that seems to work well. The bag fits with the Titec H-bars great. Sharon will put her sleeping bag in the bar bag.

Looking good...

Looking good…

The white fabric on the frame bag is crazy expensive so I couldn’t afford to go all matchy-matchy!

Frane bag fits great...

Frane bag fits great…

This frame bag was designed to fit my On One Scandal. It slides right into the 16″ Pugsley’s frame.

Another seat bag view...

Another seat bag view…

Besides getting Sharon out on tour part of my motivation to get a second set of PR bags is so I would have some to share if I can rope somebody into coming on tour with me.

Rider's eye view of bar bag...

Rider’s eye view of bar bag…


Solo Shred…

17 05 2013
Spring has sprung...

Spring has sprung…

Sharon has become a bit of a mountain bike fiend these days. Part of that is as her skills improve she is enjoying each ride more and more and part of it is that she’ll be off the bike for 3 months this summer after knee surgery so she is trying to get in as much riding as she can.

Either way it means a car is going to Hartland MTB Park frequently and I hate to waste gas so I jump in with her whenever my schedule allows. I don’t like to mess up the all-girl-MTB vibe she has with her friends so we go our separate ways and arrange a time to meet up back at the car.

Riding solo has its benefits. I ride at my own pace and can get into a nice flow – especially coming back down the mountain. I’m not worried about riding as fast as possible, but I do like to clean everything on the trail and find a consistent rhythm. The longer I can stay in the same “zone” the happier I am. 🙂


Surly Krampus Fork w/ Anything Cage Mounts…

16 05 2013
Krampus porn...

Krampus porn…

Surly is selling a Krampus fork with mounts for Salsa Anything Cages. It’s something you have to buy separately from a Krampus and it will only be available in black, but if you really must have cage mounts on your Krampus fork a solution exists. This fork isn’t shown on Surly’s website yet, but I confirmed with Surly that it does indeed exist. Surly forks typically cost ~$100.

Here is a pic of it.

Construction and fork stiffness will be the same as the stock Krampus fork.


Downtube Water Bottle Cage…

16 05 2013
1.5L water bottle...

1.5L water bottle…

I wanted to see how well a downtube mounted water bottle cage would work on my Krampus. I didn’t love the fork mounted cages I tried on my Scandal 29er. Plus if the DT cage worked I could always add fork mounted cages later if I needed a ton of water on a trip.

Two bottle cages...

Two bottle cages…

I just used two hose clamps on the Topeak cage and them a velcro pant strap at the top of the bottle. It seems pretty secure, but only time will tell.

kb4

Stem mounted bottle cage…

Combined with the stem mounted bottle that gives me over 2L of water.

Just enough tire clearance...

Just enough tire clearance…

Here are a couple close ups.

The magic of hose clamps...

The magic of hose clamps…


Shimano Alfine 11 IGH Oil Change…

15 05 2013

It’s been over a year since I started running an Alfine 11 IGH. First off in my On One Scandal 29er MTB and now in my Surly Krampus. Shimano wants you to do an oil change after the first 1000kms and every year or 5000kms after that. I was putting off my first oil change since I hadn’t acquired the supplies I needed and I know oil change intervals are conservative.

Alfine 11 cleaned and oiled...

Alfine 11 cleaned and oiled…

On my last tour I made a poor decision to ride across a washed out trail which submerged my Alfine 11 at least partially. IGH seals are not designed to keep water out when the hub goes under so I assumed I had at least a little water in the hub. While I might push the limits of bike maintenance sometimes I also know when I am fooling with an expensive repair. Leaving water inside an IGH for any length of time can lead to a hub failure that could necessitate a total factory rebuild.

So I got my lazy ass in gear and figured out an oil change plan. Since I own a couple Rohloffs I have used several of that brand’s oil change kits. I kept all the old parts for re-use and they conveniently fit my Alfine 11. Stocking two separate sets of expensive IGH maintenance supplies seemed like too much of a PITA. So I decided to stick with Rohloff products.

The Fairfield Bicycle Shop kindly sold me 300ml of bulk Rohloff cleaning solution and Rohloff hub oil. You need 25ml of each fluid for an oil change so I’m good for 12 IGH services. That’s a lot of years of IGH maintenance.

Rohloff Bulk oil and syringe...

Rohloff Bulk oil and syringe…

Just for the IGH Geeks here is why Rohloff says you should use their oil:

“The SPEEDHUB requires a pressure resistant oil with the correct viscosity so as to ensure this works over a vast temperature range (making the SPEEDHUB suitable in all climates) whilst not increasing friction/decreasing transmission efficiency or escaping under the special seals. For this reason we insist that only original Rohloff oils be used.

It is incredibly important that the oil does not react with the hard-nylon components within the gear-unit. Our early tests proved that various different oils reacted with hard-nylon components within the gear-unit. These components would sometimes swell and increase friction to the point where the SPEEDHUB failed to operate correctly. The sheer number of different percentages and types of additives used in oils is so vast, that we were forced to produce our own oil so that we can safely offer and uphold a warranty on our products.

The use of non-original oils is easy to detect after opening a SPEEDHUB transmission and in every service case where this is apparent, we are unable to offer warranty repairs.”

Now it would be legitimate to ask why a Rohloff product would be good for a Shimano IGH? I don’t know that it is for sure, but I’m willing to take the chance that an oil safe for a Rohloff is safe for a Shimano hub. If something bad happens I’ll let you know! 😉

BTW – the Rohloff syringe and injection tube fitting work on the Alfine 11 perfectly.

Here is my Alfine 11 oil change process:

  1. clean outside of hub shell
  2. open hub via oil plug
  3. inject 25 ml of Rohloff cleaning solution
  4. pedal hub through all gear combos for 5 mins
  5. let drain for 30 mins
  6. suck out any remaining cleaning fluid and old oil with syringe
  7. inject 25 ml of Rohloff hub oil
  8. seal up Alfine and ride
  9. dispose of dirty oil/cleaning fluid responsibly

The oil change went without a hitch and took about 45 mins including the 30 mins of draining time for the old oil.

Dirty oil...

Dirty oil…

Tip – there is a tiny o-ring on the Alfine 11 oil plug. Don’t lose it! 😉

Here is what you need for an Alfine 11 oil change:

  • Rohloff 25 ml cleaning solution & 25 ml Rohloff oil
  • or 50 ml Shimano hub oil
  • syringe with injection tube and hub fitting
  • 3 mm allen key
  • paper towels
  • ziplock bag to collect dirty oil
  • electrical tape to attach ziplock to tube while it drains
  • 2 cold beers


Gravel Pimp: Port Alberni to Cumberland Loop Part 2…

13 05 2013
Middle of nowhere...

Middle of nowhere…

Day 3 – Wrong Turn

I made a serious mistake on the last day. I didn’t question the Google Maps bike route enough. I was so close to PA I could taste the ice cream and I wasn’t thinking straight. I ended up paying the price.

How bad was it?

  • 2500′ and 3.5hrs of pushing my bike up Mount Horne
  • 30 degree C heat
  • limited water
  • not realizing it was a dead end until right at the top where I was expecting an awesome downhill run to PA
  • road down other side didn’t exist 😦
  • 30mins of controlled falling down the mountain on my bike the same way I pushed up

I was totally crushed when I figured out the mistake in my route. I sat down and would have cried if I didn’t feel the need to conserve water! In my defence when I looked at the Google Maps satellite images it put a white line and road name for the imaginary roads. The white line looked just like a break in the trees which is what a logging road looks like. The only way you can tell the real roads from the fake roads is to zoom in uber close at which point the fake roads disappear and are replaced by trees. The real roads of course stay on the screen no matter how much you zoom in. Lesson learned.

The only upside was the cell tower at the top of the mountain meant I had 4bars on my phone so I could download satellite images and scope out a new route – very carefully!

After figuring out where to go next I had to head down the way I came. It was so steep I could barely ride safely and had to stop a few times to let my brakes cool.

Steep road...

Steep road…

and up...

and up…

thank God some water...

thank God some water…

my Sopranos look...

my Sopranos look…

Forgetting the climb for a second...

Forgetting the climb for a second…

at least the views are sweet...

at least the views are sweet…

and up we go...

and up we go…

My only reward...

My only reward an awesome cell signal… 😉

Back where I started...

Back where I started…

Day 3 – Heading to PA Finally!

4hrs of hard work and I was back where I started from. Bummer. 😦

The safest option would have been to head back to the highway and ride to PA on pavement. Did I take it?

Hell no! 😉

I decided to stay dirty and recon a route around the bottom of Horne Lake on logging roads. This had some risks and since it was now the afternoon one more setback would mean another night of camping as I could run out of daylight. After tasting a bit of main road touring I felt the opportunity to ride alone on logging roads was the better way to spend my time.

Although I felt some trepidation passing another “Keep Out!” gate the road past the gate was pretty nice. Enough shade to help beat the heat and after hours of pushing uphill it was nice just to be riding my bike again. The road deteriorated rapidly and I feared it might dead end, but it kept going and I was rewarded with a connection to a well maintained logging road at the south end of Horne Lake.

I got a little cocky at this point and spotted a shortcut on the map if I was willing to hike-a-bike across a clear cut. It would save me a long logging road detour. So I went for it. As I rode up to the clearcut I realized it was really rough and uphill the whole way. Yikes! I just kept going. Looking back at the effort required to manhandle the Krampus up the clearcut I’m not sure it was easier than riding the long way around, but it was a unique challenge. After many hours of touring on this trip doing something new was refreshing even though it was really hard.

At the far end of the clearcut I thought all my challenges were over, but Google Maps screwed me one more time with a fake road. I thought I had a straight shot to PA. But when I showed up at the intersection it didn’t exist. A zoom way in on the satellite image revealed it was another faker. **sigh**

This time however there was a reasonable alternate route I could take so instead of an 8km ride to PA. I had to ride 14-16kms. Not the end of the world. I had been through enough that even though I was pretty burnt out I knew I would get to PA that night before sunset and be drinking a cold beer.

So I cranked down the last part of the logging road I was on and hit the Alberni Highway. I enjoyed a really long downhill that brought me to the PA city limits with barely any pedalling. I stopped for a sub, bag of chips and a cold Sprite. I was thrilled to be almost done the ride. Not knowing PA very well I didn’t realize I had some super steep hills to climb back to my friends’ house, but nothing could stop me now!

I rolled into their place at 8pm. I guess I didn’t make it for lunch! A shower, 3 beers and a hottub later I felt like a champion. 😉

Another gate...

Another gate…

Looking good...

Looking good…

What happened to the last guy that tried this route... ;)

What happened to the last guy that tried this route… 😉

Getting rustic...

Getting rustic…

and rough...

and rough…

and I'm golden...

and I’m golden…

Stunning views...

Stunning views…

more gates to ignore...

more gates to ignore…

One last challenge...

One last challenge…

A harsh push through an uphill clear cut...

A harsh push through an uphill clear cut…

IMG_5752

Halfway up…

Last section of gravel...

Last section of gravel…

The Alberni Highway...

The Alberni Highway…

Viktory!

Viktory!

The Mighty Krampus!

All Hail The Mighty Krampus!

The loop map - click for more details...

The loop map – click for more details…

Wrap Up

All in all it was a great trip despite the heat and the navigation challenges. I learned a lot about this part of Vancouver Island and about route planning with the tools at my disposal. The Krampus with Porcelain Rocket bags is a capable bikepacking rig.

I cleaned up the GPS tracks on Ride With GPS to remove any detours, backtracks or wrong turns so the routes are more useful to people that download them. Riding 200kms in 3 days doesn’t seem like much, but it was quite hard for me with a lot of pushing.

The great news is I know have ~400kms of dirt touring route mapped out from Cumberland to Victoria BC and I’ve covered a bit less than half of Vancouver Island so there is lots more to come! 🙂

Ride GPS data...

Ride GPS data…


Gravel Pimp: Port Alberni to Cumberland Loop Part 1…

13 05 2013
Bridge on the Log Train Trail...

Bridge on the Log Train Trail…

With a dirt bikepacking route sorted out from Lake Cowichan to Victoria I was eager to push northwards. I know the logging roads from Lake Cowichan to Port Alberni as I have driven them on my kiteboarding adventures. So I skipped that section and looked at how to ride from PA to Cumberland on dirt.

Route map - click for more detail...

Route map – click for more detail…

I have friends in Port Alberni so I decided to drive 2hrs north to their place and start the ride from there. I figured I’d just do it as an out and back or come up with some loop options once I had a feel for the terrain.

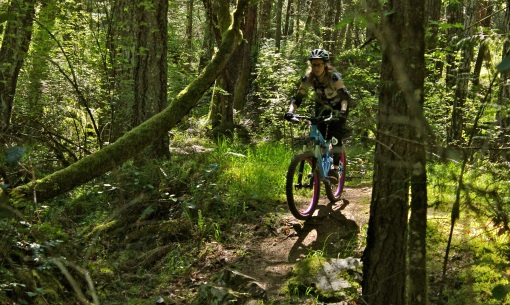
You can have a look a the trip photos here. I should warn you as a solo trip there are lots of scenery shots and not much in the way of biking action – sorry!

Me and the Krampus at the start...

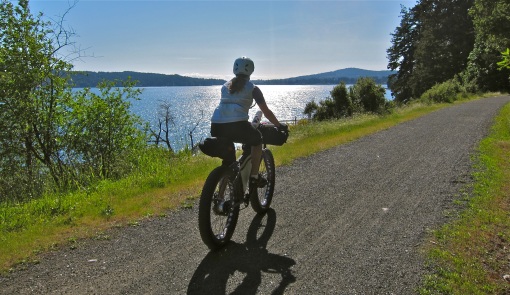
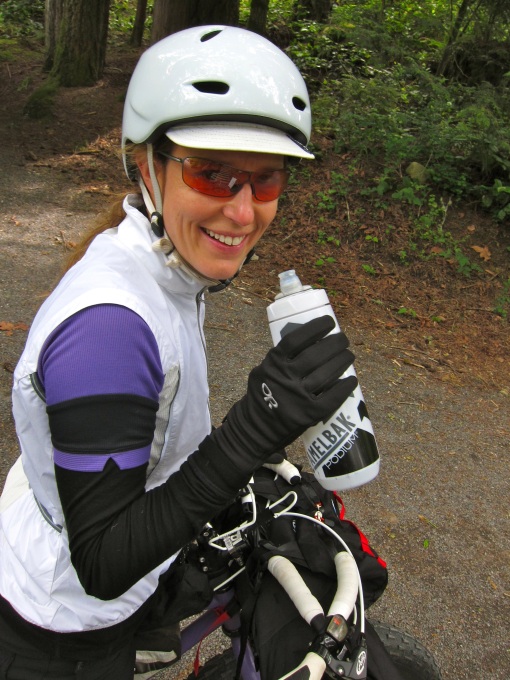
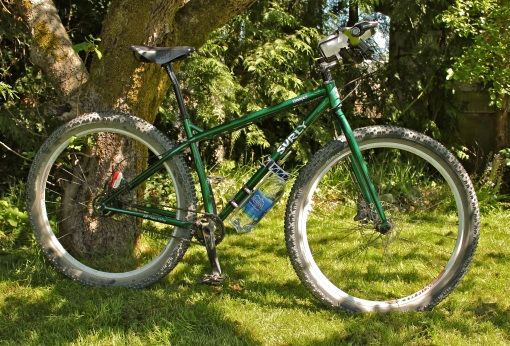
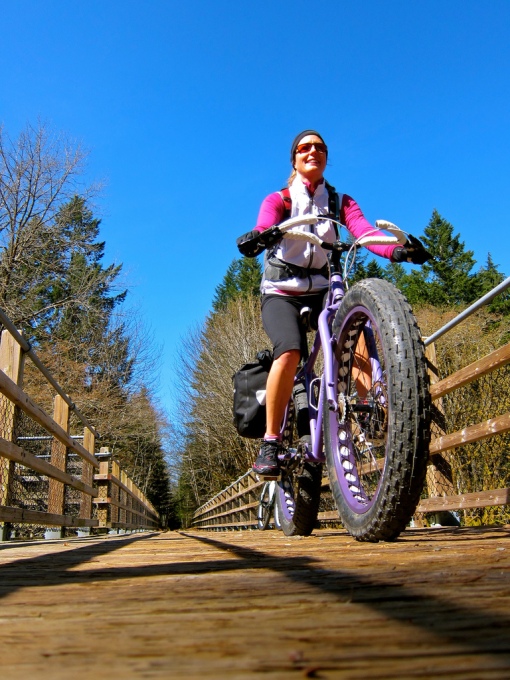
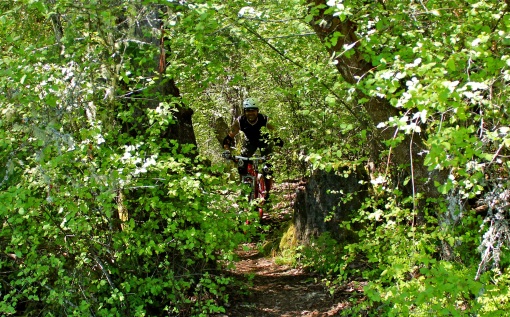
Me and the Krampus at the start…

Day 1 – Port Alberni – end of the Log Train Trail

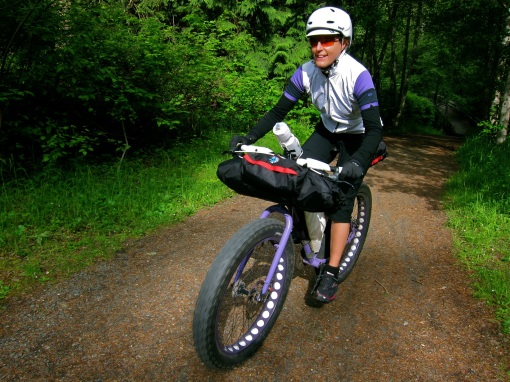
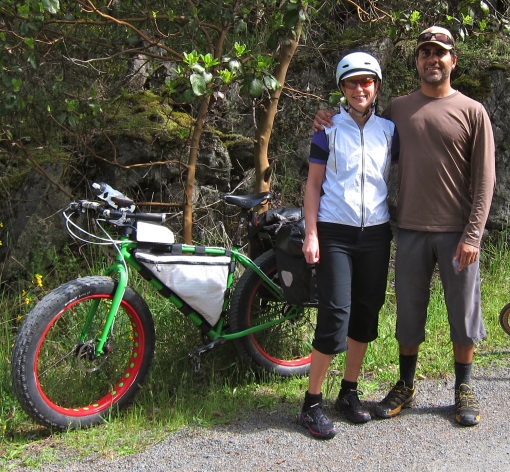
I got to PA around 1pm on the first day of the trip. Talking about my route with my friend Rob he suggested I should ride the Log Train Trail out of PA rather than the route I had planned. It sounded like a nice ride, but I would have to abandon my well researched GPS route and navigate on the fly. It sounded like a good idea given that I had some spare time in my schedule in case things took longer than expected. Before I could even leave Rob’s place my front tires went flat while we were chatting. Turns out a pinch flat I patched on the last Krampus tour had failed. Possibly as a result of running normal 29er tubes in the big 3″ Knard tire. I ripped off the old patch and applied a new one. which held the rest of the trip.

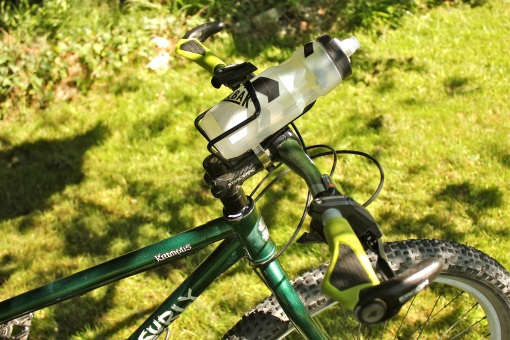
Rob took the photo of me and my bike at the start of the Log Train Trail above. The LTT was a fun dirt rail bed ride with quite a few rough spots and twists/turns. I got lost several times and spent a lot of energy backtracking and asking locals for directions. I had to ford a fast flowing creek where the trail had washed out and rode the Krampus through a mud puddle that ended up being deeper than the hubs/BB. 😦 I guess it’s time for an oil change in the Alfine 11!

The shoes and socks I was wearing were not designed to dry fast so I had wet feet all day which did not make me happy! I need to figure out some quick dry bikepacking footwear or carry a second set of lightweight footwear [ie. Vibram FIve Fingers for camp use and river crossings]. Since the day was extremely hot ~30 deg C at least getting wet was pleasant for its cooling effect. The LTT also had a lot of tree cover and I appreciated the shade very much.

I spent a lot of time covering the LTT. Much more than if I would have followed my planned route, but the riding was amazing and I was happy to have heard about the LTT from Rob. A quiet rough dirt track with a modest grade and some shade is bikepacking paradise!

Log Train Trail Map - click for larger...

Log Train Trail Map – click for larger…

flat Knard!

flat Knard!

Lovely countryside...

Lovely countryside…

Nice shade...

Nice shade…

Good landmark for navigation...

Good landmark for navigation…

Time for wet feet...

Time for wet feet…

Where did the trail go?

Where did the trail go?

Quiet riding...

Quiet riding…

Day 1 – From LTT to Camp near Pear Lake

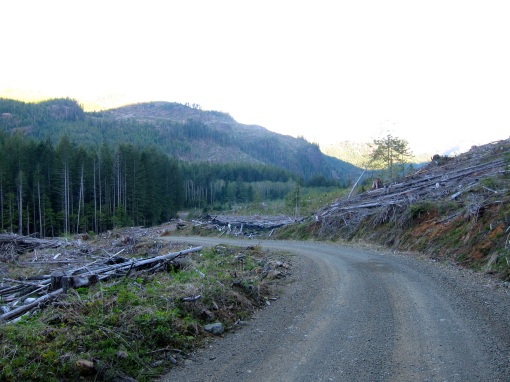
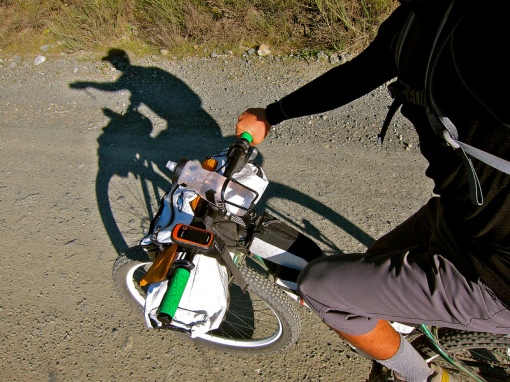
Leaving the LTT behind I hit logging roads heading north towards Comox Lake. This was part of my planned GPS route so navigation was easy and the riding was fun despite the heat and general uphill trend to the terrain. I stopped at every creek to throw water over my head and refill my bottles as needed. The logging roads did not provide any shade due to the lack of big trees in most places. That meant a lot of baking for me. Although my late start also meant that by the time I hit this section it was the late afternoon and the temperature was heading slowly in the cooler direction.

I’m not a fast rider and I stop frequently to take photos, eat and generally check stuff out. That works well in the heat because I am not pushing myself too hard and I can sustain a constant moderate exertion all day.

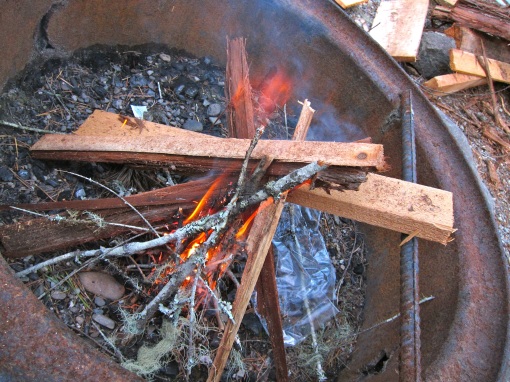
As I was riding along I spotted a tiny clearing next to a beautiful little lake. I rode in to investigate and found a lovely campsite with a stool made from a chunk of log and some firewood ready to light next to a fire ring. I had another 90mins of daylight and wanted to push on, but I also wasn’t confident I’d find an equally nice campsite further on and I was tempted by the almost ready to go fire so I could dry my wet shoes/socks. OTOH – if I kept going I’d be a lot closer to breakfast in Cumberland the following day!

After 15mins of deliberating I sat down and lit a fire. An hour later I had dry feet, dry socks and dry shoes! Yeah! 🙂 I had sandwiches and perishable snacks with me so rather than let them go bad I just ate everything I had that wouldn’t last in the heat. That let me skip my usual dehydrated camp meal. The campsite was really peaceful and I enjoyed a good long chill out session by the fire until it got dark.

Last tour I camped up high with my lightweight summer sleeping bag and suffered a lot. This trip I brought the same bag, but temperatures were high and my camp was much lower. What I didn’t realize was that there were about 1000 frogs in the lake I was camped next to and it was date night!!!!! I’ve never heard frogs that loud before – amazing. Happily I am a solid sleeper so I only woke up a few times, but every time I did it was a shock to hear them. Funny thing was when I woke up the last time and the sun was coming up the lake was silent again and I never did see a single frog!

I should mention the bear situation since Vancouver Island is home to a healthy population of black bears. I ran into a couple bears that were on the road during the first day of riding. I don’t carry any bear spray or bear bangers on the island. Black bears aren’t aggressive and they are well fed here. So I just holler at them with a Mr. T impression such as “I pity the fool bear that tries to mess with the Mighty Krampus!” It works every time and the bear scampers away into the woods never to be seen again. I keep my food away from my tent at night, but close enough I can hear an animal trying to steal it so I can get up and shoo them away. I’m actually more concerned with rodents as they’ll quietly chew through any bag to get at a snack and they are harder to notice than a 250lbs bear!

We also have cougars on the island. I don’t carry any anti-cougar safety gear either. A cougar you see isn’t interested in you and will run away every time. The first indication that a cougar wants to eat you is when its jaws are closing around your neck. You aren’t going to get bear spray out and do anything useful in that case. Since a cougar attack is rarer than a lightning strike I don’t worry about it.

Logging road...

Logging road…

Positive message...

Positive message…

Cool water!

Cool water!

Dusty and no shade...

Dusty and no shade…

Cell service 50kms from nearest people...

Cell service 50kms from the nearest town…

Nice campsite...

Nice campsite…

Dry feet... :)

Dry feet… 🙂

Chilling...

Chilling…

Home sweet home...

Home sweet home…

Breakfast...

Breakfast…

Day 2 – Camp to Cumberland

The next morning was nice and cool so I wanted to make tracks for Cumberland before it got too hot. The road went downhill a long way to the lake which actually got too chilly so I stopped to drink some hot green tea I made at breakfast and was carrying in my framebag. That really hit the spot and I was soon greeted with lots of climbing as the road around the lake was very lumpy!

I should have looked at the elevation profile more carefully, but I was expecting a leisurely cruise around the lake to Cumberland. Instead I got lots of steep ups and downs. The kind you couldn’t use your momentum from the previous downhill to get up. So there was lots of sweating and some pushing involved. Since my pace was slow it got plenty hot well before I reached Cumberland. There wasn’t much I could do other than to keep going and think about the cold drinks I could buy when I reached town.

On the plus side the scenery was really nice and I had the road to myself like I usually do when riding BC logging roads.

I did finally reach Cumberland and without thinking I pulled into the first gas station for an ice cold Sprite and a bag of salty chips! I sat outside and devoured them as fast as I could before heading into the center of town.

Early morning downhill...

Early morning downhill…

Comox Lake...

Comox Lake…

A message...

A message…

Getting warm...

Getting warm…

Nearly done!

Nearly done!

Mar's on Main = breakfast! :)

Mar’s on Main = breakfast! 🙂
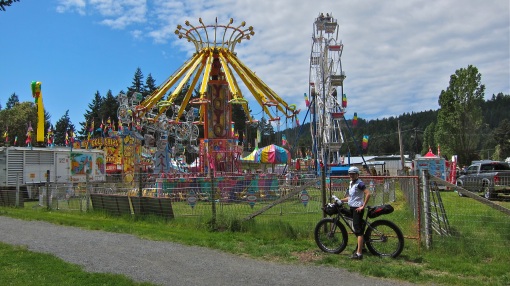
Day 2 – Cumberland

Getting to Cumberland was great not just for the food and beverages, but it meant I now had ~400kms of dirt bikepacking route mapped out all the way down to Victoria. Almost half the island. Nice! 🙂

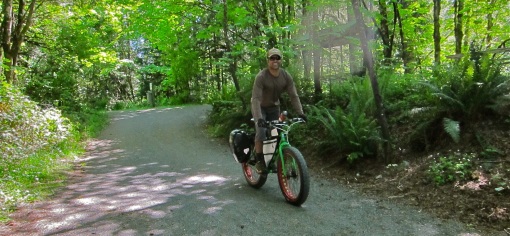
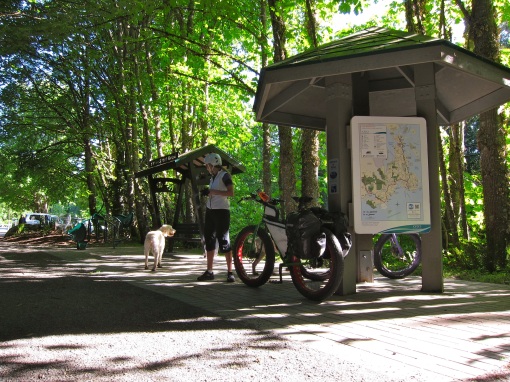
First thing I did was find the LBS which is Dodge City Cycles. I knew it was my kind of shop when I saw a Krampus in the window and a well used Moonlander leaning against the counter. Not to mention loads of sweet mountain bikes. Dan and Chris were very kind to me letting me leave my bike in the shop while I walked down to Mar’s on Main for a delicious breakfast.

After eating I bought a trail map from DCC and they let me drop my camping gear in a corner of the shop so I could do some unencumbered mountain biking. Thanks guys! I spent a couple hours exploring the trails closest to town and barely even scratched the surface of the riding potential in Cumberland. Their trail network blows my mind and they keep building more and more each week.

Eventually the heat and the knowledge I had more miles to cover today convinced me to head back to the shop. I chatted with the DCC guys a bunch and then I went over to the Waiverly Pub for some cold beer and shade while I figured out the route back to PA.

I could have gone back the way I had come, but I was really burnt out from the heat and the idea of repeating the hilly, hot and dusty road along Comox Lake did not appeal to me. Looking at Google Maps I decided heading to the coast for a spin down the old island highway made sense. It was flat-ish and would be 10 degrees cooler by the water. I waited until late afternoon to let the temperature subside a bit before heading out. In the meantime I caught up on stuff via my smartphone and watched some hockey recaps on TV.

Dodge City Cycles...

Dodge City Cycles…

My Krampus taking a break at DCC...

My Krampus taking a break at DCC…

Cumberland tech...

Cumberland tech…

A fresh Krampus at DCC...

A fresh Krampus at DCC…

Fat skinny...

Fat skinny…

Cumberland Trail Map...

Cumberland Trail Map…

Heading out of town over the new highway...

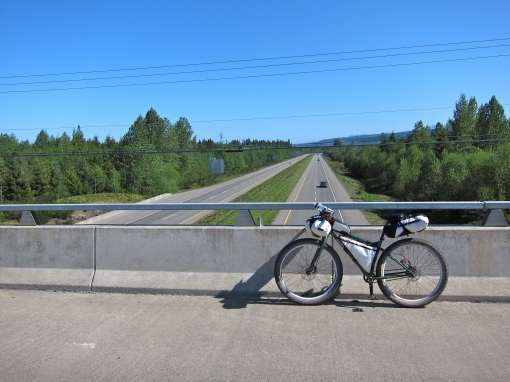
Heading out of town over the new highway…

Day 2 – Cumberland to Roswell Creek Provincial Park

Riding to the coast I passed over the new Island Highway which is a 4 lane highspeed beast that sees most of the traffic up and down the island. That leaves the old 2 lane Island Highway on the coast much quiter for a bike tourist to enjoy! As expected the coast was much cooler than inland plus the fact it was late afternoon meant long shadows to ride in away from the burning sun. I was happy! 🙂

This section of the ride reminded me of my road touring days – for the good and the bad. The riding was easy with the Knards rolling well on pavement and there were lots of services along the way to fill any desire for food or drink. With people around to interact with the ride was a lot more social. OTOH – even this relatively quiet road had 1000 times more traffic than the deserted logging roads I used to get to Cumberland. The shoulder was wide enough that my safety wasn’t in question – just the difference between peaceful solitude and the hustle/bustle of civilization.

Given how sun blasted I felt I was happy to trade some remoteness for cool air, shade and the odd Sprite! 😉

I turned off the road near Roswell Creek Provincial Park [which doesn’t allow camping] and found a secluded campsite nearby on some undeveloped land. It was a long hard hot day on the bike and I had eaten a sub an hour back. So I just set up camp. Drank a lot of water to fight off dehydration and went right to bed. There was no frog symphony that night to keep me up!

The old Island Higway...

The old Island Higway…

Enjoying a rest stop break...

Enjoying a rest stop…

Seals...

Seals…

Shellfish shells...

Shellfish shells…

Time to camp...

Time to camp…

Day 3 – Camp to Wrong Turn

Waking up in camp near civilization didn’t make me hungry for instant oatmeal so I packed up super fast and hit the road. I almost rode past the last cafe I would see all day, but something told me I better stop so I circled back and went to town on a delicious brealkfast. Little did I know this meal would be all that kept me sane during mistakes that would occur later in the day.

After eating I rolled inland and got back on gravel roads. I made it to Spider Lake no problem and figured I was a short 28kms from PA. I’d be there for lunch baby!

No I wouldn’t! 😦

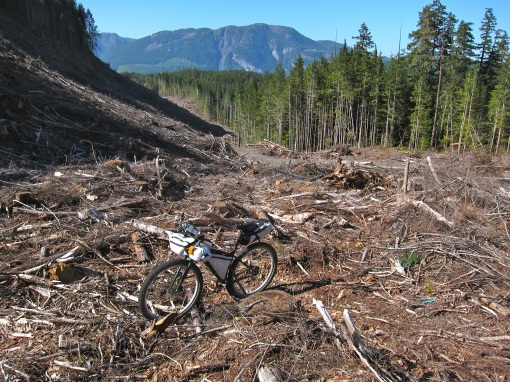
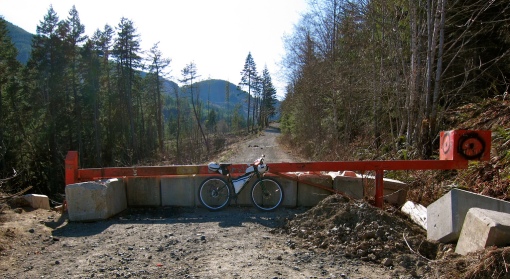
Then I hit a bunch of private roads around Horne Lake that were on my route. I just kept going and ignored the keep out signs. When I asked Google Maps for a good bike route to PA it suggested I ride over a 3000′ mountain on a gravel road. I thought it was a bold choice, but the route was short and seemed worth the climbing. I started to worry when I saw how rough and how steep the “road” was. I could barely get traction to push my bike uphill.

I should have known something was wrong…

To be continued!

Sandbar Cafe...

Sandbar Cafe…

Breakfast...

Breakfast…

Coastal beauty...

Coastal beauty…

Heading inland...

Heading inland…

Fight the giant robot for my bike!.. ;)

Fighting a giant robot for my bike!.. 😉

Spider Lake...

Spider Lake…

Private - keep out! - not...

Private – keep out! – not…

Really keep out!

Really keep out!


Travel Document Security…

12 05 2013

Scan your important documents…

Losing your important documents while traveling can be a huge problem. You can’t get on an international flight without your passport and you can’t pay for a hotel without your credit card/bank card if you don’t have cash.

Here is what I do when I am going on a major trip:

  • check that all my documents are up to date
  • check that the magnetic strips on my credit cards and bank cards are in good shape
  • renew/replace as needed
  • scan all my documents and both sides of any cards into PDF files
  • I print a copy and leave at home
  • I print another copy and leave with a friend
  • I use my Gmail account or an online drop box service to store copies of these PDFs for access on the road

This way if I lose some or all of my documents I can either look them up myself online and/or have someone at home help me get back on track.

A few more tips:

  • have at least 2 credit cards and 2 bank cards so you can lose one and still keep on traveling without a huge hassle
  • store the spare cards somewhere besides your wallet so it less likely you’ll lose both at once
  • keep enough cash on you for several days of traveling so if you lose your cards you have time to sort out how you’ll access more money
  • if you can’t lock your valuables while traveling hide them instead
  • when I am beach camping I just bury my cash and documents in the sand for security


Q-Tubes…

12 05 2013
Lightweight tubes for my Pugs...

Lightweight tubes for my Pugs…

Folks are using these light tubes instead of the “normal” Surly fat bike tubes to drop some weight from their fatties. I may try these in my Pugsley. I’m just bookmarking them here for easy reference later.


Surly Krampus Complete Problems?

11 05 2013
Photo: Gear Junkie.com

Photo: Gear Junkie.com

If you have bought or are going to buy a Surly Krampus complete bike in the next while you should read this blog post over at the Surly website regarding some minor issues that have cropped up. Nothing life and death, but worth being aware of.


Gravel Pimp: The Missing Link…

10 05 2013
On a recon mission...

On a recon mission…

At the end of March I rode the dirt connector route I’ve been working on for a while between Lake Cowichan and Victoria. I’ve since ridden another leg of the Vancouver Island bikepacking route that I am working on. But I’ve told myself that I have to do at least a minimal trip report for the first trip before I do anything about the second trip report.

Route map - click for more details...

Route map – click for more details…

You can see all the trip photos here and if you want to get the backstory on how I  found this route click here.

I like it! :)

I like it! 🙂

It all started with a killer spring forecast for a great weekend on Vancouver Island in March. I couldn’t resist getting out on my bike.

Sharon rocking the purple Pugsley...

Sharon rocking the purple Pugsley…

Lake Cowichan to Kinesol Trestle via the Trans-Canada Trail [TCT]

Sharon kindly drove me to the start of the ride in Lake Cowichan. That saved me the hassle of doing a car shuttle so it was much appreciated. She decided to ride the first 15kms of the TCT with me. We enjoyed the sunshine and easy riding on the TCT which is an old railway line. We stopped for lunch on a wooden bridge after about 15kms and Sharon turned back towards the car while I headed for the Kinesol Trestle.

She picked a good time to turn around because I ran into several sections of blowdown after I left her. One was particularly big and I got a chance to carry the Krampus and do some gymnastics. 15′ above the ground! Besides the fallen trees the riding continued to be fun and easy.

I spent half an hour checking out the Kinesol Trestle a huge wooden rail bridge that was recently rebuilt for hikers and bikers to enjoy. I wanted to make sure I ate and drank regularly to avoid low energy blahs as much as possible.

The Kinesol Trestle marked the end of an easy 35kms of riding on the TCT. Next up I turned onto the logging roads near Koksilah RiverProvincial Park.

Team Lazy...

Team Lazy…

Roadblock...

Roadblock…

Typical TCT goodness...

Typical TCT goodness…

Kinesol Trestle...

Kinesol Trestle…

It's a tough job, but somebody has to do it...

It’s a tough job, but somebody has to do it…

Koksilah Park to Camp Day 1 below Mt. Lazar

The riding took a definite turn for the remote and the climby. In fact the majority of this leg is the climb up the slopes of Mt. Lazar on logging roads. The sunny weather was nice much of the time, but when I was cranking uphill at 5kph I started to bake. Happily there were many creeks to refill water bottles from and pour cold water over my head.

Eventually I got up top onto the rolling terrain of the mountains. It was beautiful riding with no signs of human life other than the road I was on and the occasional clear cut. I started seeing snow and had to ride through sections of the white stuff, but they weren’t sustained. This section of the ride had been reconed with my motorcycle and I recalled it being easy and fairly short. I remembered badly! It took a long time to ride and involved a lot of climbing. At least it was cool as the sun started to set.

I expected to camp down low on the far side of the mountain, but the setting sun meant I had to call it a day right on top after 40kms. Which was fine except I was carrying my light summer sleeping bag. I cooked up a camp meal and a cup of hot tea before bed. I drank my fill of water so I wouldn’t start the next day dehydrated. I enjoyed a brief campfire for some relaxation time and vainly hoped I could store some heat for later in the evening.

I woke up way early freezing my ass off. I had put on my thermal undies, long socks, toque, neck warmer and puffy jacket before going to bed. They helped, but didn’t solve the problem totally. On the upside I got an early start on the day’s riding! 😉

I knew I'd have the roads to myself after this...

I knew I’d have the roads to myself after this…

Long hot climb...

Long hot climb…

I look stupid, but I'm nice and cool for at least the next 5mins... ;)

I look stupid, but I’m nice and cool for at least the next 5mins… 😉

Clear cut...

Clear cut…

Early season mountain riding...

Early season mountain riding…

Home sweet home...

Home sweet home…

Yikes - cold night...

Yikes – cold night…

Riding with all my clothes on in the chilly AM... ;)

Riding with all my clothes on in the chilly AM… 😉

Day 2 – Riding to Boneyard Main

Riding down the mountain towards Boneyard Main was freezing and I kept my puffy jacket on most of the time. The Krampus loves to bomb downhill fast and the big wheels gave me tons of confidence that I could handle whatever came my way at speed – deep gravel, rocks or potholes?….no problemo!

This was the section of the route I had not actually scouted so I was not 100% that it went through. I had two route options 1) the high probability ride down the mountain to the start of the Boneyard Main logging road and 2) a shortcut along the hard to find Leech Main logging road. As I suspected  the later option didn’t exist on the ground even though it was on all the maps!

I didn’t mind going the long way since I was stoked the route was going to work after so many recon missions.

When I finally reach the start of the Boneyard Main logging road after a nice 25kms of downhill riding I took a long break in the sunshine and hit my food bag hard!

Stopping to warm up...

Stopping to warm up…

This is logging country...

This is logging country…

Prime Gravel Pimp terrain...

Prime Gravel Pimp terrain…

Lazy Krampus action...

Lazy Krampus action…

Boneyard Main...

Boneyard Main…

Boneyard Main to Leechtown

Although I had a lot of riding left to do I was really happy at this point because I had scouted the rest of the route on various previous occasions so I knew it was going to work. I just had to turn the pedals. The ride up Boneyard Main was a bit of a slog as it climbed the whole way. The road followed the Sooke River which I was tempted to ford several times to cut off some distance, but I not only had to get my bike across the river I also had to climb up the far bank to the Galloping Goose MUP. I decided it was best to just ride to Leechtown and cross where the river was uber tame.

I got my first Krampus flat on this section hitting a large rock at speed and getting a pinch flat. The huge Knard tires provide nice traction and floatation, but this is still a rigid bike so you can only slam into rocks so fast before you get pinched. I patched up the tube and ate a snack.

It was getting really hot again so good time find a reasonable ford for the Sooke River. Getting across was no big deal. I just carried the Krampus on my shoulder. I did get wet shoes/socks which I hate, but going barefoot and falling or cutting my feet didn’t seem like a better option.

Once across I was on the Galloping Goose MUP which is familiar territory. I rode down to the Sooke Potholes and hung out at the red shelter we’ve camped in a few times on previous rides after ~122kms of riding. I ate a big snack before pushing off for the roll towards Victoria.

More big logging toys...

More big logging toys…

Dang a flat! :(

Dang a flat! 😦

Scouting the Sooke River...

Scouting the Sooke River…

Leechtown baby! :)

Leechtown baby! 🙂

Wet feet...

Wet feet…

Hunting for the Galloping Goose...

Hunting for the Galloping Goose…

The famous red shelter at the Sooke Potholes Park...

The famous red shelter at the Sooke Potholes Park…

Sooke Potholes to Victoria

I’ve ridden this section so many times I kind of dread it even though it’s quite pleasant. Rather than repeat a description of this part of the ride here is a previous report you can read.

Got her done - yeah! ;)

Got her done – yeah! 😉

I’m so happy to get a dirt touring route up island sorted out. This section from Lake Cowichan to Victoria is ~175kms long with less than 1km of paved roads. Best of all I wrapped up the trip on my birthday. Nice!

Next up the section from Cumberland to Port Alberni and on to Lake Cowichan. That will bring the route up to ~400kms of dirt bikepacking goodness. Here are some photos from the PA to Lake Cowican section that I just completed.

Keep ’em rolling! 😉


Replacing Rohloff Hub Oil Seals…

9 05 2013
Leaky Rohloff...

Leaky Rohloff…

The Rohloff IGH in my Surly Big Dummy has been leaking oil for a while. This doesn’t really matter a whole lot as the Rohloff continued to work just fine, but I knew it was something I should sort out. So I collected the parts I needed and specialized Rohloff tools last year and finally got around to making it happen last week.

Most of what I needed...

Most of what I needed…

Here is what you need:

  • Hub oil seals x 2 = #8244
  • Tools for mounting hub seals = #8503
  • Paper gaskets = #8710
  • Loctite = #8347
  • Oil change kit = #8410
  • Sprocket removal tool = #8510
  • Rohloff instruction manual
  • Torx 20 driver
  • 3mm, 5mm & 8mm allen keys
  • large adjustable wrench
  • chain whip
  • paper towel
  • q-tips
  • rubbing alcohol
  • beer x 6
  • music

Before getting started wash your hub/rim/tire and let dry. You don’t want to have chunks of dirt fall into the open hub and it will be nicer to work with a clean wheel.

Axle side oil seal removed...

Axle side oil seal removed…

Like all Rohloff projects I’ve embarked on it was much easier than I had feared, but complicated enough that I ran into a couple glitches. Here are some instructions on how to replace the hub oil seals.

You will also need to read up on:

  • removing/installing the disc brake [assuming you have one]
  • removing/installing the shifting mechanism
  • removing/installing the drive sprocket
  • how to do an oil change

It’s worth reading all the way through so you can be sure you have all the parts and tools you need.

Staying organized...

Staying organized…

I started on the axle side where the shift box attaches. Pulling off the disc brake rotor and the shifting mechanism was easy. The hub oil seal was in pretty tight so it took me a few tries to get it out. It helps that you can destroy it in the process since it’s headed for the bin anyways.

New hub seal...

New hub seal…

With the Rohloff tool installing the new hub seal is dead easy. Just make sure you clean out the old seal mating surface before installing and don’t get crazy with the Loctite around the new seal. You don’t want to contaminate the hub.

Seal installed...

Seal installed…

Once the hub seal is installed just reassemble the axle side of the hub. It’s a bit fiddly so read the instructions first and then tackle it.

Paper gaskets...

Paper gaskets…

It was about this point that I realized I was missing 2 small paper gaskets I needed to reinstall my shift mechanism. I was a bit bummed because I didn’t think I’d be able to source them locally and figured I might be waiting 2 weeks for mail order parts to arrive. Happily I went down to the Fairfield Bicycle Shop and they had exactly what I needed in stock. Awesome! 🙂

It’s really nice to have a LBS who services Rohloffs in town. If I ever have questions I can talk to them and they carry the parts I need for any projects.

The video above shows how to remove the sprocket from a Rohloff hub. These sprockets are threaded onto the hub and continuously tightened by your pedalling action. So they are a bitch to get off.

I tried....

I tried….

I tried to loosen the sprocket at home, but failed. So I carried the hub down to the kind folks at Cycles West my neighbourhood LBS. They used their bench vice to hold the hub and spin off the sprocket with a chain whip. Thanks guys – you rock! 🙂

The video above shows how to replace the hub oil seal on the drive side of the hub.

SLX brake parts...

SLX brake parts…

I cleaned the brake rotor with rubbing alcohol to remove any traces of hub oil that may have gotten on to it. I sanded down the pads and then set them ablaze for a while in a pool of rubbing alcohol to clean them up as well. I probably need new pads, but I’m a bit lazy so I’ll use these for now until I get some freshies.

My Big Dummy repair stand... ;)

My Big Dummy repair stand… 😉

With the hub back together I pumped some cleaning solution into it as the first part of an oil change.

The video above explains how to do an oil change.

Time to haul...

Time to haul…

I needed to work the cleaning solution all through the hub so I figured I might as well go get some groceries.

Checking everything out...

Checking everything out…

The ride let me check that the hub was working correctly in case I had goofed something during reassembly. As it turns out the IGH was purring like a kitten! 🙂

My buddy Steve...

My buddy Steve…

I ran into my buddy Steve so we talked cargo bikes and he checked out the passenger deck.

Fresh oil...

Fresh oil…

Once home I let the dirty oil drain out and then I injected 25ml of the clean stuff and buttoned up the Rohloff.

See you in 5000kms...

See you in 5000kms…

Since my Big Dummy doesn’t see big mileage these days and lives inside I won’t be messing with this Rohloff for a few years.

Ready for summer...

Ready for summer…

Now that I have been through it all once I could replace a set of Rohloff hub seals in 1hr – assuming I had the parts and a bench vice at home. Sadly I’ll probably forget everything I just did by the time I need to do it again! 😉


Surly Pugsley – Amazon Tree Frog Edition…

8 05 2013
Red is faster...

Red is faster…

I’ve been working on some born again Pugsley wheels since January. First I bought some Rolling Darryl rims and got them powder coated red.

My inspiration...

My inspiration…

Then I overhauled my Alfine 8 IGH. Finally I got the new rims swapped into the old wheels at the Fairfield Bicycle Shop.

The Pugsley ready for action...

The Pugsley ready for action…

The new wheels are wider and lighter than before. They should improve my sand floatation. If I am lucky they’ll never seen any snow! 😉 I’m not sure if I will notice much difference in bikepacking mode.

Alfine 8 and Rolling Darryl - what a team!

Alfine 8 and Rolling Darryl – what a team!


Krampi have landed!

7 05 2013
Surly Krampus complete...

Surly Krampus complete…

I just noticed that The Fairfield Bicycle Shop has 3 Surly Krampus complete bikes in stock [small, medium & large] if you are Knard curious and on the island. The complete bikes seem very nice. If I was doing it over I’d be tempted to buy a complete rather than build a bike up from a frame to take advantage of the OEM cost parts.

I got my Krampus frame/fork and tires from Fairfield. They got my order sorted out quickly and the price was competitive with the US mail-order options.

The Krampus is proving to be a very fun bike to ride and Surly has managed to tweak the front end geometry so those big tires don’t suck the life out of the steering. In fact you very quickly forget you are riding an unusual MTB and just enjoy the great traction and comfy ride.

These bad boys are worth a test ride if you are in the market for a rigid 29er. 🙂


Partridge Hills Hot Box…

6 05 2013
At the top of a hot sweaty climb...

At the top of a hot sweaty climb…

Sharon in the groove...

Sharon in the groove…

and on the move!

and on the move!

Did I mention it was Africa hot?

Did I mention it was Africa hot?

Hunting for a breeze...

Hunting for a breeze…

Enjoying the zero crowds...

Enjoying the zero crowds…

Where did we leave the car?

Where did we leave the car?


Surly Nice Rack For Sale…

4 05 2013
If you like big front racks...

If you like big front racks…

I’m selling a Surly Nice rack – front version in black. It’s been mounted to one bike, but never toured on and looks mint like it just came out of the package. New Nice racks are $135 – this one is for sale at $80 for local pickup. It comes with all the original mounting hardware and instructions.

Nice rack mounted to my Thorn Sherpa [briefly]...

Nice rack mounted to my Thorn Sherpa [briefly]…

Not only do you get this rack for $80, but you will help me buy some Rabbit Hole rims for my Krampus… ;)!


Bike Condom…

3 05 2013
Kinda ugly...

Kinda ugly…

Hauling your expensive MTB around on the back of your car across the continent gets a little depressing when it starts to rain and your bike is coated in the nastiest road spray. Not only do you have to wipe the bike down just to ride it without getting filthy, but all that water and grit aren’t doing your components any favours.

So like they taught you in high school when in potentially dangerous territory protect what’s between your legs! 😉

Bikes ready for the drive back to Canada...

Bikes ready for the drive back to Canada…

We use whatever falls to hand readily. Usually garbage bags or plastic sheeting from Home Depot and duct tape to secure it. I only cover the drivetrain, brakes, saddle, suspension and handlebars. That leaves the wheels mostly open so cars following you can see you taillights.

One advantage to doing this beyond keeping your bike clean is it obscures your bike’s true value making it less attractive to thieves. 

bb2

Clean bike at end of road trip…

It takes about 10mins to wrap the bike and another 10mins to unwrap it. Not a huge deal, but I wouldn’t bother if I was just doing a day trip. I have used leftover mattress covers and bungee cord to cover bikes before. This has the advantage of being very fast. Just drop the cover over the whole bike and wrap with bungee cord. The cover can be removed and reused a few times. The downside is that the cover quickly gets dirty and obscures your taillights. I had a cop pull me over and make me remove the mattress cover for that reason. 😦 If you have a wide vehicle you might get away with it.


Mountain Bike Pack Load – Heavy…

2 05 2013
My MTB backpack load...

My MTB backpack load…

Some people worry about gaining or losing 100g off their mountain bike. I ride with the equivalent of a small child on my back and my bike is heavy as well! I just keep telling myself it’s a great training aid and some day this will all pay off when I am sponsored by Santa Cruz and living the dream. 😉

Rear view...

Rear view…

The pack is a 15yr+ old Camelbak Transalp. At the time this was heinously expensive and I had doubts about buying it, but once I actually started using it I fell in love and it’s only costs me a couple quarters a month to own.

Side view...

Side view…

I’ve tried a bunch of newer uber packs over the years, but nothing has displaced the Transalp from my regular rotation. It carries its weight well and is comfortable for all day efforts. It has something like 30L of capacity split up between a few storage areas and has lots of external temporary storage if I need to really haul a ton of stuff.

A little saggy in its old age...

A little saggy in its old age…

Despite loads of use it hasn’t let me down yet. There are some areas of minor wear and tear, but nothing that has compromised its functionality. Besides being a bit faded and dirty it still looks pretty good.

It can get sweaty...

It can get sweaty…

If I was going to complain about it I would tell you that my back gets sweaty and that the waist belt is unpadded. I’ve tried some of the new packs with mesh backs and space between the pack and my body to let airflow between them. I haven’t come across one that was comfy and that airflow space takes away from the pack’s storage space. The unpadded belt means this pack is happiest with a medium load. You can carry lots of heavy stuff, but you’ll know it’s there.

What you can’t see is a rain cover tucked into a small pocket on the bottom of the pack. Very handy when the rain starts to fall unexpectedly.

It's all about the DSLR...

It’s all about the DSLR…

The main reason I carry the Transalp on trail rides is so I can haul my DSLR. It’s bulky and a tad heavy so I need something bigger than your typical hydration pack to bring it along. The DSLR stays inside its padded case in the main body of the Transalp. That gives it a reasonable amount of impact and vibration protection.

I usually also carry a small point and shoot on the waist belt in a padded case. Sometimes I don’t have time to stop and deploy the DSLR, but I want to document something. I have fallen onto my small camera during some crashes. So far I haven’t broken one. **fingers crossed**

H2O and tools...

H2O and tools…

I use a 100oz Nalgene bladder for most rides. The Transalp can fit two of these bladders for epic camel capacity, but I can’t recall ever needing that much water.

I carry the following tools and spares:

  • Topeak pump
  • shock pump
  • multitool w/ chain tool
  • tire levers
  • patch kit w/ 2 tubes of glue
  • spare tube
  • tubeless tire plug kit

The ziplock bag holds an ultralight Patagonia wind shell and a LED headlamp for emergencies. I try to remember to recharge the headlamp batteries every 3 months or so.

If I am going on a really long really remote ride I would add in some zipties and a small roll of electrical tape. Possibly a couple kevlar emergency spokes.

F/A kit...

F/A kit…

I carry a small first aid kit for repairing any human crash damage. I got to use it in Moab when one of the guys I was riding with punched a tree during a high speed crash and received a partially severed tendon for his trouble. The 4 ER doctors I was riding with didn’t have a bandaid between them so this kit came in very handy 2hrs from help [with a car pick up].

This all goes in the small pocket...

This all goes in the small pocket…

In the smaller pocket on the back of the Transalp I carry:

  • map
  • cellphone in waterproof case [assuming there is any hope of getting service to call 911]
  • some snacks
  • wallet [assuming there is any place to use it]
  • eye drops [if it’s dusty]
Hauling the Transalp and smiling...

Hauling the Transalp and smiling…

Although I can’t say the heft of this pack is unnoticeable. It’s mostly when I pick it up after a rest break or photo session that I’m aware of how heavy it is. I can ride technical terrain with it and still smile and I never feel like I’m being held back terribly. The DSLR photos are so much better than my point and shoot cameras that I am always motivated to carry it after processing images from both types of cameras.


Santa Cruz Bronson – Don’t Feed the Trolls!

1 05 2013

If you want to experience some anti-650B Trollism – just head over to the MTBR.com Santa Cruz forum and settle into a Bronson thread with a beer. 😉


Rocky Mountain Bike Music…

1 05 2013

I owned a Rocky Mountain Instinct many years ago. Back when they were all 26ers and nobody would have conceived of rolling through the forest on road size rims.